Part 4: painting your terrain
This article is part of a series on how to create and edit a terrain. To learn about the terrain panel, head over to Terrain panel.
| Part 1: creating a terrain object |
| Part 2: resizing a terrain object |
| Part 3: shaping your terrain |
| Part 4: painting your terrain |
This article describes how to paint your terrain.
Description
The last thing you need to know to make amazing terrains is how to paint materials! There are a lot of materials available, from lava to snow and sand, but for now we will use restrict ourselves to painting dry mud.
The tool used to paint the terrain is the ![]() terrain paint interaction mode. This simple paint brush paints when you hold the left mouse button, and erases when you hold the right mouse button. As with the other interaction modes there are extra options available if you right-click the interaction mode, and you can change the brush size with the '[' and ']' keys on your keyboard.
terrain paint interaction mode. This simple paint brush paints when you hold the left mouse button, and erases when you hold the right mouse button. As with the other interaction modes there are extra options available if you right-click the interaction mode, and you can change the brush size with the '[' and ']' keys on your keyboard.
Painting the terrain
Step 1: importing a material
In order to paint a material, we first need to import one to our terrain. To do this, we will need to open the ![]() resource manager.
resource manager.
Importing a material to the terrain
To import a material to the terrain:
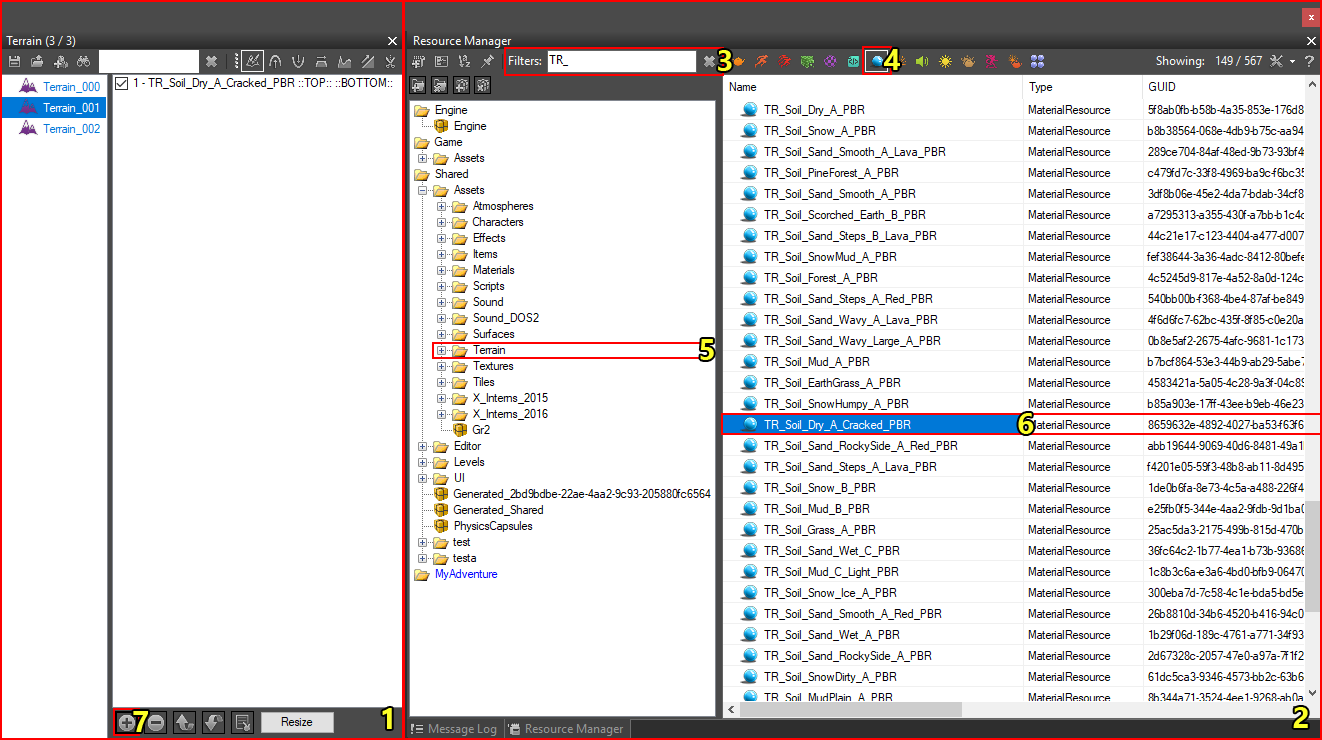
- Open the terrain panel and select your terrain (1).
- Open the resource manager (2).
- Filter the resources (3) (optional). Standard terrain materials supplied by Larian have a TR_ prefix. Note that those starting with TR_Base_ do not have alpha blending, we do not want to use these for painting!
- Filter by material resources (4). You can do this by right-clicking the
 material resource icon.
 - Browse to the Shared/Assets/Terrain folder in the resource browser (5).
- Find and select the TR_Soil_Dry_A_Cracked_PBR material (6).
- Click the "+" button in the terrain panel to assign the material to your terrain (7). If the material is assigned, it will show up in the list on the right side of the terrain panel.
Step 2: painting
Painting the material onto the terrain
Once our material is succesfully imported, all we have to do is paint it!
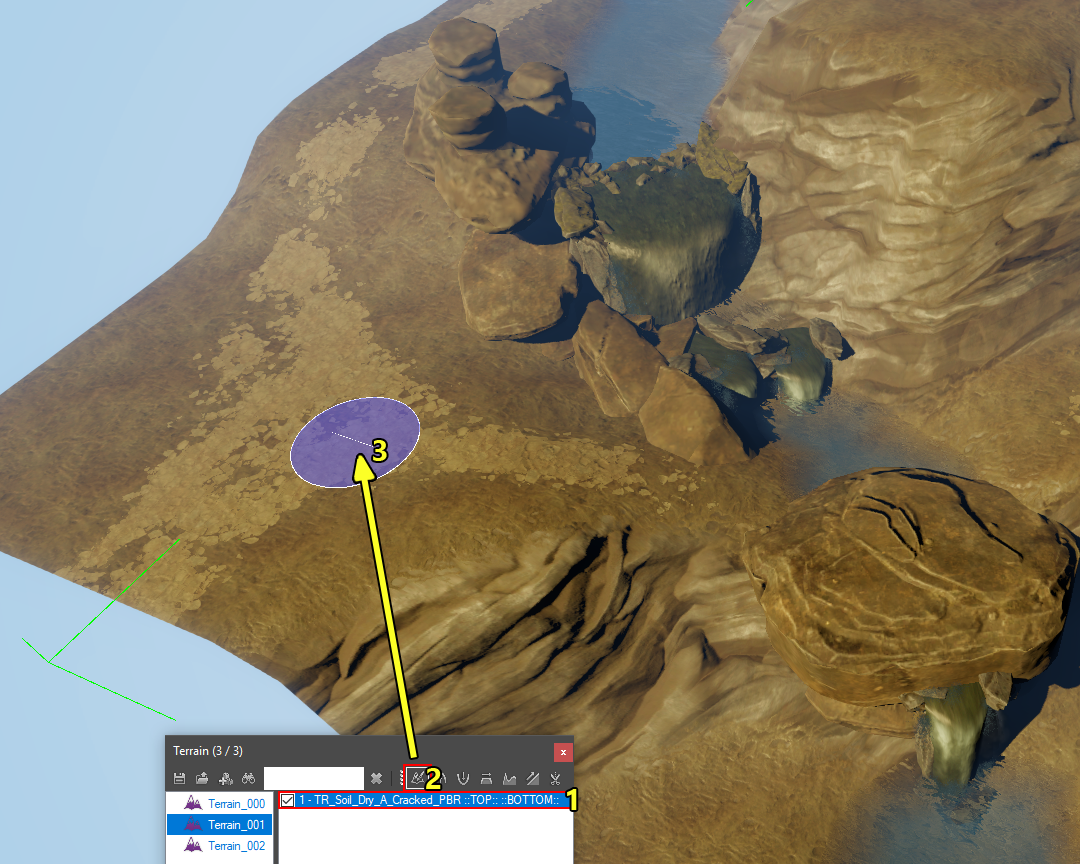
Select the material you want to paint (1), toggle the terrain paint interaction mode (2), hold your mouse over the part of the terrain you want to paint and hold the left mouse button (3)!

