Part 3: shaping your terrain
This article is part of a series on how to create and edit a terrain.
| Part 1: creating a terrain object |
| Part 2: resizing a terrain object |
| Part 3: shaping your terrain |
| Part 4: painting your terrain |
This article describes how to shape your terrain.
Description
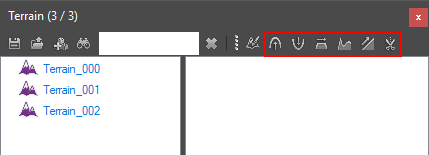
The terrain sculpting interaction modes on the terrain panel
The following tools allow you to sculpt your terrain:
 Raise
Raise
- Raise terrain height
 Lower
Lower
- Lower terrain height
 Flatten
- Flatten terrain height
 Smooth
- Smooth terrain
 Slope
Slope
- Create a slope on the terrain from point A to B
 Cut
Cut
- Cut 1x1 meter cells out of the terrain
In this guide I will be using the raise, flatten, smooth and lower interaction modes to sculpt the 64x64 meter terrain we created in part 2 of this series. Keep in mind that for all terrain interaction modes, you can customize the brush by right clicking the interaction mode button, or resize the brush by clicking '[' and ']'.
Shaping your terrain
Step 1: raising
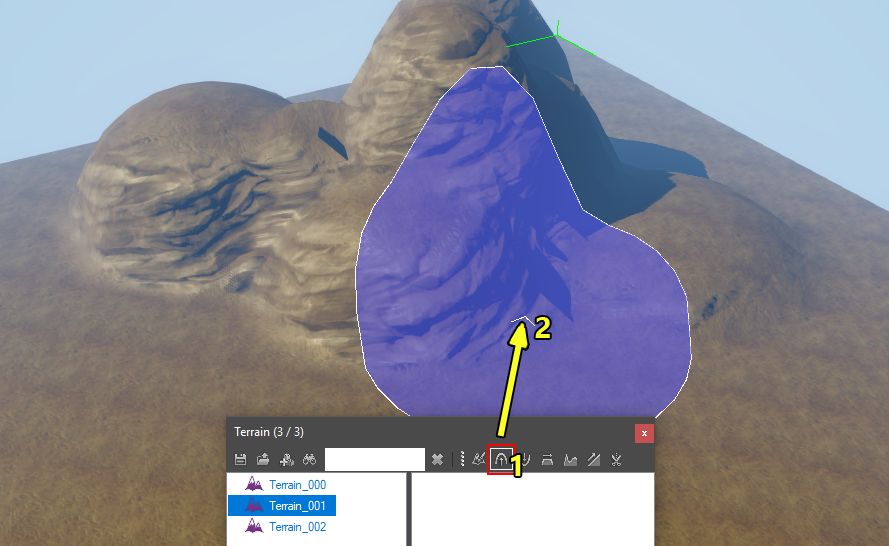
Using the terrain raise interaction mode
First, I will use the terrain raise interaction mode to create some basic height levels on my terrain. To do this, select the terrain raise interaction mode (1), hover your mouse over the terrain and hold the left mouse button (2).
Step 2: flattening
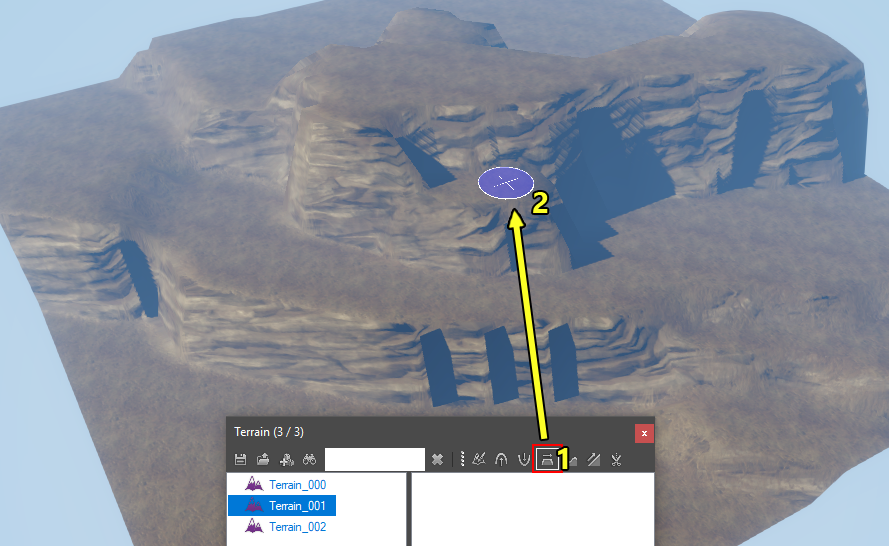
Using the terrain flatten interaction mode
Next, I flattened some areas of the terrain with the terrain flatten interaction mode. Flattening the terrain will set the height of the terrain within the brush to the height at the center of the brush. To use the flatten interaction mode, first toggle the interaction mode (1), then hover over the terrain you want to flatten and hold the left mouse button (2).
Step 3: smoothing
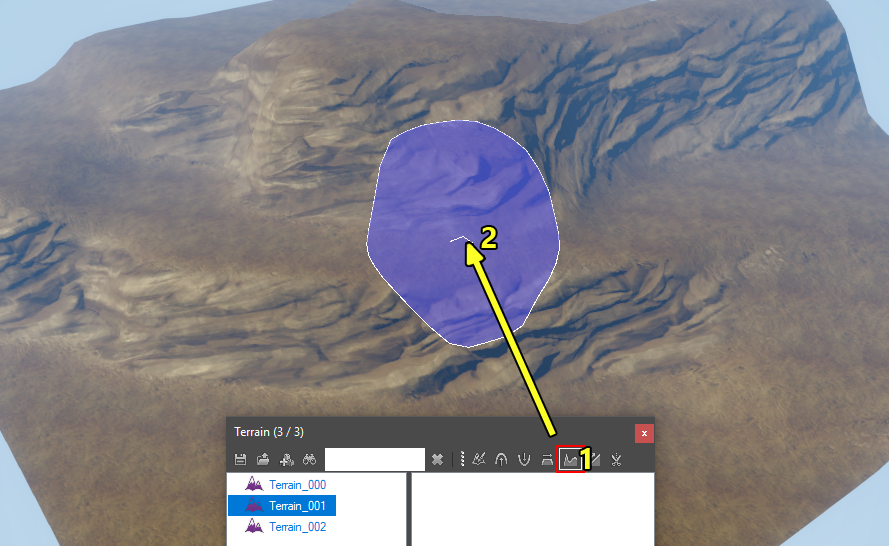
Using the terrain smooth interaction mode
You probably noticed the jagged edges and hard shadows on the terrain after step 2. This is caused by extreme height differences within short distances. To compensate for this, you can use the terrain smooth interaction mode. To use the terrain smooth interaction mode, toggle the interaction mode button (1), hover over the terrain you want to smooth and hold the left mouse button (2).
Step 4: lowering
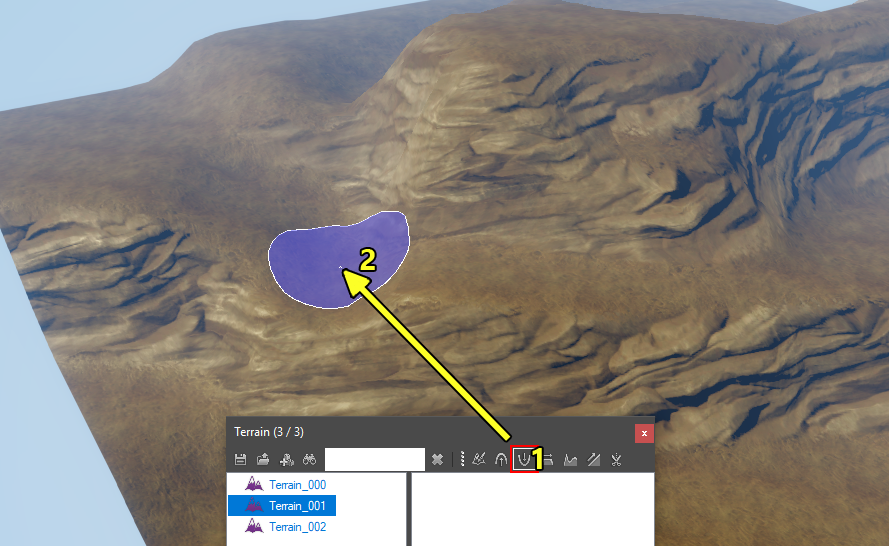
Using the terrain lower interaction mode
Last but not least I lowered some parts of my terrain so that a river can flow through it. Enable the terrain lower interaction mode (1), hover over the terrain you want to flatten and hold the left mouse button (2).
Result
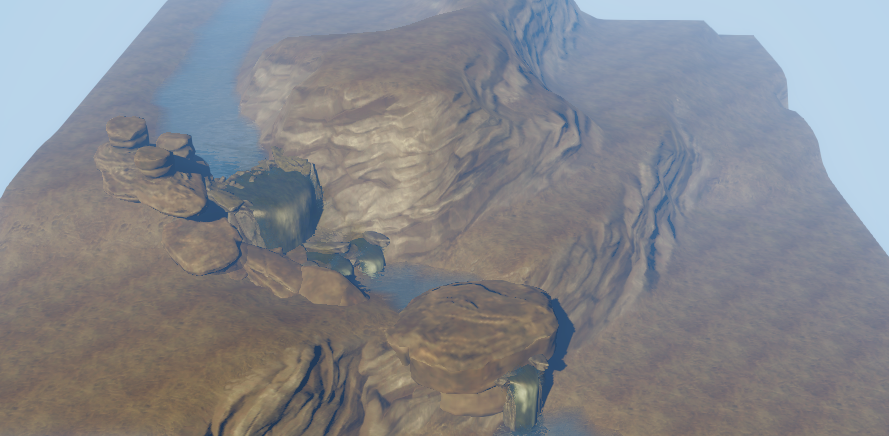
The end result of this guide
To finish my terrain I added some river plane objects and rocks. To do this, open the ![]() Root template panel, select a template, enable the
Root template panel, select a template, enable the ![]() creation interaction mode and place some objects in your level.
creation interaction mode and place some objects in your level.
Notes
- To be able to walk on and see your terrain, you will need to regenerate the AI grid. The AI grid is a system that calculates pathing, vision and more. To generate the AI grid, open the
 AI grid panel and click the "Full Generate" button. To auto generate the walkable areas correctly, you will also need to place an AI seeder trigger on your terrain before generating the AI grid.
See also
In the next part of the series we will be painting our terrain.
| Part 1: creating a terrain object |
| Part 2: resizing a terrain object |
| Part 3: shaping your terrain |
| Part 4: painting your terrain |