Part 2: creating a skill from existing
This article is part of a 4-part series on how to create, edit and use a new skill.
| Part 1: creating a new skill |
| Part 2: creating a skill from existing |
| Part 3: creating and using a skillbook |
| Part 4: adding the skillbook to a vendor |
This article describes how to create a new skill based on an existing skill.
Contents
Introduction
Creating a new skill based on an existing skill is by the easiest, quickest and most commonly used method of creating a new skill.
In this guide we will create a new projectile type skill, but the workflow is applicable to all skill types.
Creating our skill
Step 1: Opening the Stats Editor
To create a new skill based on an existing one, you will first need to open the "Skill_Projectile" document in the Stats Editor. If you do not know how to do this, see My first: Skill first.
Step 2: Creating a new Skill
Copying an existing skill
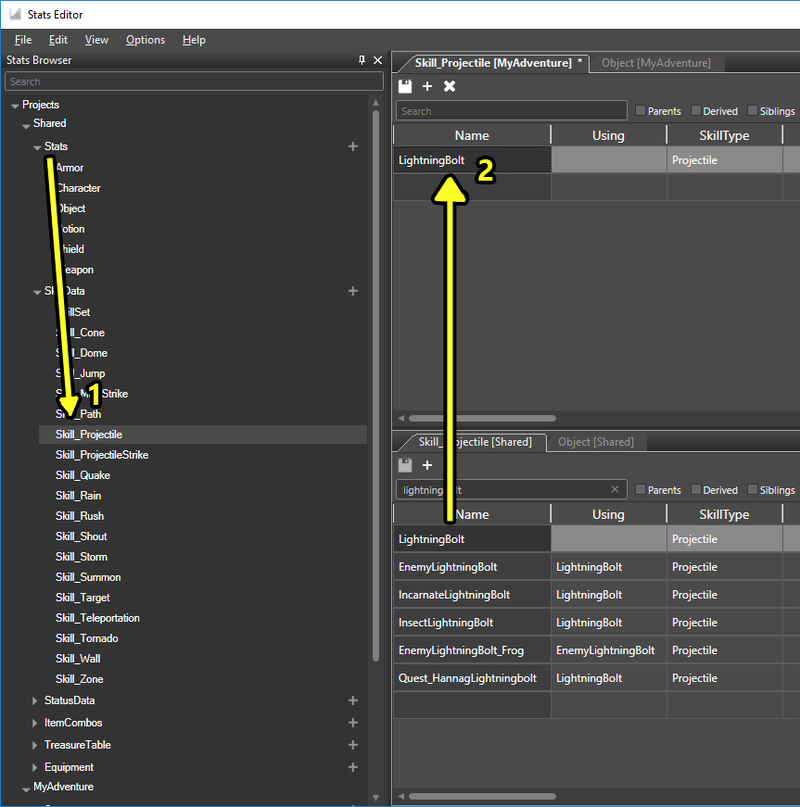
After opening the "Skill_Projectile" document in our project, we copy the "LightningBolt" skill from the Shared project. Lightning Bolt is a simple, single-projectile skill that serves as a perfect template for our new skill.
To copy the LightningBolt skill, first open the Skill_Projectile document in the Shared project (1). In the image, I docked the Shared Skill_Projectile document under the Skill_Projectile document in my own project. You can do this by clicking and dragging the tab.
Then, select the LightningBolt stats entry, copy it (Ctrl+C), select the empty row in your project's Skill_Projectile document, and paste (Ctrl+V) (2).
Editing the new skill
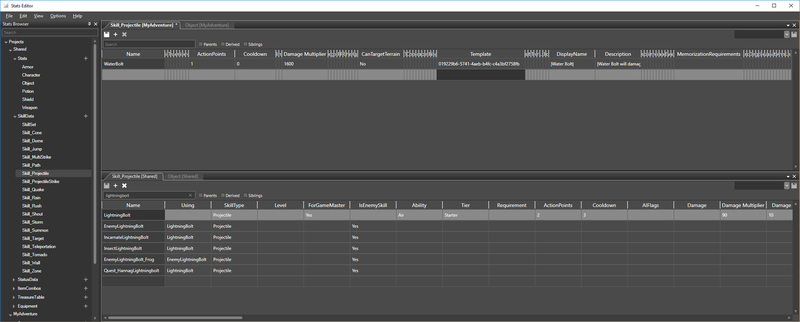
The most important step when creating a new skill based on an existing one is to change the name. Although we can modify existing skills by copying their name to our project, that is not what we want to do here. I renamed my new skill from "LightningBolt" to "WaterBolt".
After creating our new skill, we can begin editing its values. I:
- Changed the action point cost (2 to 1)
- Changed the cooldown (3 turns to 0)
- Changed whether the skill can target terrain
- Changed the projectile template (see next step)
- Changed the DisplayName, the name the skill will get in-game
- Changed the Description, which will be visible in game
- Removed the MemorizationRequirements, from 1 Aerotheurge to nothing
Note that all these modifications except for renaming the skill are optional. You can play around with the values, but be aware that the animation, icon, displayname, description and template fields are required for a proper skill.
Copying a projectile Id
I also changed the projectile template, which is the object a projectile skill spawns as it is flying from the caster to the target.
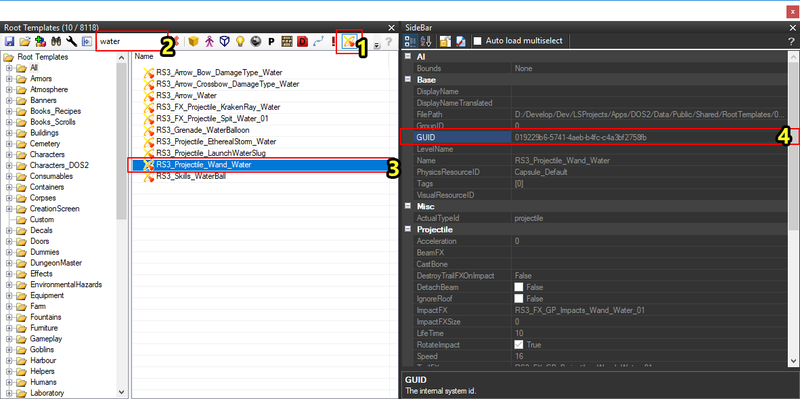
The value that needs to be assigned is a projectile template GUID. I:
- Opened up the Root template panel
- Opened up the Sidebar
- Filtered the root template panel by projectiles (1)
- Filtered the projectile templates by those containing "water" (2) (you can also create a custom projectile template, which is explained further down)
- Selected the "RS3_Projectile_Wand_Water" projectile (3)
- Right clicked the "GUID" property and clicked "Copy Value" (4)
Once the GUID of the projectile template is copied to your clipboard, simply go back to the Stats Editor, double click the "Template" field on your new projectile and paste the GUID. Don't forget to save!
See Also
We have now created a useable skill that can be assigned to enemies, but we have no way for the player to learn it. In part 3 of the series, we will create a new skillbook.
| Part 1: creating a new skill |
| Part 2: creating a skill from existing |
| Part 3: creating and using a skillbook |
| Part 4: adding the skillbook to a vendor |


