Project settings window
The Publishing Tab
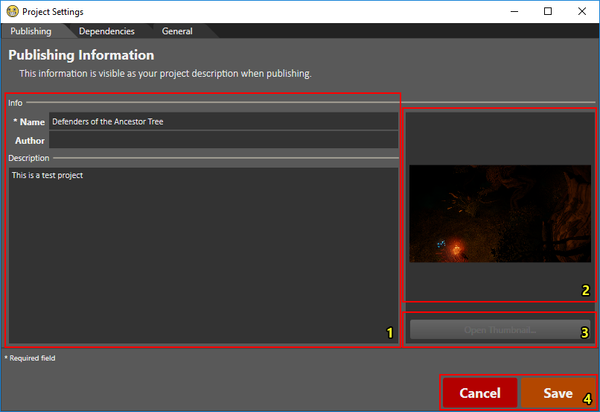
The Publishing tab with each component numbered
The Publishing tab shows the project as it will be shown on the Steam Workshop.
The tab consists of the following components:
- The project name (title), author (your name/alias) and description
- The project banner, which is both the thumbnail shown in the Project Browser and the first image shown on the Steam Workshop
- "Open Thumbnail..." which allows you to select a new banner
- Cancel/Save [1]
[1] If you save, you can see the changes in Publish Project Window
The Dependencies Tab
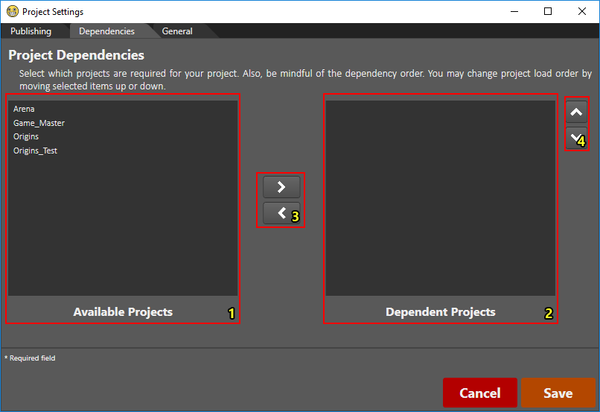
The Dependencies tab with each component numbered
The Dependencies tab allows you to modify which projects are loaded before yours. Adding a dependency allows you to use data from that project in your own.
The tab consists of the following components:
- The Available projects, projects which will not be loaded
- The Dependent projects, projects which will be loaded before yours
- The Assign/Unassign buttons [1]
- To use the Assign button, select a project from the "Available Projects" list (1) and click the Assign button ">" (3)
- To use the Unassign button, select a project from the "Dependent Projects" list (2) and click the Unassign button "<" (3)
- The Load Order buttons, which allow you to change the order in which projects are loaded [1] [2]
- To load a project sooner, click the "↑" button (4)
- To load a project later, click the "↓" button (4)
[1] Projects inherited from projects yours depends on will automatically be assigned to "Dependent Projects" and shown in the correct (fixed) load order
[1] The projects in the "Dependent Projects" list (2) are loaded from top to bottom
The General Tab
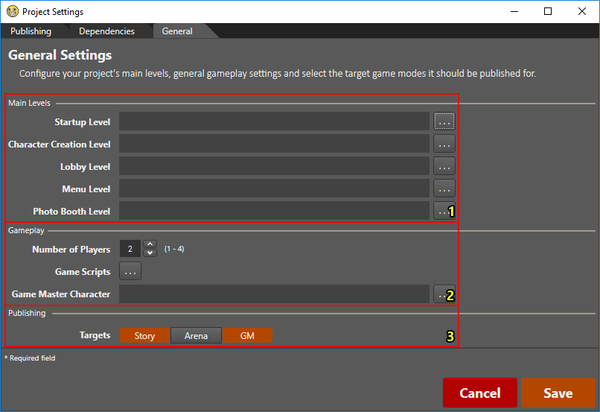
The General tab with each component numbered
- Main Levels:
- Startup Level: The first level after character creation in story mode
- Character Creation Level: The level used for character creation (story and GM)
- Lobby Level: The lobby level used for hosting multiplayer sessions
- Menu Level: The main menu level
- Photo Booth Level: The level used for making character icons
- Gameplay:
- Number of Players: The number of allowed players
- Game Scripts: Select game scripts that are automatically executed for this project
- Game Master Character: Select the model for your game master character (only available when targeting GM)
- Publishing:
- Targets: Choose in which game modes your project will be available
Anything that is not filled in will use the setting from its dependent projects.
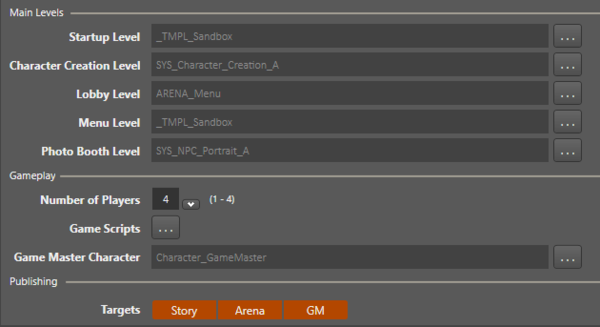
If there are no custom dependencies, our default settings will apply, as shown below:
The default settings for the general tab


