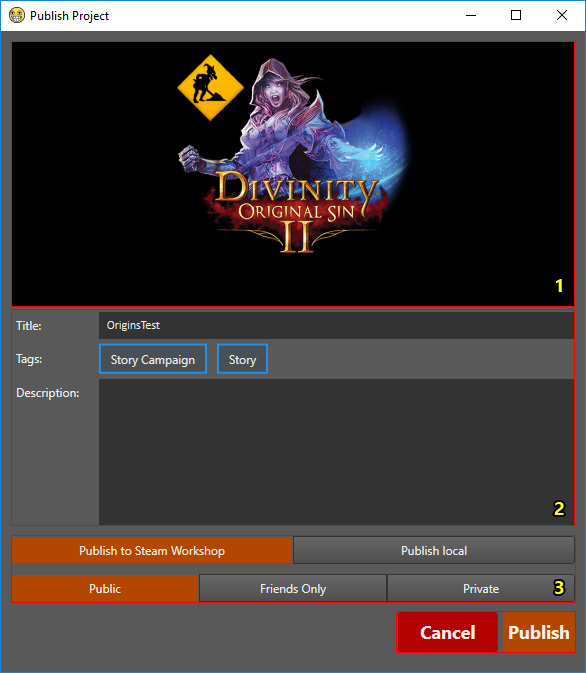
Publish project window

The Publish Project Panel with each part numbered
Content
The Project Banner (1)
The project banner is at the very top of the window and shows the main image that will be displayed on the Steam Workshop page when published.
The banner can be changed in the Project Settings Window.
The Project Configuration (2)
The project configuration is copied over from the project settings set in the project settings window.
The tags are the tags under which the project will be published on the Steam Workshop. The tags are automatically set based on the the project type (set when creating the project in the Project Browser Window) and the project's dependencies.
Final changes to the title and description can be made here. Do note that changes made in the Publish Project window are not saved and will be lost after closing the window.
The Publish Settings (3)
There are 2 ways to publish a project: either locally (the project is published to your harddrive) or directly to the Steam Workshop (the project is published to your harddrive and then published to the Steam Workshop).
When publishing a project to the Steam Workshop, you can choose between publishing a Private project (only you will be able to see it), a Friends Only project (only you and your friends will be able to see it) or a Public project (everyone will be able to see it).
Locally published mods will show up in "User/Documents/Larian Studios/Divinity Original Sin 2/Local Mods"