My first: Item
Welcome to the Items guide. Here you will find the item creation pipeline from modelling to importing your item in Divinity Engine 2.
This article is part of a collection of guides, with a page for every type of item.
| My first: Item - Scenery (Rocks, Plants, Trees, Shelves etc.) |
| My first: Item - Lootable items (Shells, plates, food, gems etc) |
| My first: Item - Interactable animated items (Levers, Doors etc) |
| My first: Item - Interactable socket items (Chairs, Beds etc) |
| My first: Item - Interactable socket items (Work in Progress) |
There are different types of Items you can create:
- Scenery (Rocks, Plants, Trees, Shelves etc.)
- Lootable items (Shells, plates, food, gems etc)
- Interactable animated items (Levers, Doors etc)
- Interactable socket items (Chairs, Beds etc)
- Weapon Guide (Work in Progress)
To create items you will need some 3d modelling and texturing skills.
Two most important things you need to have if you want to create an Item: item model and it's textures.
File formats used by Divinity Engine 2 :
In the editor 3d models are saved as granny files .GR2 more info on granny 3d here
The textures are saved as DirectDraw Surface .dds files more info on dds here
No matter what type of item you want to do your pipeline will consists of:
Modelling > Texturing > Setting up the item in the file > Setting up the item in the editor
Modelling
You will need a 3d modelling software to create items. If you unfamiliar with 3d modelling we advice you to check some 3d modelling specific guides first.
Places you can find good tutorials about 3d modelling:
- http://polycount.com/
- https://cubebrush.co/
- youtube tutorials (good example)
Importing your resources in the editor.
If you already have your .GR2 granny files and .dds texture files it's time to import them in the editor.
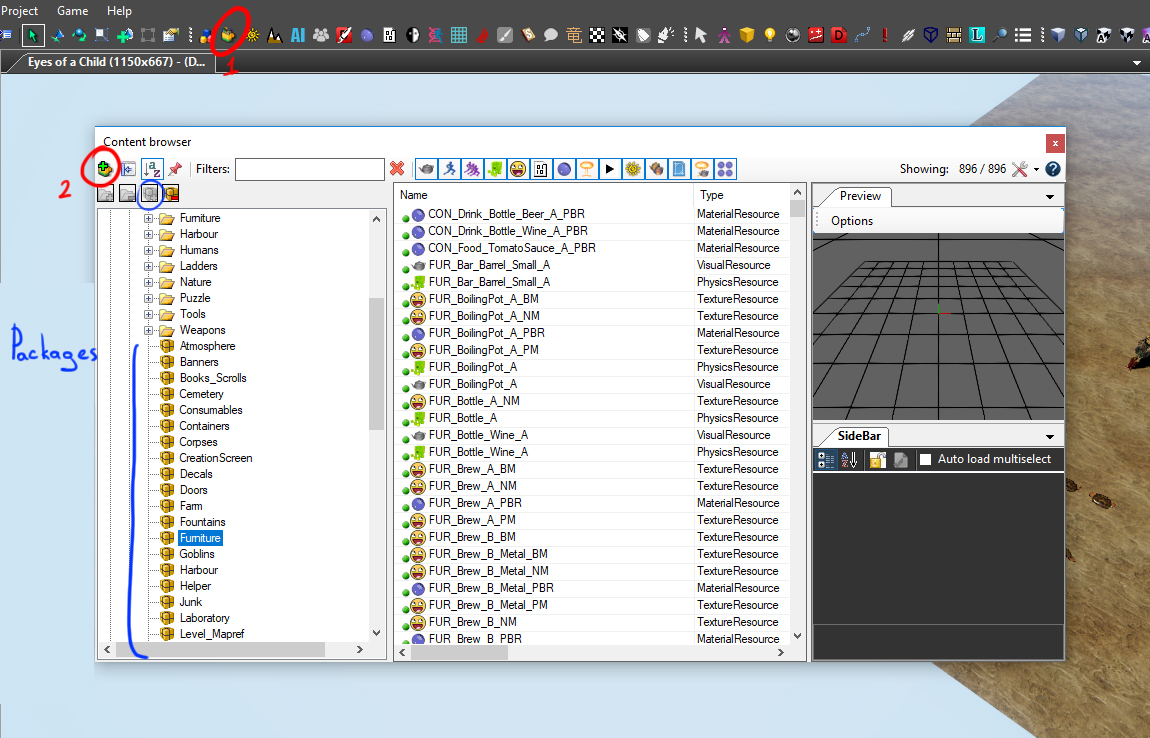
1. Open your Content Browser. Choose a correct package or create a new one.
2. Hit the add resource button (highlighted red in the left upper corner) and select what type of resource you want to add.

After that you'll need to make a new material, assign textures to your new material and assign the material to your mesh.
To make a new material you have two options:
1. Create a new material by pressing "Add resource" button highlighted red on the screenshot above and select material.
How to create or edit materials read here.
2. Select any material that you see in content browser right click it and select "Create new from selected". That will create a new material.
Beware that will keep all the textures and parameters of the material you copied.
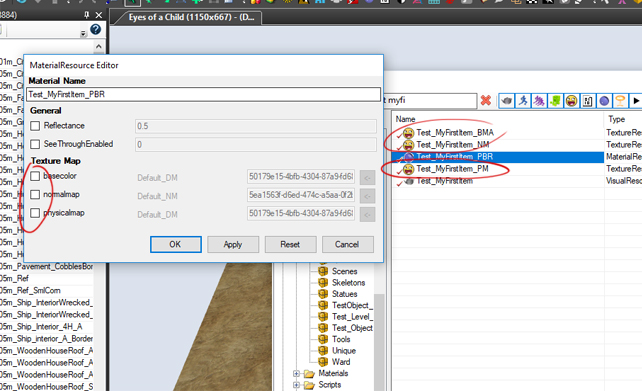
Now you need to assign textures to your material and material to the mesh.
Depending on the type of the material you're using it can have different texture parameters. The most standard material we use for items is called Base_PBR.

We are using physical based rendering, it means that you need a base color texture (BM) a physical map (PM) and a normal map (NM)
PM is :
- Roughness in green channel
- Metalness in blue channel
- Ambient Occlusion is in red channel
more info on PBR here