AI Bound Editor: Difference between revisions
Jump to navigation
Jump to search
mNo edit summary |
mNo edit summary |
||
| Line 3: | Line 3: | ||
== Opening the AI Bound Editor == | == Opening the AI Bound Editor == | ||
[[File:AIBoundProperty.png|none | [[File:AIBoundProperty.png|none]] | ||
<sub>A dockpanel containing a [[Root template panel|Root Template Panel]] and a [[Sidebar|Sidebar Panel]] showing the location of the AI Bounds property</sub> | <sub>A dockpanel containing a [[Root template panel|Root Template Panel]] and a [[Sidebar|Sidebar Panel]] showing the location of the AI Bounds property</sub> | ||
| Line 14: | Line 14: | ||
== Using the AI Bound Editor == | == Using the AI Bound Editor == | ||
[[File:AIBoundEditorStepByStep.png|none| | [[File:AIBoundEditorStepByStep.png|none|496px]] | ||
<sub>Each component of the AI Grid Panel numbered</sub> | <sub>Each component of the AI Grid Panel numbered</sub> | ||
Revision as of 09:03, 2 August 2017

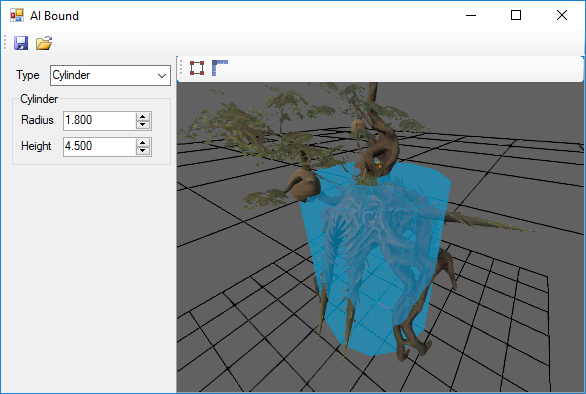
The AI Bound Editor
Opening the AI Bound Editor

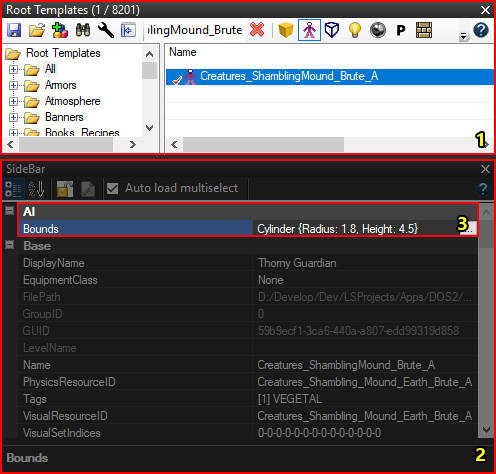
A dockpanel containing a Root Template Panel and a Sidebar Panel showing the location of the AI Bounds property
To open the AI Bound Editor to edit the bounds of a character or item:
- Open the Root Template Panel and select the root template of the character or item you want to edit
- Select and open the Sidebar Panel via View > SideBar or press <Ctrl + B>
- Select the "Bounds" property in the PropertyGrid and click the [..] button to the right
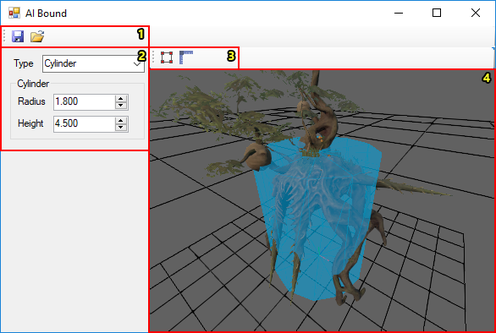
Using the AI Bound Editor

Each component of the AI Grid Panel numbered