Part 1: creating a terrain object: Difference between revisions
mNo edit summary |
mNo edit summary |
||
| Line 86: | Line 86: | ||
{| class="wikitable" | {| class="wikitable" | ||
|- | |- | ||
| [[Part 1: creating a | | [[Part 1: creating a terrain object]] | ||
|- | |- | ||
| [[Part 2: | | [[Part 2: resizing a terrain object]] | ||
|- | |- | ||
|} | |} | ||
<br /> | <br /> | ||
Revision as of 15:12, 19 September 2017
This article is part of a series on how to create and edit a terrain. To learn about the terrain panel, head over to Terrain panel.
| Part 1: creating a terrain object |
| Part 2: resizing a terrain object |
This article describes how to create a flat, 64x64 meter terrain object.
Introduction
Creating and editing terrains is a relatively easy process, although it takes time to master.
The Divinity Engine 2 offers several tools for editing terrains, but to get there we first need to create a terrain object in our level.
Creating a terrain object
Step 1: Opening the Terrain Panel

The Terrain Panel button
First, open the ![]() Terrain panel.
Terrain panel.
With the terrain panel open, it is time to add a terrain.
Step 2: Creating a terrain

The Create New button on the terrain panel
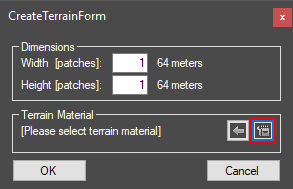
To begin creating a new terrain object, click the "Create New" button on the top toolbar on the terrain panel. The Create Terrain Form should open up.

The open resource manager button on the create terrain form
On the create terrain form, you will see several options. By default, our terrain will be 1 by 1 patches, or 64 by 64 meters. The terrain can always be resized later, so it's best to leave this at 1x1 for now.
One thing we need to do before our terrain object is created is to set a base terrain material. To do this, we need to open the ![]() Resource Manager. Click the resource manager button to open the resource manager.
Resource Manager. Click the resource manager button to open the resource manager.

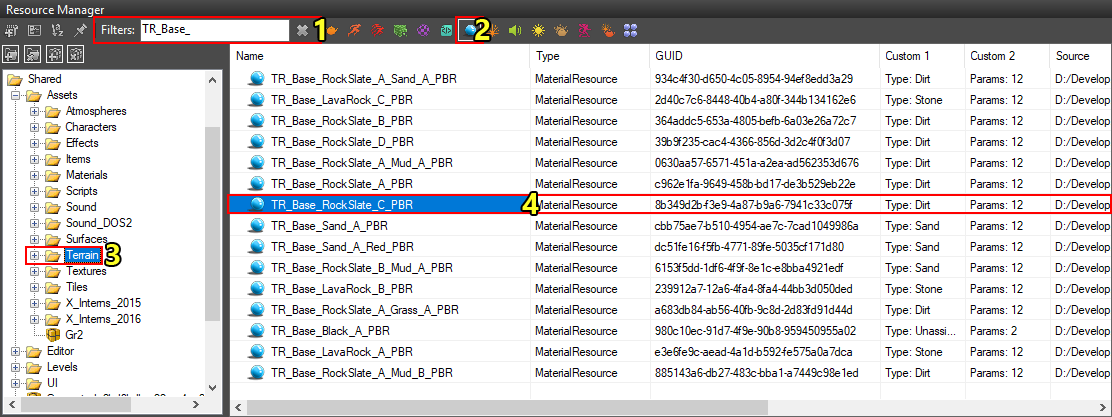
Selecting a base terrain material in the resource manager
There are several terrain materials available to us by default which are loaded from the Shared project. To find them, we will need to filter all the resources we have no interest in.
I used the material "TR_Base_RockSlate_C_PBR" as my terrain's base material. To find this resource, follow these steps:
- Type "TR_Base_" in the filter box to find all default base terrain materials (1).
- Right click the
 material icon to only show material resources (2).
 - Navigate to the Shared/Assets/Terrain folder (3).
Then, click the TR_Base_RockSlate_C_PBR material to select it (4).

Finalizing the terrain creation
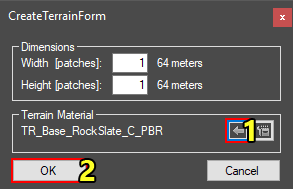
Finally we need to apply the selected material and finalize the creation.
To import the material, make sure you still have the TR_Base_RockSlate_C_PBR material selected in the resource manager and click the import button on the create terrain form (1).
Then, confirm the creation by clicking "OK" (2).
Step 3: Viewing our terrain

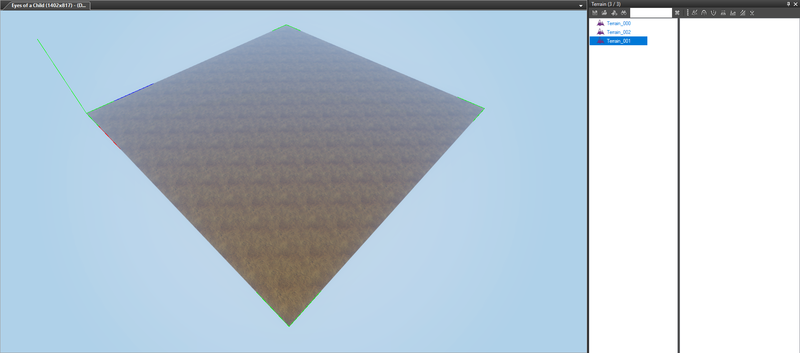
The created terrain
And that's all! We have now created an editable terrain object in our level.
Note that you will not yet be able to walk on the terrain. For that, you will first need to place an AI Seeder from the ![]() Root template panel and then generate the AI grid from the
Root template panel and then generate the AI grid from the ![]() AI grid panel.
AI grid panel.
See Also
In the next part of the series we will be resizing our terrain.
| Part 1: creating a terrain object |
| Part 2: resizing a terrain object |