Overview: Difference between revisions
Larian Jeff (talk | contribs) |
Larian Jeff (talk | contribs) |
||
| Line 81: | Line 81: | ||
* '''Delete''', this will remove the pin <font color="FF0000">'''IMPORTANT NOTE'''</font>: Clicking this will remove the pin forever | * '''Delete''', this will remove the pin <font color="FF0000">'''IMPORTANT NOTE'''</font>: Clicking this will remove the pin forever | ||
* '''Toggle Visibility''', this will make the pin invisible to the players or if it's already, show it to the players | * '''Toggle Visibility''', this will make the pin invisible to the players or if it's already, show it to the players | ||
[[File:GM_NewSceneName.jpg]] | |||
Revision as of 19:48, 25 August 2017
Overview Map
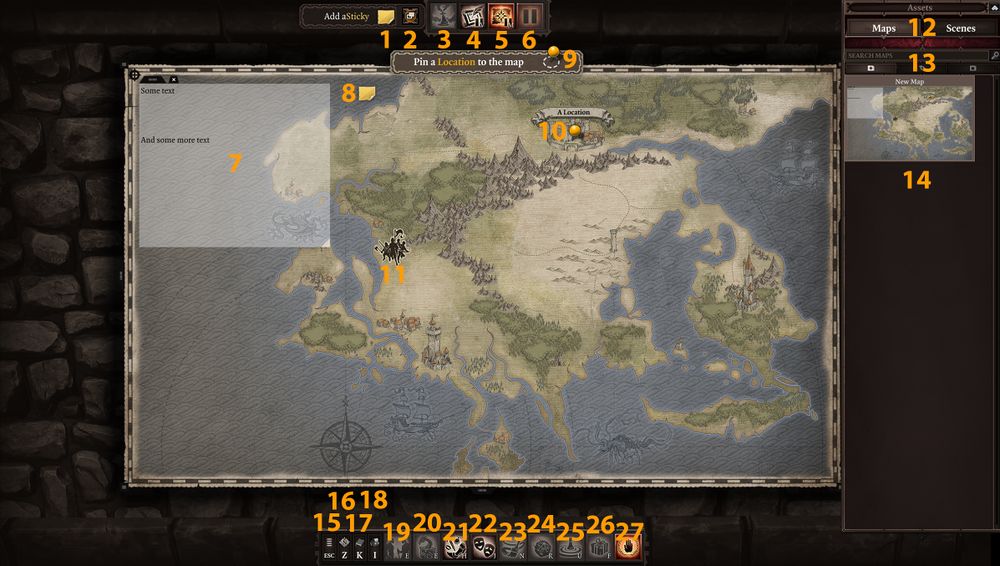
After creating your campaign you'll be moved to the Overview Map panel. After a few steps, it could look like this:
- Add a Sticky, drag/drop this on the map to create a sticky
- Stickies Panel, this will open the Stickies Panel
- Game Field Panel, once a scene is loaded, this will close the Overview Map and you'll be in the scene
- Vignettes, this will open the Vignettes Panel
- Overview Map, this will open the Overview Map (this is the panel opened by default)
- Pause, this is used to pause/unpause the game when a scene is loaded
- Text, this is a text box created by the GM over the Overview Map
- Sticky, this is a sticky placed on the Overview Map
- Location Pins, drag/drop this on a map to create a Location Pin
- Pin, this is a Location pin with a name on the Overview Map
- Party, this is the representation of where the party is on the Overview map
- Maps/Scenes, this will toggle the Map or the Scene panel
- Search & Folders, there you can search anything related to the panel you're in, add folder, rename folder and delete folder
- Panel Area, this is where all the stuff you created in a panel will be
- Menu, this will open the Menu window
- Minimap, this will toggle on/off the Minimap
- Game Master Skill, this will open the Game Master Skill panel
- Game Master Inventory, this will open the Game Master Inventory
- Encounter Manager, this will open the Encounter Manager panel where you will be able to manage all the NPCs in a scene
- Monster & Items, this will open the Monsters & Items panel where you will find every single entities in the mode to be used
- Item Generator, this will open the Item Generator panel where you will be able to create custom pieces of equipment
- Mood Panel, this will open the Mood panel where you will be able to change atmosphere, music and ambiance in a scene
- Surface Panel, this will open the Surface Panel where you will be able to paint any kind of surface in a scene
- Dice Roller, this will open the Dice Roller panel where you will be able to ask players to roll dice or to roll dice yourself
- Starting Point, this will change the cursor to a circle of different color. With it you will be able to choose where the party will start in a scene
- Reward Panel, this will open the Reward panel where you will be able to give gold or experience to the players
- Peace Mode, this will toggle Peace Mode on/off, allowing enemies to not enter combat with the players automatically
Map Options
There are a few options given to you as the Game Master with the Overview Map.
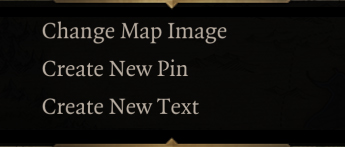
Right-clicking the Map will open this small menu:
Change Map
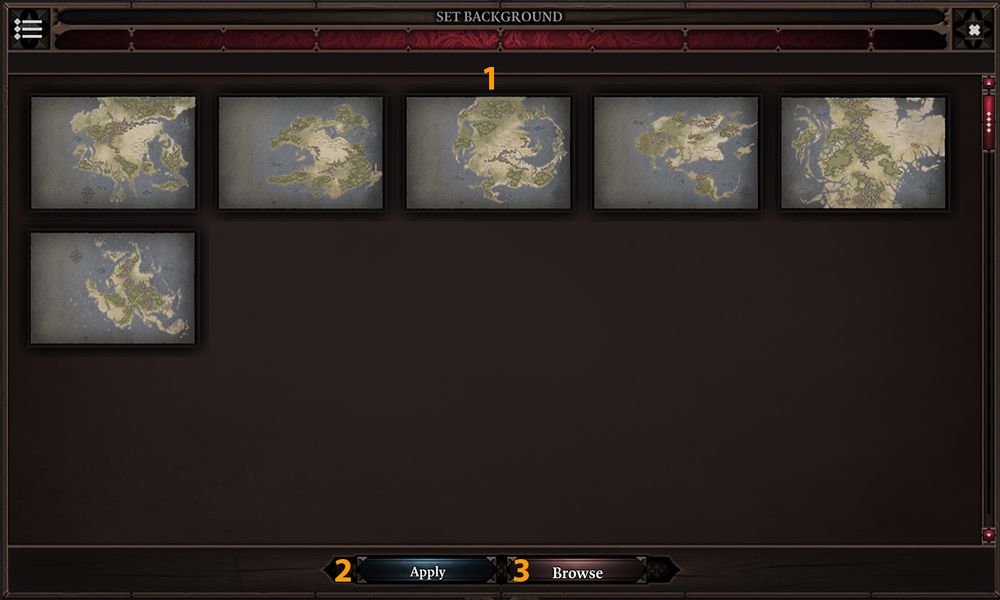
Selecting this option will open this window:
- Maps Sample, this is where all the usable image for maps are
- Apply, after selecting an image, pressing this button will apply the new image as a new Overview Map
- Browse, this will open a new window and you will be able to select any image you have on your computer to import it as a new image for your campaign
Supported format are PNG and JPG. IMPORTANT NOTE: Renaming a PNG for a JPG and vice-versa won't be supported.
Create New Pin
This option is pretty straight forward, you can either choose this to create a new pin exactly where your cursor is or drag/drop the pin icon at the top of the Overview Map.
Both options do the same thing.
Create New Text
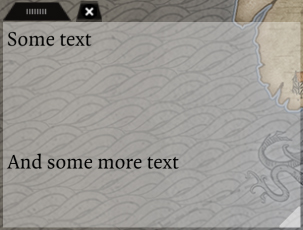
This will create a new white/transparent text area on the map looking like this:
- Clicking and holding the black area at the top/left will allow you to move the text around.
- Clicking the black X will delete the text. IMPORTANT NOTE: If you press this button, your text will be gone forever.
- Clicking and holding the small white triangle at the bottom/right will allow you to expand/shrink the text box
Also, if you shrink the text box too much, a scroll bar will appear on the right
Location Pins
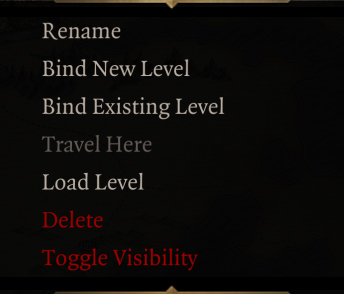
Right-clicking on a pin will open this menu:
- Rename, this will allow you to rename the pin. You can also just click on the paper above the pin to change the text.
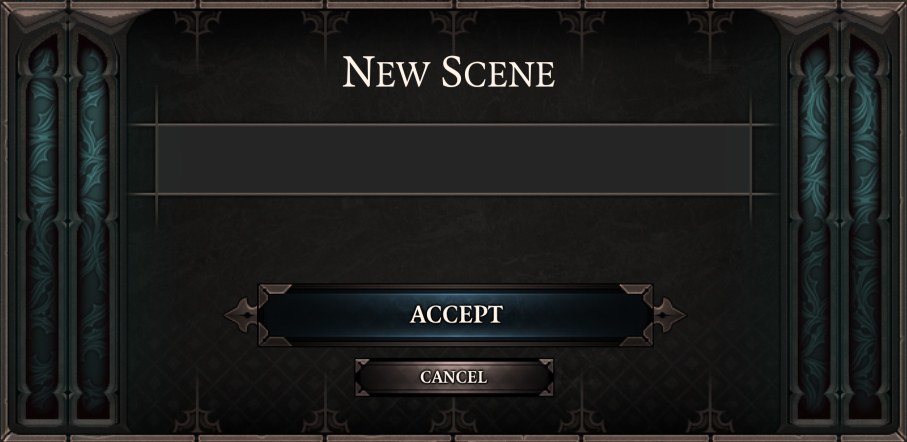
- Bind New Level, this will allow you to bind a new scene to the pin to load quickly from the pin
- Bind Existing Level, this will allow you to bind a scene you have already created to load quickly from the pin
- Travel Here, this will make the Party Icon travel from where it is on the map to the pin leaving a red travel line behind it
- Load Level, if there is a bind scene on the pin, this will load it
- Delete, this will remove the pin IMPORTANT NOTE: Clicking this will remove the pin forever
- Toggle Visibility, this will make the pin invisible to the players or if it's already, show it to the players
