General
The Overview Map is the default panel that will be loaded after creating or loading a campaign.
From there, all the options in the Game Master Mode is open to you, from stickies to encounters.
Bellow is a small explanation on all the buttons you can see.
Overview Map
After creating your campaign you'll be moved to the Overview Map panel. After a few steps, it could look like this:
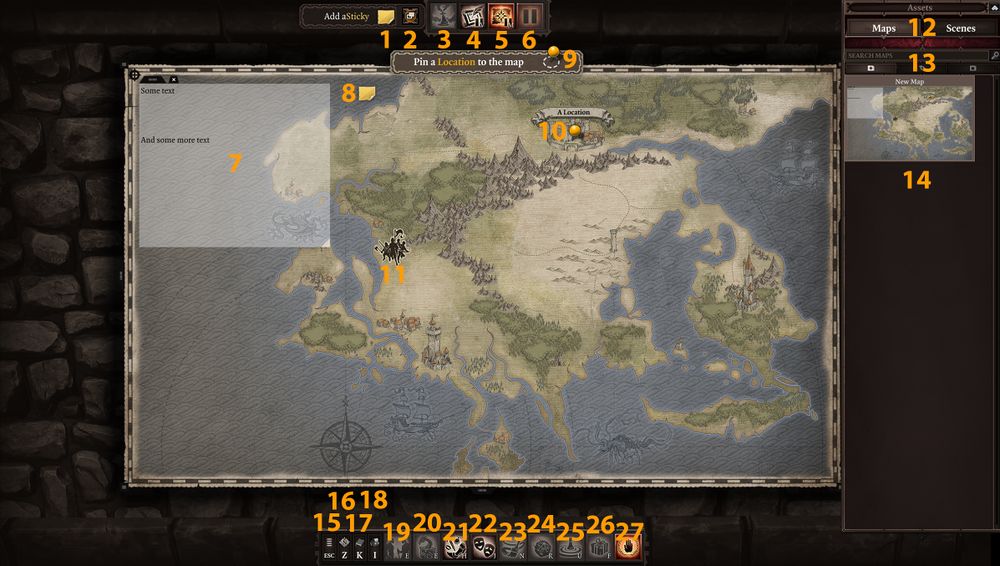
- Add a Sticky, drag/drop this on the map to create a sticky
- Stickies Panel, this will open the Stickies Panel
- Game Field Panel, once a scene is loaded, this will close the Overview Map and you'll be in the scene
- Vignettes, this will open the Vignettes Panel
- Overview Map, this will open the Overview Map (this is the panel opened by default)
- Pause, this is used to pause/unpause the game when a scene is loaded
- Text, this is a text box created by the GM over the Overview Map
- Sticky, this is a sticky placed on the Overview Map
- Location Pins, drag/drop this on a map to create a Location Pin
- Pin, this is a Location pin with a name on the Overview Map
- Party, this is the representation of where the party is on the Overview map
- Maps/Scenes, this will toggle the Map or the Scene panel
- Search & Folders, there you can search anything related to the panel you're in, add folder, rename folder and delete folder
- Panel Area, this is where all the stuff you created in a panel will be
- Menu, this will open the Menu window
- Minimap, this will toggle on/off the Minimap
- Game Master Skill, this will open the Game Master Skill panel
- Game Master Inventory, this will open the Game Master Inventory
- Encounter Manager, this will open the Encounter Manager panel where you will be able to manage all the NPCs in a scene
- Monster & Items, this will open the Monsters & Items panel where you will find every single entities in the mode to be used
- Item Generator, this will open the Item Generator panel where you will be able to create custom pieces of equipment
- Mood Panel, this will open the Mood panel where you will be able to change atmosphere, music and ambiance in a scene
- Surface Panel, this will open the Surface Panel where you will be able to paint any kind of surface in a scene
- Dice Roller, this will open the Dice Roller panel where you will be able to ask players to roll dice or to roll dice yourself
- Starting Point, this will change the cursor to a circle of different color. With it you will be able to choose where the party will start in a scene
- Reward Panel, this will open the Reward panel where you will be able to give gold or experience to the players
- Peace Mode, this will toggle Peace Mode on/off, allowing enemies to not enter combat with the players automatically
|
IMPORTANT NOTE: When an Icon is Orange it's because it's active in your current view. In the image above you can see that The Overview Map, Peace Mode and Pause are active.
Icons that are grayed out are unavailable in the current state of your campaign. For example, in the image above, you can't go to Game Field because you haven't loaded a scene yet.
You can also resize the Overview Map. Just click on the little black area on the corner of the image and you will be able to resize it.
Map Options
There are a few options given to you as the Game Master with the Overview Map.
Right-clicking the Map will open this small menu:

Change Map
Selecting this option will open this window:
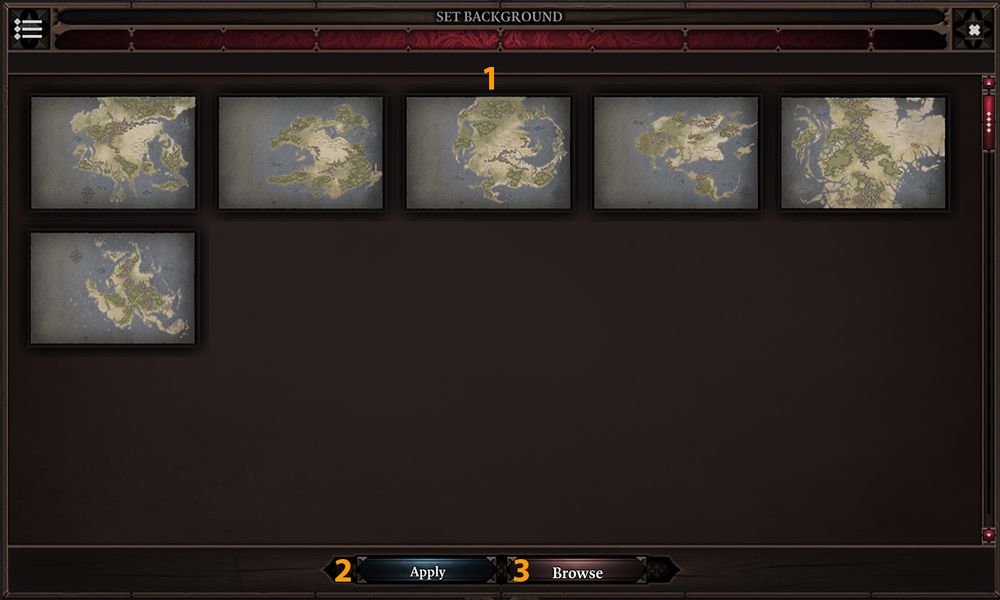
- Maps Sample, this is where all the usable image for maps are
- Apply, after selecting an image, pressing this button will apply the new image as a new Overview Map
- Browse, this will open a new window and you will be able to select any image you have on your computer to import it as a new image for your campaign
Supported format are PNG and JPG. IMPORTANT NOTE: Renaming a PNG for a JPG and vice-versa won't be supported.
|
Create New Pin
This option is pretty straight forward, you can either choose this to create a new Pin exactly where your cursor is or drag/drop the Pin icon at the top of the Overview Map.
Both options do the same thing.
Create New Text
This will create a new white/transparent text area on the map looking like this:

- Clicking and holding the black area at the top/left will allow you to move the text around.
- Clicking the black X will delete the text. IMPORTANT NOTE: If you press this button, your text will be gone forever.
- Clicking and holding the small white triangle at the bottom/right will allow you to expand/shrink the text box
Also, if you shrink the text box too much, a scroll bar will appear on the right
|
Location Pins
Right-clicking on a pin will open this menu:
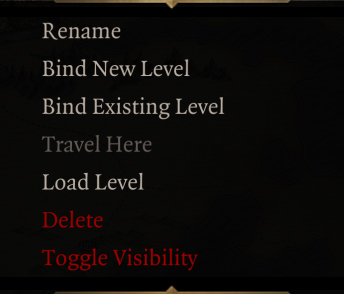
- Rename, this will allow you to rename the pin. You can also just click on the paper above the pin to change the text.
- Bind New Level, this will allow you to bind a new scene to the pin to load quickly from the pin
- Bind Existing Level, this will allow you to bind a scene you have already created to load quickly from the pin
- Travel Here, this will make the Party Icon travel from where it is on the map to the pin leaving a red travel line behind it
- Load Level, if there is a bind scene on the pin, this will load it
- Delete, this will remove the pin IMPORTANT NOTE: Clicking this will remove the pin forever
- Toggle Visibility, this will make the pin invisible to the players or if it's already, show it to the players
|
Bind New Level
After selecting Bind New Level a window like this will pop:
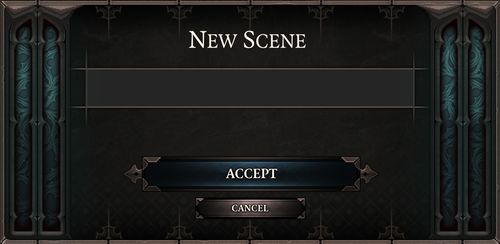
Just give a name to the scene you want to create and then press Accept.
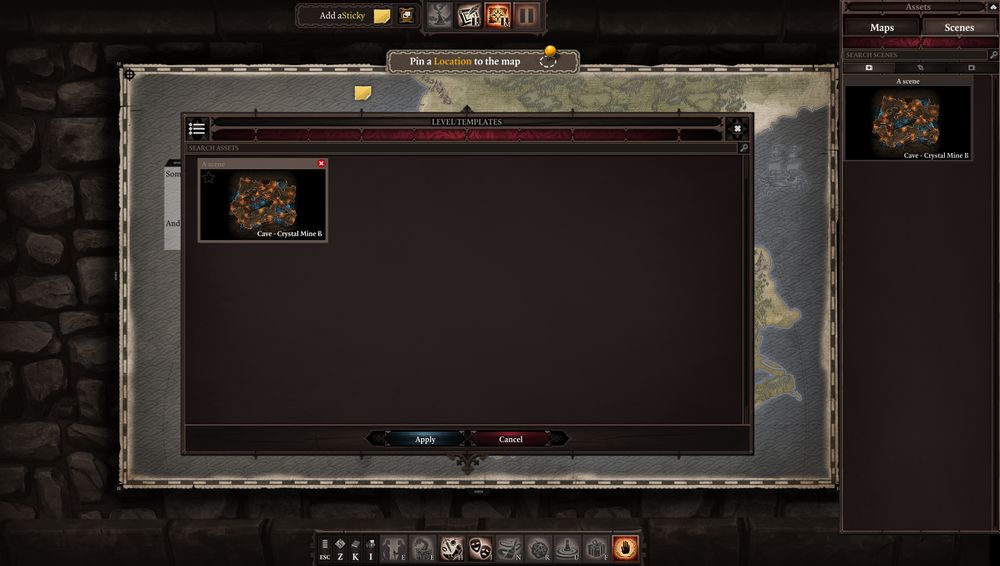
Then a window with all the available scene will open.
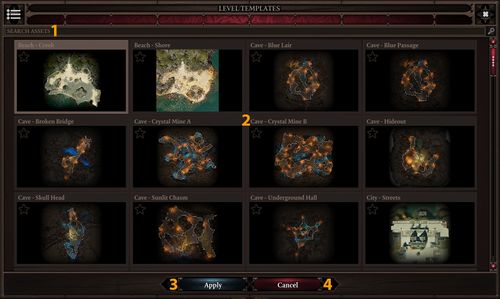
- Search, this is where you can type something like Forest or Swamp and all the scene with the chosen word in their name will be shown
- Scenes, all the scenes available are there
- Apply, press this after choosing a scene to accept
- Cancel, this will cancel the whole thing and bring you back on the Overview Map
|
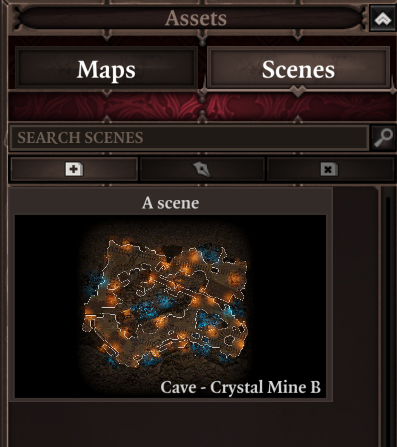
After selecting a scene and clicking the Apply button, your new scene will then be added on the right under the scene tab.
The name over the image is the name you chose earlier and the name at the bottom/right of the image is the technical name from the editor.
This should look like this:
Bind Existing Level
After clicking on Bind Existing Level a window will open looking like this.
You will have a list of all the scenes you have already created in your campaign.
From this list, select the scene you want to bind to your pin and click Apply. The selected scene will now be the one loaded if you choose the Load Level option while right-clicking it.