Working with projects: Difference between revisions
No edit summary |
m (Protected "Working with projects" ([Edit=⧼protect-level-larianeditonly⧽] (indefinite) [Move=⧼protect-level-larianeditonly⧽] (indefinite))) |
||
| (45 intermediate revisions by the same user not shown) | |||
| Line 1: | Line 1: | ||
[[File:Projectbrowser-overview.png|center]] | [[File:Projectbrowser-overview.png|center]] | ||
<br /> | <br /> | ||
== Projects and the Project Browser == | == Projects and the Project Browser == | ||
<p>Everything you create/change in the editor is stored in projects. To be able to share a mod with the world, you have to create and share an editor project you make for that mod.</p> | <p>Everything you create/change in the editor is stored in projects. <br /> | ||
To be able to share a mod with the world, you have to create and share an editor project you make for that mod.</p> | |||
<p>The project browser is used for loading and creating projects. Here you can see all existing projects, as well as the different types of new projects you can create. The browser will show automatically on editor startup. This is because you need a project loaded at all times. Afterwards, you can change projects by loading a different one, as explained in sections [[#Creating|Creating a Project]] and [[#Loading|Loading a Project]].</p> | <p>The project browser is used for loading and creating projects. <br /> | ||
Here you can see all existing projects, as well as the different types of new projects you can create. <br /> | |||
The browser will show automatically on editor startup. This is because you need a project loaded at all times. <br /> | |||
Afterwards, you can change projects by creating or loading a different one, as explained in sections [[#Creating|Creating a Project]] and [[#Loading|Loading a Project]].</p> | |||
{| class="wikitable" | {| class="wikitable" | ||
| Line 12: | Line 16: | ||
|- | |- | ||
|} | |} | ||
<br /> | |||
== <span id="Creating"></span> Creating a Project == | == <span id="Creating"></span> Creating a Project == | ||
| Line 17: | Line 23: | ||
[[File:NewProject.png]] | [[File:NewProject.png]] | ||
</div> | </div> | ||
< | <div> | ||
[[File:Projectbrowser-new.png|800px]] | |||
</div> | |||
<sub> Entering the new project browser via the editor File window.</sub> | |||
<p>When creating a project, there are two things you have to choose: the project type and start-up settings.</p> | <p>When creating a project, there are two things you have to choose: the project type and start-up settings.</p> | ||
<br /> | |||
=== Project Type: Adventure or Add-on? === | === Project Type: Adventure or Add-on? === | ||
<p>Depending on the type of mod you want to release, you have to make either an adventure project, or an add-on project:</p> | <p>Depending on the type of mod you want to release, you have to make either an adventure project, or an add-on project:</p> | ||
*'''Add-on''': Can be toggled on and off between play sessions. Savegames keep working with or without any of them. | *'''Add-on''': | ||
*'''Adventure''': You always start a new campaign (story and gm) for a specific adventure. An adventure is fixed for a game session and savegames | **Can be toggled on and off between play sessions. | ||
**Savegames keep working with or without any of them. Story changes get patched in/out when enabling/disabling add-ons. | |||
**Add-ons are generally projects that add new content to the game (like extra items, classes or quests) or change existing content (turn the Red Lizard blue). | |||
*'''Adventure''': | |||
**You always start a new campaign (story and gm) for a specific adventure. | |||
**An adventure is fixed for a game session and savegames are specific to an adventure. | |||
**An adventure contains the story you will be playing and all content related to that story. | |||
<p>So, in summary, if you want to make a full-blown custom story -> Adventure. For everything else -> Add-on.</p> | |||
< | <br /> | ||
=== Project Settings === | === Project Settings === | ||
| Line 34: | Line 53: | ||
[[File:ProjectSettings.png]] | [[File:ProjectSettings.png]] | ||
</div> | </div> | ||
< | <sub> The available settings before creating your project.</sub> | ||
<p>Before creating your project, you can setup a few things in advance. | <p>Before creating your project, you can setup a few things in advance. </p> | ||
*'''Project name''' | |||
**This is the name your project has in the editor and in your files. | |||
**You will be able to change the title before publishing your project to the world, so don't worry too much about choosing the perfect title.</p> | |||
*'''Load Data From''' | |||
**Our three game modes (Story, Arena and Game Master) are also projects we made in the editor ourselves. | |||
**Select to load the data from any of them, to make your project dependent on the selected project(s). | |||
**This will cause your project to always load all characters, items, story, etc. from there. | |||
**You will need this if you want to make changes to existing content or if you just want to reuse our content to create completely new levels. | |||
*'''Target Project For''' | |||
**Defines in which game mode your published project will work. | |||
**You might for example want to make balancing changes that only affect battles in arena mode. In that case you would only select Arena. | |||
**Or, if you want to create a new sword for your game master campaign and don't want it to be available when playing the main story, you only select GM.</p> | |||
{| class="wikitable" | {| class="wikitable" | ||
| Line 43: | Line 75: | ||
|- | |- | ||
|} | |} | ||
<br /> | |||
== <span id="Loading"></span> Loading a Project == | == <span id="Loading"></span> Loading a Project == | ||
<div> | <div> | ||
[[File: | [[File:OpenProject.png]] | ||
</div> | |||
<div> | |||
[[File:ProjectBrowser-existing.png|800px]] | |||
</div> | </div> | ||
<sub> Entering the existing projects browser via the editor's File window.</sub> | |||
<p>To load a project, simply open the browser and select the project you wish to load. <br /> | |||
To start loading, double-click the thumbnail, press the enter key, or press the Select button in the bottom-right corner of the browser.</p> | |||
<br /> | <br /> | ||
== Publishing a Project == | |||
<p>When you deem your project worthy for the raging masses of gamers out there in the wild, it is time to publish your project. <br /> | |||
Publishing can be done via the publish project window. <br /> | |||
To open the publish project window, go to the editor's Project menu as shown below.</p> | |||
<div> | <div> | ||
[[File: | [[File:OpenPublish.png]] | ||
</div> | </div> | ||
< | <div> | ||
[[File:Publish.png|500px]] | |||
</div> | |||
<sub> Entering the project publish window via the editor's Project window.</sub> | |||
{| class="wikitable" | |||
|- | |||
|More info on the different options in the publish window can be found here: [[Publish project window]] | |||
|- | |||
|} | |||
Latest revision as of 09:20, 2 October 2017
Projects and the Project Browser
Everything you create/change in the editor is stored in projects.
To be able to share a mod with the world, you have to create and share an editor project you make for that mod.
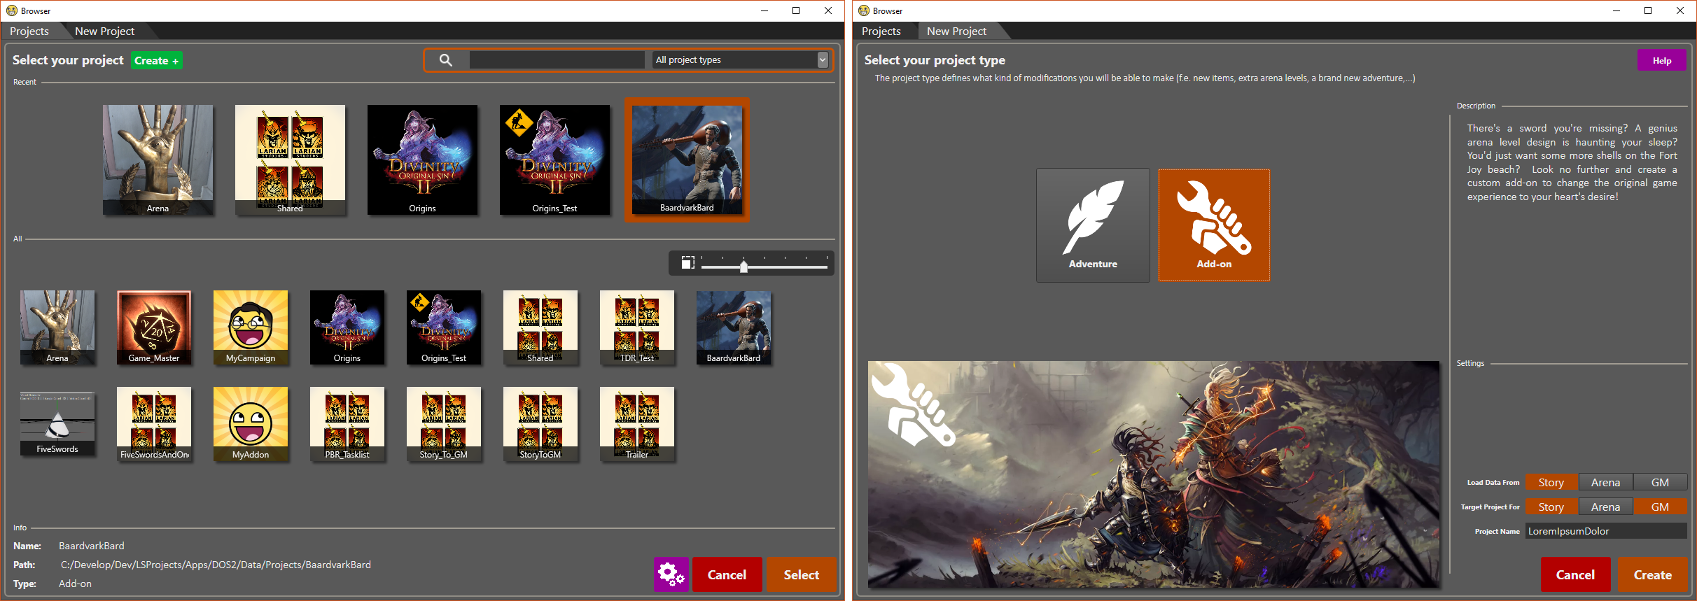
The project browser is used for loading and creating projects.
Here you can see all existing projects, as well as the different types of new projects you can create.
The browser will show automatically on editor startup. This is because you need a project loaded at all times.
Afterwards, you can change projects by creating or loading a different one, as explained in sections Creating a Project and Loading a Project.
| An explanation on the different buttons and functionalities of the project browser can be found here: Project browser |
Creating a Project
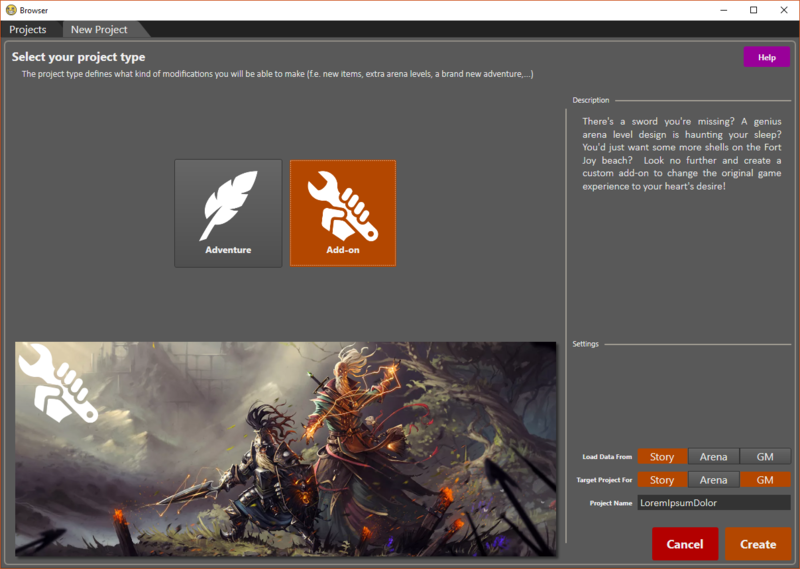
Entering the new project browser via the editor File window.
When creating a project, there are two things you have to choose: the project type and start-up settings.
Project Type: Adventure or Add-on?
Depending on the type of mod you want to release, you have to make either an adventure project, or an add-on project:
- Add-on:
- Can be toggled on and off between play sessions.
- Savegames keep working with or without any of them. Story changes get patched in/out when enabling/disabling add-ons.
- Add-ons are generally projects that add new content to the game (like extra items, classes or quests) or change existing content (turn the Red Lizard blue).
- Adventure:
- You always start a new campaign (story and gm) for a specific adventure.
- An adventure is fixed for a game session and savegames are specific to an adventure.
- An adventure contains the story you will be playing and all content related to that story.
So, in summary, if you want to make a full-blown custom story -> Adventure. For everything else -> Add-on.
Project Settings
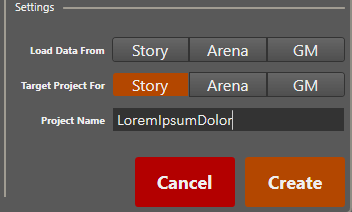
The available settings before creating your project.
Before creating your project, you can setup a few things in advance.
- Project name
- This is the name your project has in the editor and in your files.
- You will be able to change the title before publishing your project to the world, so don't worry too much about choosing the perfect title.
- Load Data From
- Our three game modes (Story, Arena and Game Master) are also projects we made in the editor ourselves.
- Select to load the data from any of them, to make your project dependent on the selected project(s).
- This will cause your project to always load all characters, items, story, etc. from there.
- You will need this if you want to make changes to existing content or if you just want to reuse our content to create completely new levels.
- Target Project For
- Defines in which game mode your published project will work.
- You might for example want to make balancing changes that only affect battles in arena mode. In that case you would only select Arena.
- Or, if you want to create a new sword for your game master campaign and don't want it to be available when playing the main story, you only select GM.
| More info on "dependent project" and how changes to existing content are handled can be found here: Modding internals |
Loading a Project
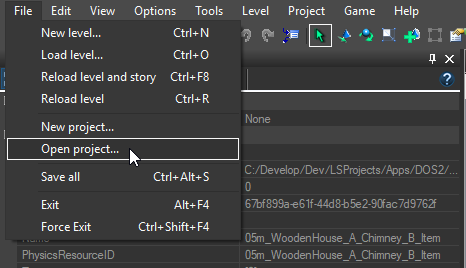
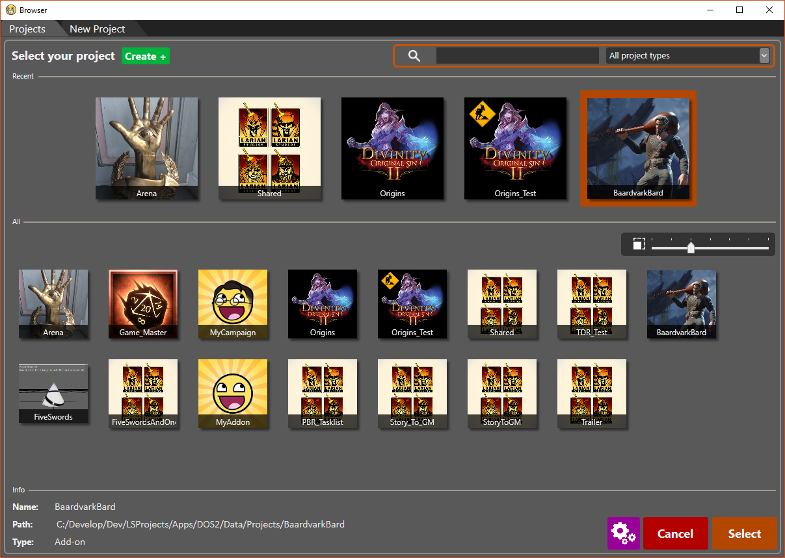
Entering the existing projects browser via the editor's File window.
To load a project, simply open the browser and select the project you wish to load.
To start loading, double-click the thumbnail, press the enter key, or press the Select button in the bottom-right corner of the browser.
Publishing a Project
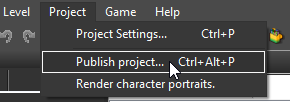
When you deem your project worthy for the raging masses of gamers out there in the wild, it is time to publish your project.
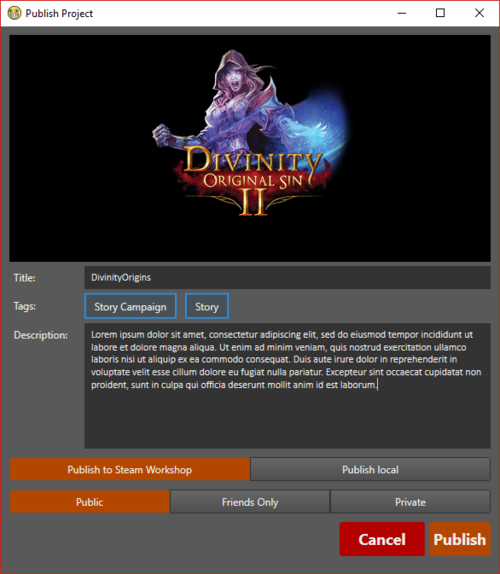
Publishing can be done via the publish project window.
To open the publish project window, go to the editor's Project menu as shown below.
Entering the project publish window via the editor's Project window.
| More info on the different options in the publish window can be found here: Publish project window |

