Part 2: resizing a terrain object: Difference between revisions
Jump to navigation
Jump to search
mNo edit summary |
m (Protected "Part 2: resizing a terrain object" ([Edit=⧼protect-level-larianeditonly⧽] (indefinite) [Move=⧼protect-level-larianeditonly⧽] (indefinite))) |
||
| (5 intermediate revisions by one other user not shown) | |||
| Line 6: | Line 6: | ||
|- | |- | ||
| [[Part 2: resizing a terrain object]] | | [[Part 2: resizing a terrain object]] | ||
|- | |||
| [[Part 3: shaping your terrain]] | |||
|- | |||
| [[Part 4: painting your terrain]] | |||
|- | |- | ||
|} | |} | ||
| Line 24: | Line 28: | ||
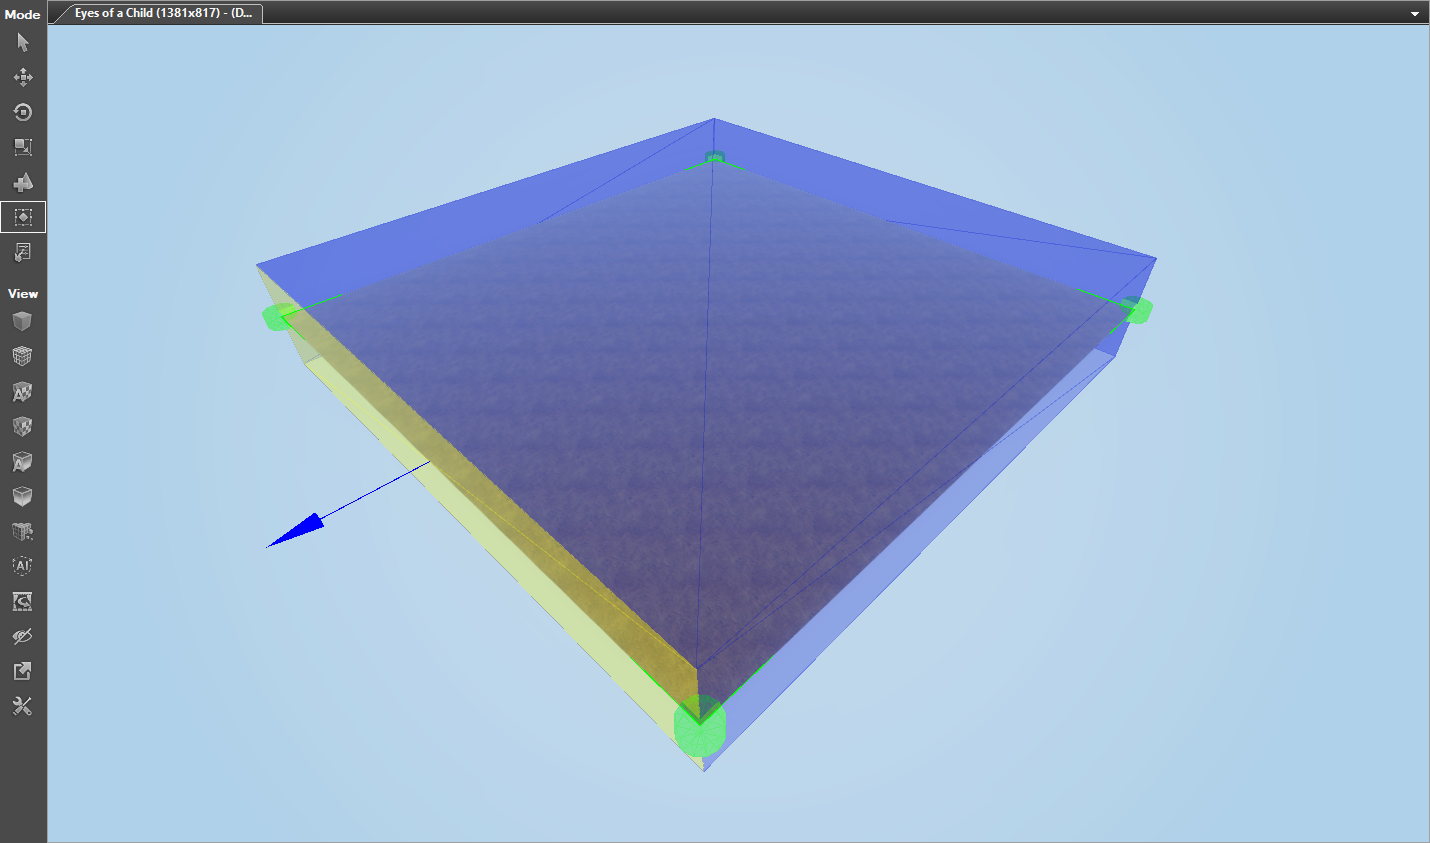
[[File:Option1_ResizeInteractionMode.png|none]] | [[File:Option1_ResizeInteractionMode.png|none]] | ||
<sub>The resize interaction mode in action</sub> | <sub>The resize interaction mode in action</sub> | ||
To use the resize interaction mode: | |||
* Select the terrain you want to resize | |||
* Toggle the [[File:InteractionMode_Shape.png|32px]] resize interaction mode (left toolbar under "Mode") | |||
* Click and drag sides of the box surrounding your terrain | |||
<br /> | <br /> | ||
| Line 29: | Line 39: | ||
[[File:Option2_ResizeButton.png|none]] | [[File:Option2_ResizeButton.png|none]] | ||
<sub>The resize button on the terrain panel</sub> | <sub>The resize button on the terrain panel</sub> | ||
To use the resize button: | |||
* Select the terrain you want to resize (in the terrain panel) | |||
* Click the resize button (at the bottom of the terrain panel) | |||
* Add or subtract a part of the terrain by patches or meters | |||
* Click "OK" | |||
<br /> | <br /> | ||
== See | == See also == | ||
In the next part of the series we will be shaping our terrain. | |||
{| class="wikitable" | |||
|- | |||
| Part 1: creating a terrain object | |||
|- | |||
| [[Part 2: resizing a terrain object]] | |||
|- | |||
| [[Part 3: shaping your terrain]] | |||
|- | |||
| [[Part 4: painting your terrain]] | |||
|- | |||
|} | |||
<br /> | <br /> | ||
Latest revision as of 10:08, 2 October 2017
This article is part of a series on how to create and edit a terrain.
| Part 1: creating a terrain object |
| Part 2: resizing a terrain object |
| Part 3: shaping your terrain |
| Part 4: painting your terrain |
This article describes how to resize your terrain.
Introduction
An integral part of being able to use your terrain is the ability to resize it as your level grows. In the Divinity Engine 2, we introduced vastly improved terrain resizing tools.
There are two ways to resize your terrain:
- The resize interaction mode
- The "Resize" button in the terrain panel
Resizing your terrain
Option 1: The resize interaction mode

The resize interaction mode in action
To use the resize interaction mode:
- Select the terrain you want to resize
- Toggle the
 resize interaction mode (left toolbar under "Mode")
 - Click and drag sides of the box surrounding your terrain
Option 2: The resize button in the terrain panel

The resize button on the terrain panel
To use the resize button:
- Select the terrain you want to resize (in the terrain panel)
- Click the resize button (at the bottom of the terrain panel)
- Add or subtract a part of the terrain by patches or meters
- Click "OK"
See also
In the next part of the series we will be shaping our terrain.
| Part 1: creating a terrain object |
| Part 2: resizing a terrain object |
| Part 3: shaping your terrain |
| Part 4: painting your terrain |