Part 3: creating and using a skillbook: Difference between revisions
mNo edit summary |
m (Protected "Part 3: creating and using a skillbook" ([Edit=⧼protect-level-larianeditonly⧽] (indefinite) [Move=⧼protect-level-larianeditonly⧽] (indefinite))) |
||
| (2 intermediate revisions by one other user not shown) | |||
| Line 1: | Line 1: | ||
This article is part of a | This article is part of a 4-part series on how to create, edit and use a new skill. | ||
{| class="wikitable" | {| class="wikitable" | ||
| Line 26: | Line 26: | ||
<br /> | <br /> | ||
== Creating our skillbook == | |||
=== Step 1: Creating the Stats Object === | === Step 1: Creating the Stats Object === | ||
[[File:Step6_EditObject.png|800px|none]] | [[File:Step6_EditObject.png|800px|none]] | ||
Latest revision as of 10:09, 2 October 2017
This article is part of a 4-part series on how to create, edit and use a new skill.
| Part 1: creating a new skill |
| Part 2: creating a skill from existing |
| Part 3: creating and using a skillbook |
| Part 4: adding the skillbook to a vendor |
This article describes how to create a skillbook, from which skills can be learned. The data used in this article was created in part 2 in the series.
Description
Skillbooks are items that can be found or bought in the game, and provide the player with new learnable skills.
To create and use a new skillbook, we need to:
- Create a new skillbook object in the Stats Editor
- Create a new skillbook template in the Root template panel
- Set the skillbook's OnUse action to learning a skill
- Spawn the skillbook in a level
Creating our skillbook
Step 1: Creating the Stats Object
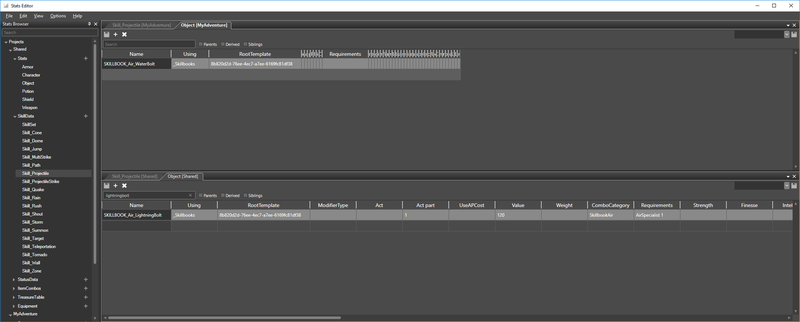
Copying a skillbook stats entry, like we did for the WaterBolt skill
First, we need to create a new skillbook stats entry. We do this the same way we did it for the skill:
- Open the Object stats document in your project
- Open the Object stats document in the Shared project
- Find and copy the SKILLBOOK_Air_LightningBolt entry
The new object needs a unique name in order to create a new object. If we don't rename it, the entry will only override the existing object in another project. I renamed my object from "SKILLBOOK_Air_LightningBolt" to "SKILLBOOK_Air_WaterBolt".
I also modified the following fields:
- RootTemplate (see further down for creating a new skillbook template, we assign this the same way we did the projectile template)
- Requirements, from 1 Aerotheurge to none
Step 2: Creating the Root Template
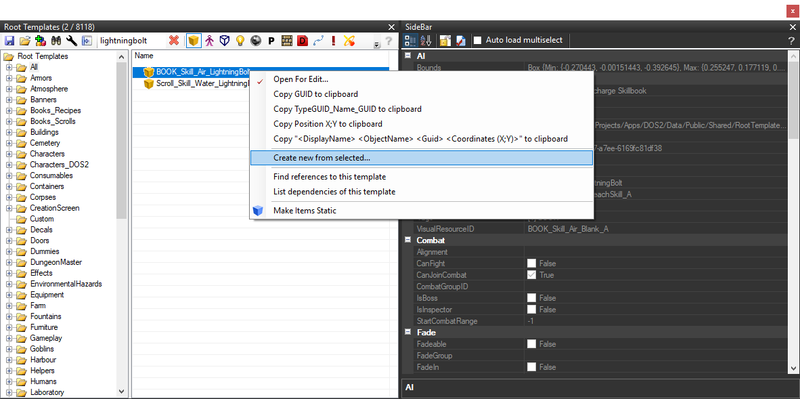
Copying a root template
To create our new skillbook template we:
- Open the Root template panel
- Filter the root templates by item templates
- Filter the item templates by "lightningbolt"
- Select and right-click the "BOOK_Skill_Air_LightningBolt" template, which is the skillbook for the LightningBolt skill
- Click "Create new from selected..."
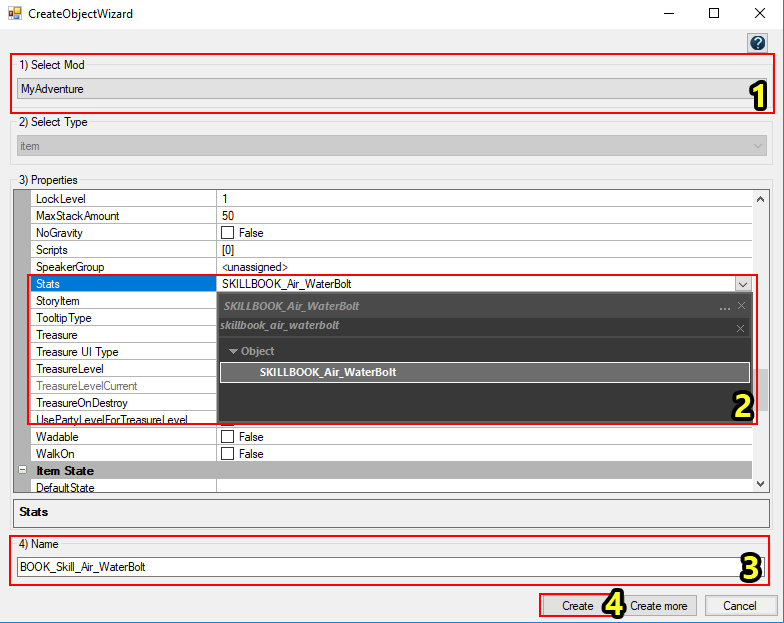
The Create Object Wizard
To create our new skillbook template, we perform the following steps in the create object wizard:
- Select our project (1)
- Assign skillbook stats entry in the "Stats" property (2)
- Rename the template (3)
- Create the template (4)
Note that the "OnUseAction" property also needs to be changed to be able to learn our skill, but I do this later.

Creating a new folder
Our root template also has to be in a folder to be assignable in the stats editor. If you already have a folder of your own, you can skip this step.
To create a new folder:
- Right click the "Root Templates" folder (at the top) in the root template panel
- Click "Add Folder"
- Name your folder
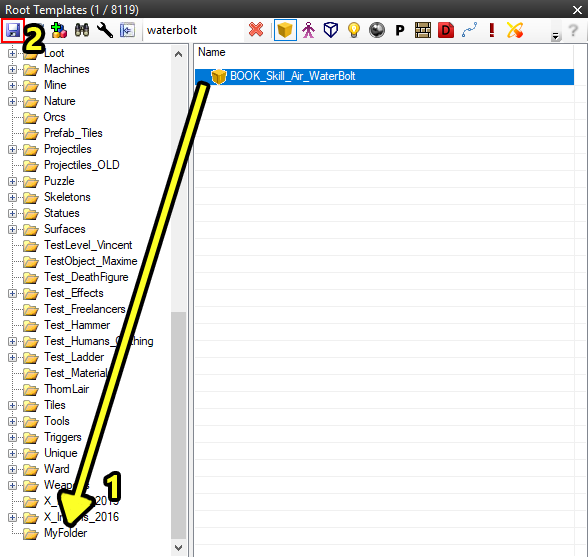
Moving our skillbook template to the new folder
Don't forget to move our new template to our newly created folder (1) and save the root templates (2)!
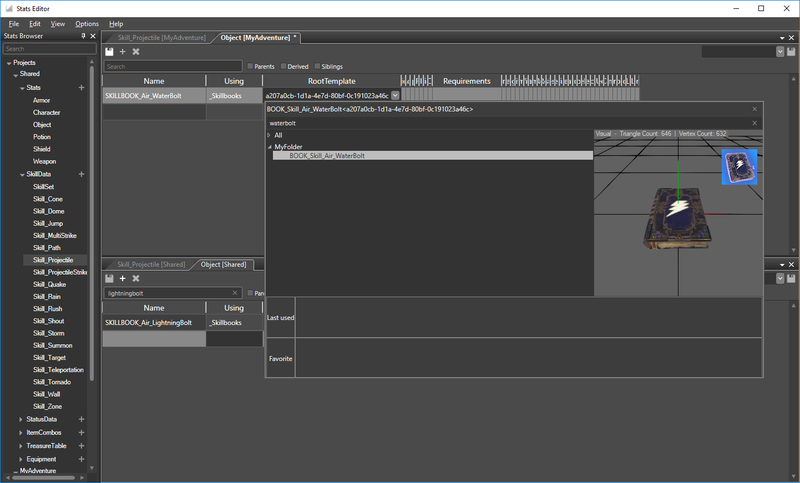
Assigning a root template to our object stats entry
There is one last thing we need to do in the Stats Editor: assign our root template to the object's stats entry. To do this:
- Open your Object document in the Stats Editor
- Navigate to the "RootTemplate" field on your stats entry and double click it
- Find your root template in the root template selector (the popup box)
- Double click it
Then you can save and close the Stats Editor.
Step 3: Setting the On Use Action
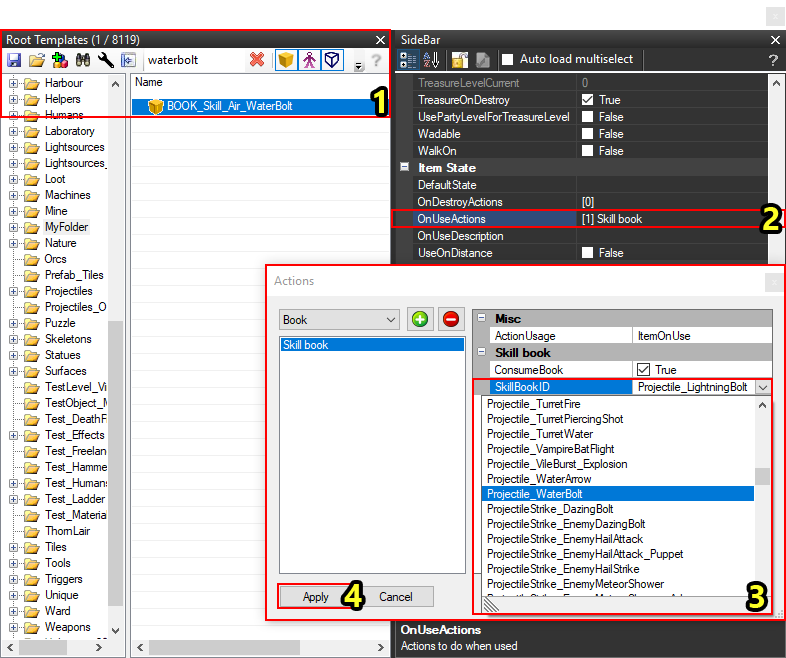
Setting the On Use action on our skillbook template
We also need perform one final (very important) step on our skillbook root template; choosing what to do when the item is used.
To change the "On Use" actions:
- Find your root template in the root template panel (1)
- Find the "OnUseActions" property and open the custom editor (select the property and click the [..] button) (2)
- Select our skill in the "SkillBookID" dropdown on the "Skill book" action (3) [1]
- Apply the changes (3)
[1] You may need to reload your project in order for the SkillBookID dropdown to refresh.
Step 4: Using our Skill
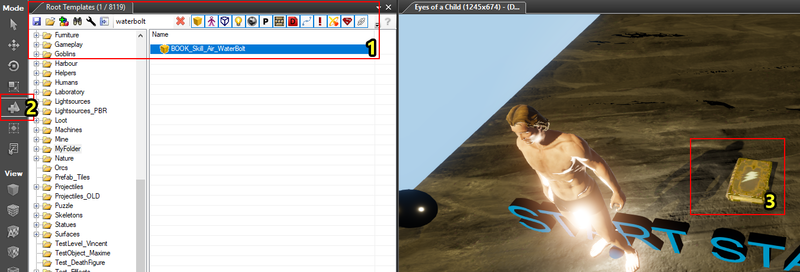
Place an instance of our skillbook template in the level
And that's it, our skill is ready to use!
To learn our skill, we need to place our skillbook in a level:
- Select the template in the root template panel (1)
- Select the Creation Interaction Mode (2)
- Place the item anywhere in your level (preferably near your player character) (3)
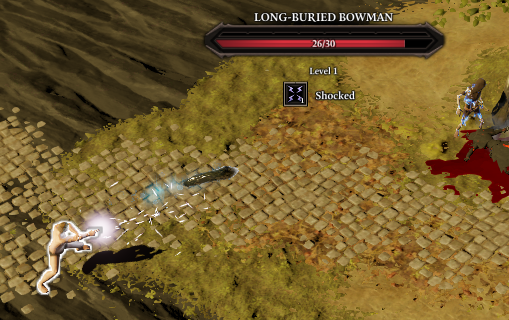
Using our skill
Last but not least, start the game (Ctrl+Enter), pick up the skillbook, learn your skill and destroy your enemies!
See Also
We have now created a useable skill that can be learned from a pleaceable skillbook. What we can not yet do is add our skillbook to a vendor, for that we will need a treasuretable, which we will create in part 4 of the series.
| Part 1: creating a new skill |
| Part 2: creating a skill from existing |
| Part 3: creating and using a skillbook |
| Part 4: adding the skillbook to a vendor |