Overview: Difference between revisions
Larian Jeff (talk | contribs) |
Larian Jeff (talk | contribs) |
||
| (6 intermediate revisions by the same user not shown) | |||
| Line 1: | Line 1: | ||
== Overview Map == | == <font color="#ff9c00">General</font> == | ||
The '''Overview Map''' is the default panel that will be loaded after creating or loading a campaign. | |||
From there, all the options in the Game Master Mode is open to you, from stickies to encounters. | |||
Bellow is a small explanation on all the buttons you can see. | |||
== <font color="#ff9c00">Overview Map</font> == | |||
After creating your campaign you'll be moved to the Overview Map panel. After a few steps, it could look like this: | After creating your campaign you'll be moved to the Overview Map panel. After a few steps, it could look like this: | ||
| Line 43: | Line 51: | ||
You can also '''resize''' the '''Overview Map'''. Just click on the little black area on the corner of the image and you will be able to resize it. | You can also '''resize''' the '''Overview Map'''. Just click on the little black area on the corner of the image and you will be able to resize it. | ||
== Map Options == | == <font color="#ff9c00">Map Options</font> == | ||
There are a few options given to you as the Game Master with the Overview Map. | There are a few options given to you as the Game Master with the Overview Map. | ||
| Line 59: | Line 67: | ||
|} | |} | ||
=== Change Map === | === <font color="#ff9c00">Change Map</font> === | ||
Selecting this option will open this window: | Selecting this option will open this window: | ||
| Line 74: | Line 82: | ||
|} | |} | ||
=== Create New Pin === | === <font color="#ff9c00">Create New Pin</font> === | ||
This option is pretty straight forward, you can either choose this to create a new '''Pin''' exactly where your cursor is or drag/drop the '''Pin''' icon at the top of the Overview Map. | This option is pretty straight forward, you can either choose this to create a new '''Pin''' exactly where your cursor is or drag/drop the '''Pin''' icon at the top of the Overview Map. | ||
Both options do the same thing. | Both options do the same thing. | ||
=== Create New Text === | === <font color="#ff9c00">Create New Text</font> === | ||
This will create a new white/transparent text area on the map looking like this: | This will create a new white/transparent text area on the map looking like this: | ||
| Line 94: | Line 102: | ||
|} | |} | ||
== Location Pins == | == <font color="#ff9c00">Location Pins</font> == | ||
Right-clicking on a pin will open this menu: | Right-clicking on a pin will open this menu: | ||
| Line 112: | Line 120: | ||
|} | |} | ||
=== Bind New Level === | === <font color="#ff9c00">Bind New Level</font> === | ||
After selecting '''Bind New Level''' a window like this will pop: | After selecting '''Bind New Level''' a window like this will pop: | ||
| Line 141: | Line 149: | ||
[[File:GM_SceneCreated.jpg]] | [[File:GM_SceneCreated.jpg]] | ||
=== Bind Existing Level === | === <font color="#ff9c00">Bind Existing Level</font> === | ||
After clicking on '''Bind Existing Level''' a window will open looking like this. | After clicking on '''Bind Existing Level''' a window will open looking like this. | ||
Latest revision as of 18:23, 30 August 2017
General
The Overview Map is the default panel that will be loaded after creating or loading a campaign.
From there, all the options in the Game Master Mode is open to you, from stickies to encounters.
Bellow is a small explanation on all the buttons you can see.
Overview Map
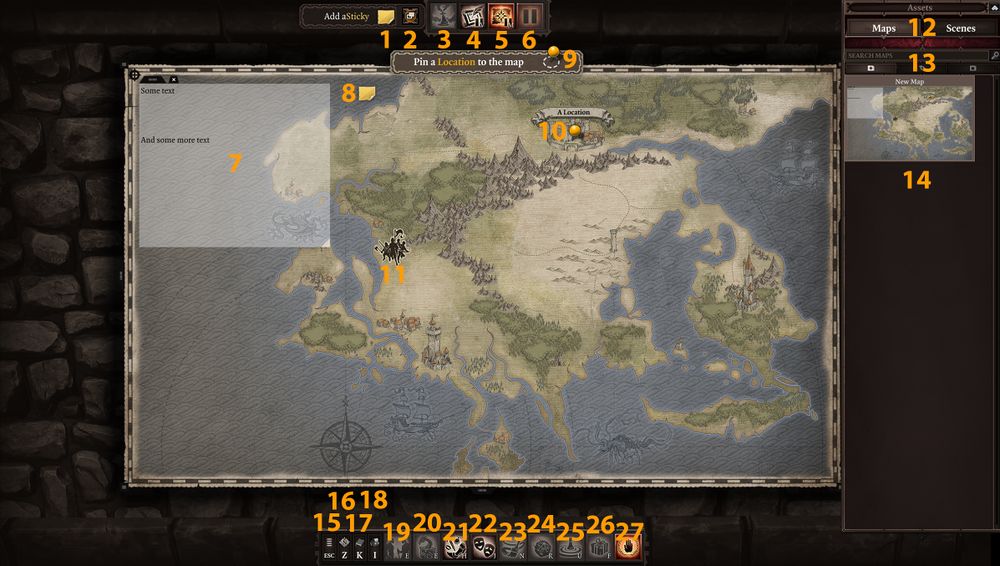
After creating your campaign you'll be moved to the Overview Map panel. After a few steps, it could look like this:
|
IMPORTANT NOTE: When an Icon is Orange it's because it's active in your current view. In the image above you can see that The Overview Map, Peace Mode and Pause are active.
Icons that are grayed out are unavailable in the current state of your campaign. For example, in the image above, you can't go to Game Field because you haven't loaded a scene yet.
You can also resize the Overview Map. Just click on the little black area on the corner of the image and you will be able to resize it.
Map Options
There are a few options given to you as the Game Master with the Overview Map.
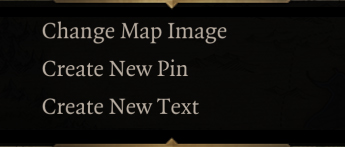
Right-clicking the Map will open this small menu:
Change Map
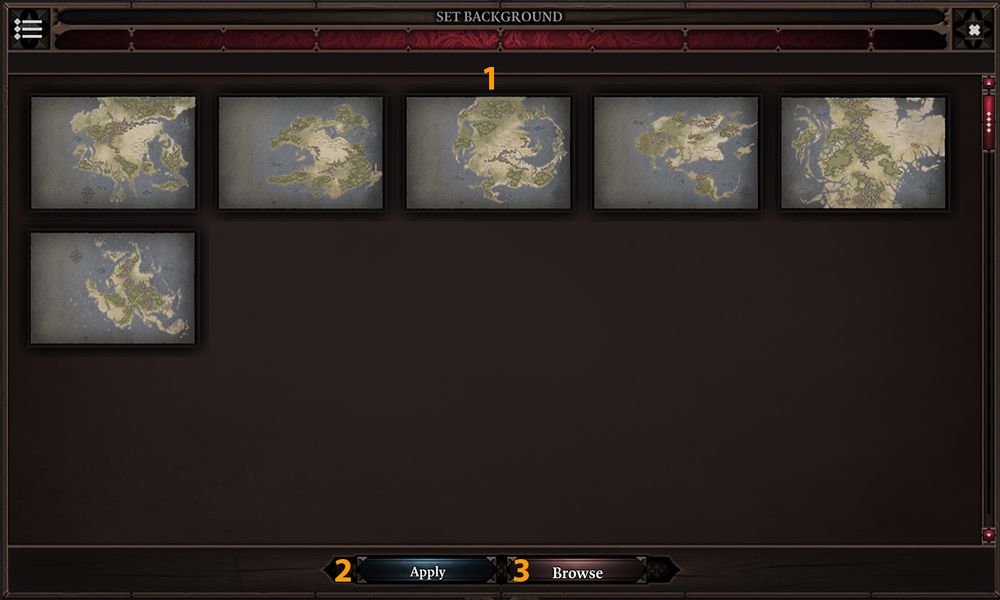
Selecting this option will open this window:
Supported format are PNG and JPG. IMPORTANT NOTE: Renaming a PNG for a JPG and vice-versa won't be supported. |
Create New Pin
This option is pretty straight forward, you can either choose this to create a new Pin exactly where your cursor is or drag/drop the Pin icon at the top of the Overview Map.
Both options do the same thing.
Create New Text
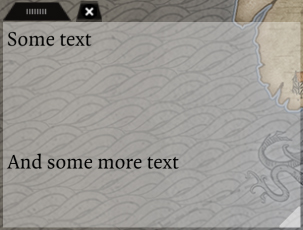
This will create a new white/transparent text area on the map looking like this:
Also, if you shrink the text box too much, a scroll bar will appear on the right |
Location Pins
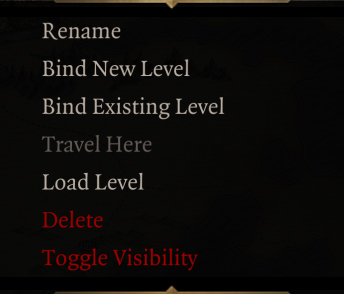
Right-clicking on a pin will open this menu:
|
Bind New Level
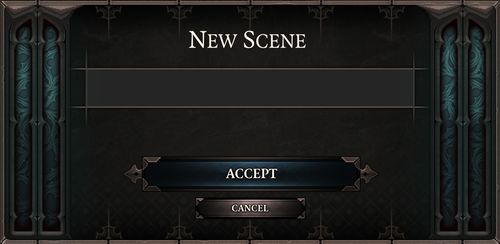
After selecting Bind New Level a window like this will pop:
Just give a name to the scene you want to create and then press Accept.
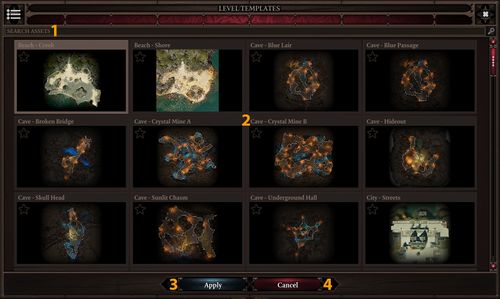
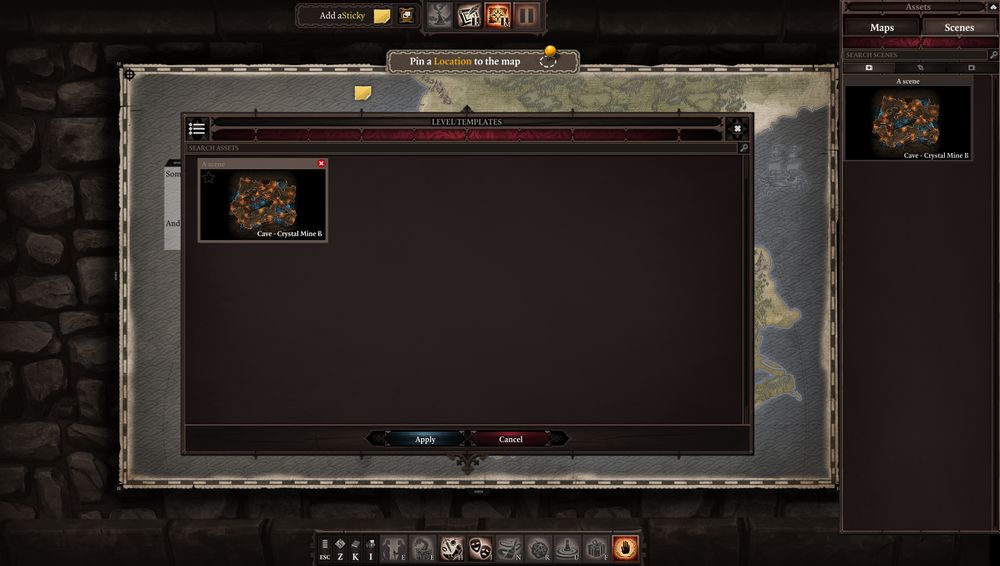
Then a window with all the available scene will open.
|
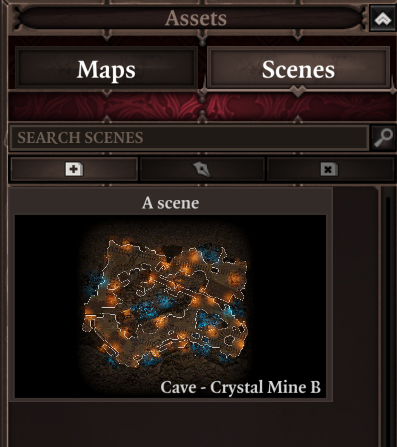
After selecting a scene and clicking the Apply button, your new scene will then be added on the right under the scene tab.
The name over the image is the name you chose earlier and the name at the bottom/right of the image is the technical name from the editor.
This should look like this:
Bind Existing Level
After clicking on Bind Existing Level a window will open looking like this.
You will have a list of all the scenes you have already created in your campaign.
From this list, select the scene you want to bind to your pin and click Apply. The selected scene will now be the one loaded if you choose the Load Level option while right-clicking it.
