My first: Character
Creating a character can be roughly divided into three parts:
- Creating a creature (monster or animal)
- Creating body parts and hairstyles (heads, hairstyles, beards)
- Creating Armor
Creating custom characters is a very technical and complicated process. It will require artistic skills and profound knowledge of 3d modelling, texturing, rigging, skinning, animation and Larian editor.
If you do not possess all the skills mentioned above and still want to make custom characters we strongly recommend reusing existing rigs and animations.
To make a creature you can either:
- Make your own custom creature, rig, animations
- Make your own custom creature that will use already existing rig and animations (recommended)
Larian pipeline of creature creation in a nutshell:
- Concept
- Creation a high poly asset in zbrush
- Retopo, unwrap
- Texturing
- Testing your mesh in the editor
- Rigging
- Skinning
- Animating
Note: if you're reusing existing rig you can skip #6 and #8
Creature editor set-up
Lets take an example of the troll creature.
To be able to implement a troll creature in the game you need:
Resources:
- 3d model
- Textures: Base Map(BM) Normal map (NM) and Physical map(PM)
- Material
- Physics mesh
- Ragdoll mesh
- Animation files (won't be covered in this guide)
Special editor files (more on them later):
- Visual Set
- Root Template
Example file of the troll creature: Pig example
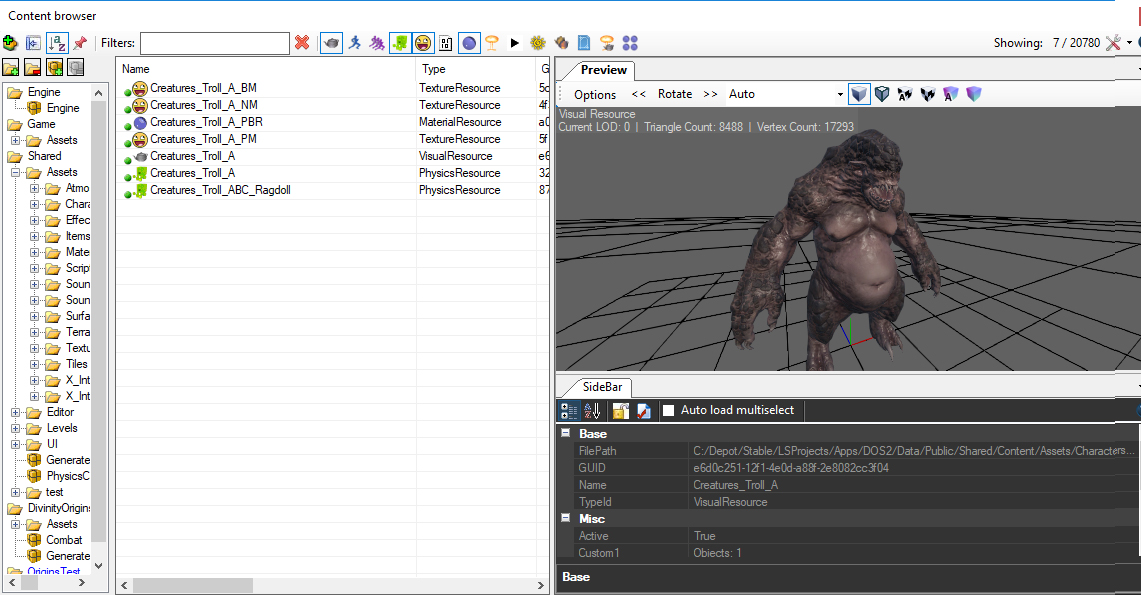
Example of all the resource files in content browser:
General modelling tips:
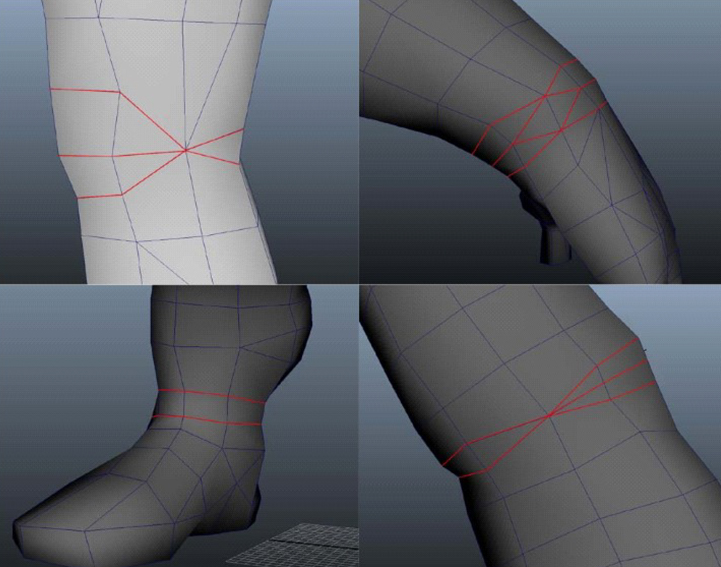
- All the joints areas should have the proper cuts (bending cuts- see below), aligned accordingly along with the respective naked model of the race you’re modeling.
- The armors are using the same rig as the naked model, evidently joints need to be placed correctly, with as similar cuts as possible.
- No Scaling applied to the meshes: reset X-form.
- No N-gonsю Only 3 (triangles) and 4-gons (quads) are allowed.
- Delete any unused vertices and floating triangles.
- Meshes that are supposed to be cloth simulated (capes, hanging piece of cloth, flags, etc) should be built as follow: NO thickness. Try to keep their polycount optimal (500 triangles max per mesh).
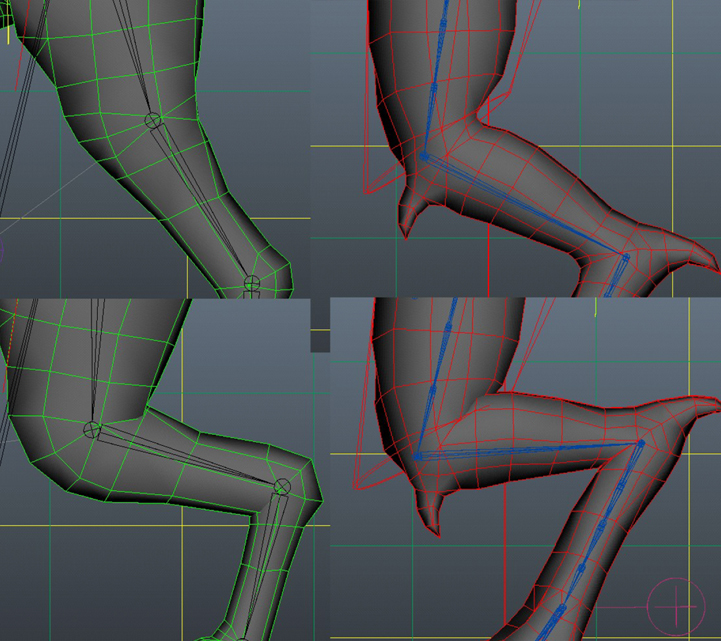
Reasons for the Cuts:
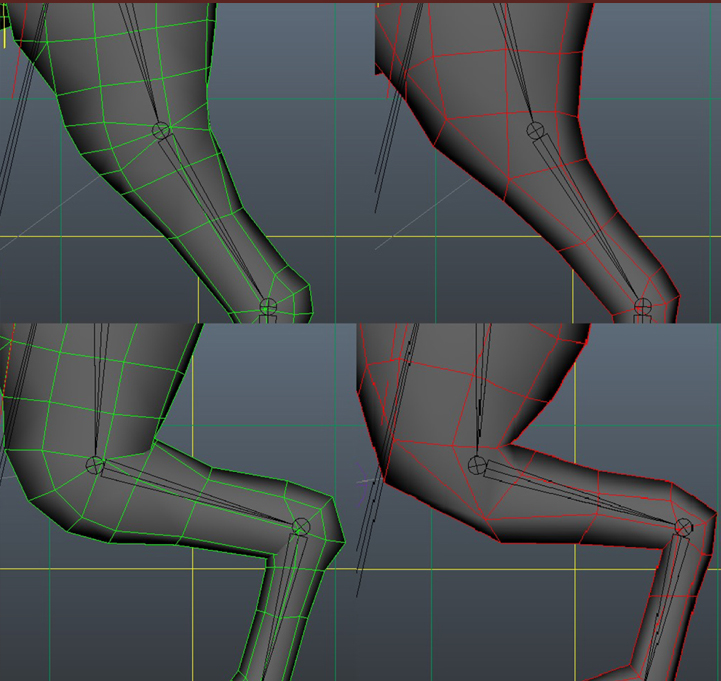
The cuts that are made will be used to squash and stretch at joint areas.
The green and red meshes are skinned to the same rig and posed in the same way.
The green mesh has the correct shapes to create a nice rolling bend of the knee.
whilst the red mesh is missing the shapes and cannot be bend in the same way.
When creating the shapes there must be enhough space to straigten the leg
the red mesh has a shape to small to straighten the leg without it collapsing on itself
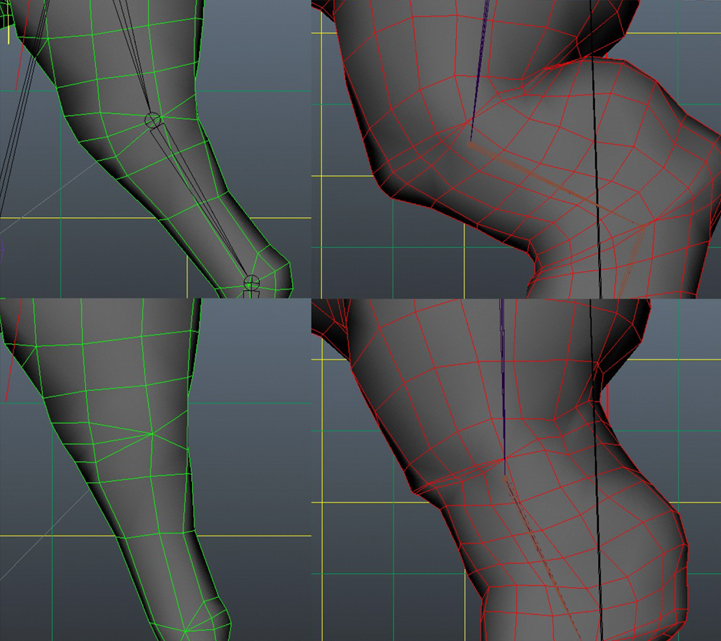
In this example the shapes do not match the location of the kneejoint
and there for are not used in the skinning.
Make sure when creating the mesh to look at the size of the shape and location of the joints.
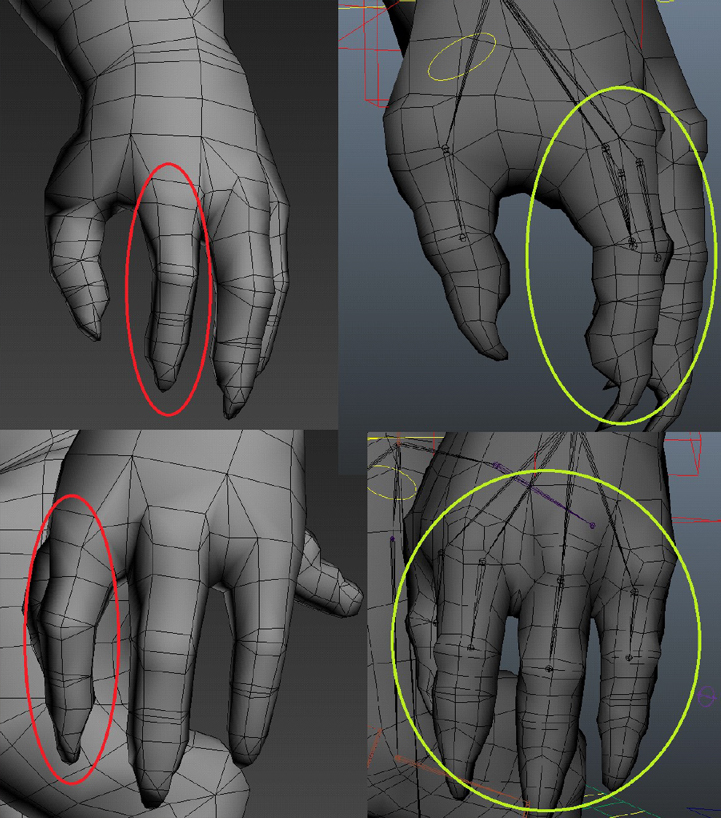
When making the Fingers make sure they all rotate the same way in their base position
- Bottom of feet should be as flat as possible.
- Use smoothing groups sparingly AND intelligently: don’t use 32 smoothing groups when 4 is enough.
- Make sure the armor/clothing pieces are not clipping through one another.
- The vertices along the center world line (symmetry line) should be obviously aligned correctly in the center.
- Close your armor pieces: the player starts with a naked model then can individually dress up his character with any armor piece you’re going to make. It is therefore important there are no holes. Also, make sure your Lowerbody and Upperbody pieces hide the cut at the waistline level.
- About objects that can bend (e.g. tails), don't put concave (=bending inwards) curves in it. They should be as straight as possible in neutral pose.
- Final character should be centered on origin (x0,y0,z0) and fit the naked model provided.
Textures
In DOS2 we use f Physically-Based Rendering (PBR).
To learn more about PBR you can read PBR Guide by Allegorithmic here.
A creature, like troll, usually needs basemap (BM), normal map(NM) and physical map(PM) textures.
Larian editor uses .dds textures.
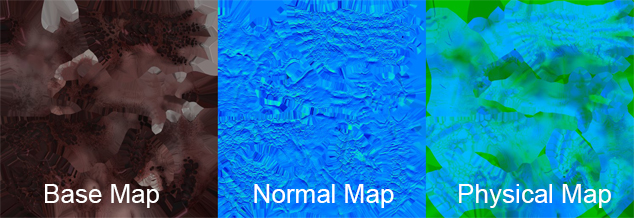
Texture examples:
We pack Metallness in the Red channel, Roughness in the Green channel and Ambient Occlusion in the Blue channel of Physical map.
Why our NM and PM textures look different from the ones used in other game engines ?
-In image files (including dds) the red channel gets the least bytes assigned to it this causes some detail loss which you don't want.
To circumvent it/improve quality, we swivel our red channel into the alpha channel to instead of outputting RGB with output xGBR maps.
Larian primarily uses Substance Painter for texturing our characters and assets. You can get/try it here.
Materials
After you imported your mesh and textures in the editor you need to create a material.
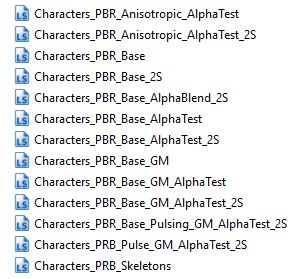
We have a couple of Larian materials(shaders) you can use:
Character materials have fresnel effect on them so you can see your character in various environment and it also has MSK system, that helps you change colors on certan things like skin and cloths (more on MSK later).
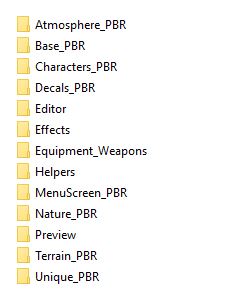
If you don't need this functionality you can use any material from the "Base_PBR" folder.
After you created your material assign your textures in it and assign material to your mesh. (double click on material in content browser; double click on the mesh in content browser)
If your are not using MSK but still want to use character material, just leave it empty (don't enable it in the box) or assign a black texture to it.
You can edit the functionality of the material by right clicking it in content browser and selecting "Open in editor".
Beware if you make changes and save the material all the assets that are using the material will change accordingly.
You can always make edits and "save as" a separate copy for testing purposes.
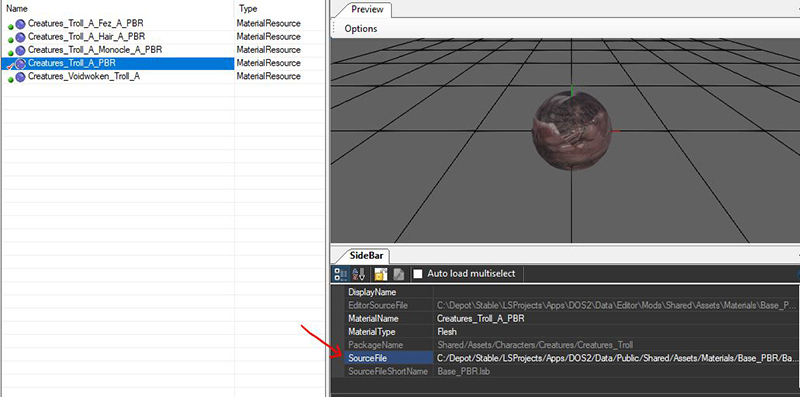
Material source file can be easily changed if you select your material in the content browser and go to the side bar.
If you change the sourcefile of the material you need to reassign textures.
You can also see a "Material Type" parameter in the side bar of the material. the parameter will trigger different sound effects in the game depending in the type of your material, so don't leave it unassigned.
Example files of the creatures Animals:
Bear example
Boar example
Cattle example
Crocodile example
Deer example
Dog example
Frog example
Pig example
Rat example
Salamander example
Squirrel example
Tiger example
Turtle example
Wolf example
Example files of the creatures Creatures:
Bear example
Boar example
Cattle example
Crocodile example
Deer example
Dog example
Frog example
Pig example
