Dialog editor
Introduction
The Dialogue Designer is a visual tool for creating dialogues in our Divinity games. The tool is easy to use for writers and scripters alike and it is independent of the game we're working on.
Creating Dialogues
The Dialogue Designer can be found in the toolbar of our game editor. Look for the speech bubble.
Click that icon to open an instance of the Dialogue Designer. Every time you click on that icon, you will open a new dialogue editor instance. You will be presented with an empty dialogue when the editor starts:
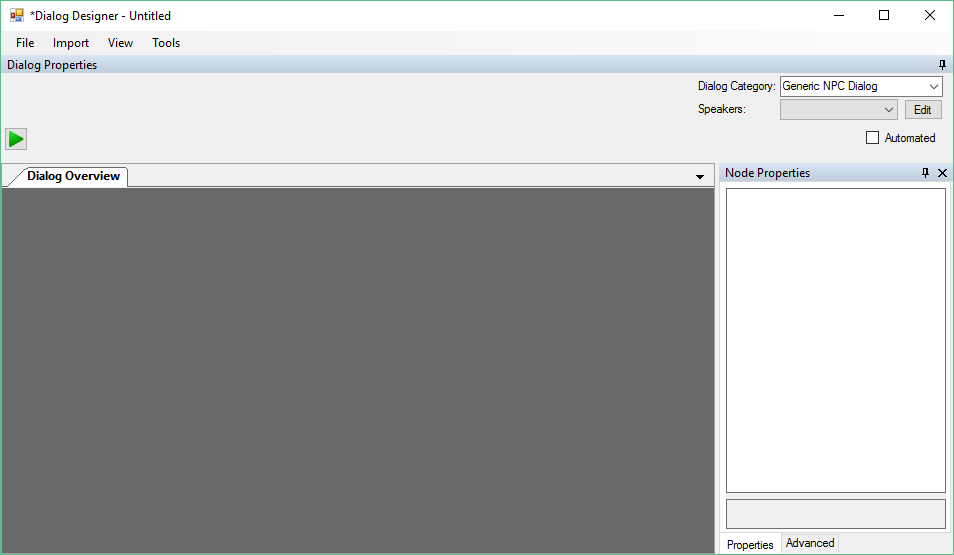
New Dialogues
From the File menu you can create a new empty dialogue (replaces the currently open dialogue, if any, with an empty one) or a dialogue from a template. For more about Templates see #Templates.
Copying Dialogues
If you want to create a new dialogue based on an existing dialogue, don't just copy the files! This will cause problems with voice recording. If you want to copy an existing dialogue you can either:
- Open up the existing dialogue and use the "save as" function in the File menu to save a new dialogue with the name of your choice. You will then be working in the copied version of the dialogue.
- OR
- Open up two instances of the Dialogue Editor. Open your source dialogue in the first instance and Copy the nodes. Then go to the second Dialogue Editor Instance and paste the nodes. For more about copying nodes see #Copying_Nodes.
Nodes
The Dialogue Designer represents the logical structure of a dialogue with a node tree. A node is a logical block of text said by an actor in the dialogue. Everything an NPC or a player can say (or ask), is represented by such a node. Nodes form a tree by connecting to other nodes. These connections denote the flow of the dialogue. For example, if you want an NPC A to say something and another NPC B to reply to that, you have to make a node for NPC A and connect another node for NPC B to that. Nodes can be connected to multiple other nodes, but more about that later.
Adding Nodes
In your dialogue window, right click the grey area to get the node popup menu:
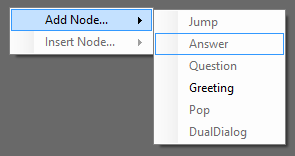
From this menu you can select which type of node you want to add to your dialogue. You'll notice that some of them are greyed out in this pictures. That's because not all node types can be added independently. Some node types require a parent node, before they can be added.
Connecting Nodes
In the previous section we saw that some nodes need a parent node before they can be added to your dialogue. That's the case for most node types found in a dialogue. The Greeting node is an example of a node that doesn't need a parent, since it's the node where the dialogue will start execution. They form the roots of the dialogue tree and the rest of the dialogue flows from them.
Let's create a greeting node, by selecting “Greeting” from the node popup menu:
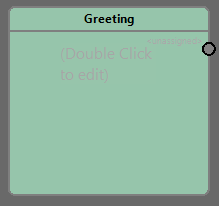
You'll see a green box appear in the main panel of your dialogue designer. Every node is represented as a little box like that, each with a unique colour, Notice the little circle at the top right of the greeting node? That's a connector. This is where other nodes will connect to this greeting node. The greeting node only has a single connector (to the right), because it does not accept parent nodes. You can only attach nodes to it, you can't attach a greeting node to another node since it has no connector on the left.
Now lets add an Answer node to this greeting node. Answer nodes are plain text nodes, usually put in dialogues as answers to questions made by a player (hence the name). You can't have an answer without a preceding question or another text node of some kind, That just wouldn't make sense. That's why Answers require a parent node and that explains why they were greyed out when we first opened up the node popup menu.
To add an answer node, we first select the greeting node, by left clicking on it. You'll notice the colour will change to a lighter shade of green. Now you right click to open the node popup menu:
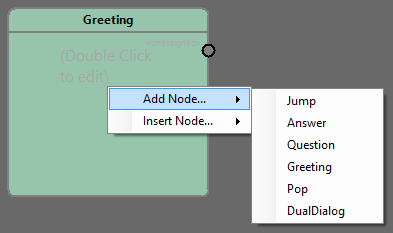
You'll notice the previously greyed out options are now available to click. All those greyed out node types require a parent node before they can be used in a dialogue. Now select “Answer” from the menu. You'll see an Answer node appear next to your Greeting node:
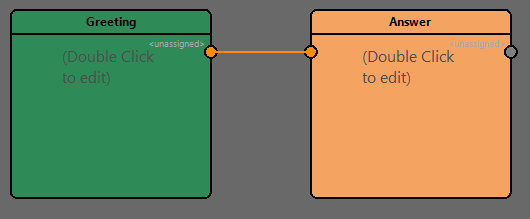
Notice the line between the two nodes. That's a node connection. It extends from one node connector to another node connector. The Answer node has a node connector on its right side, That means you can attach other nodes to it. It also has a node connector on the left, which means it accepts incoming connections from other nodes.
There is no limit on the number of node connections you can have. A single Greeting node can have multiple nodes attached to it. Just as a single Answer node can have multiple nodes as parents.
Inserting Nodes
Some times you want to add a node in between a parent and its children. Instead of adding a new node to the parent and then manually connecting (and disconnecting) the parent's child nodes, you can use the node popup menu's “Insert Node” function.
To insert a node, select the parent node and right click it. Then from the node popup menu open the “Insert Node” sub menu and select your desired node type from the list. This list only contains nodes that can be inserted in between 2 nodes. That is, it only contains nodes that accept parents and children. Selecting Nodes
If you want to move a node, remove it or change its properties you have to first select it. You can select more than one node, though you can't change node properties if you have more than 1 node selected. The dialogue editor offers several ways to select nodes:
- Select a single node by left-clicking it with the mouse.
- Add or remove from your node selection by holding the CTRL key and left-clicking another node. If the new node was not selected it gets added to the current node selection. If the new node was already selected it will be removed from the current selection.
- You can marquee select a (group of) nodes by left-clicking in empty space and dragging over the node(s) you want to select. You'll see a rectangular region extend from where you clicked and following the mouse cursor. When you let go of the left mouse button, any nodes contained in the selection rectangle will be selected.
- Select a node and all of its children by holding the ALT key and left-clicking a node.
Copying Nodes
You can copy and paste nodes into your dialogues.
To copy dialog nodes, select the nodes you want to copy and press the CTRL + C key combination on your keyboard. The dialog nodes are now put on the clipboard and can be pasted in either the current dialogue or another instance of the dialogue editor.
To paste your copied dialog nodes, simply go to the destination dialogue editor window and press the CTRL + V key combination on your keyboard. If the pasted nodes had parent and/or child nodes and those nodes are present in the destination dialogue editor, the newly pasted nodes will be connected to those too.
Removing Nodes
Remove nodes from the dialogue by selecting them and pressing the DELETE key.
Moving Nodes
To move nodes to a new location in the dialogue tree, select them first. Then left click and drag one of the selected nodes. The group of selected nodes will now follow the mouse cursor as you drag it around. Let go of the left mouse button to place the nodes on the new location. When you drop the nodes, they will snap to a location. You can show the grid by checking the 'Show grid' option in the 'View' menu.
Collapsing Nodes
You can collapse dialog Nodes in the editor by double clicking their title bar. That is the top part of a Node where the Logical Name is shown:
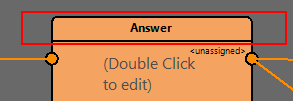
A collapsed Node only displays the Logical Name and not its contents:
![]()
Changing Node Properties
Every node type has a number of properties that can be changed from the node properties side bar:
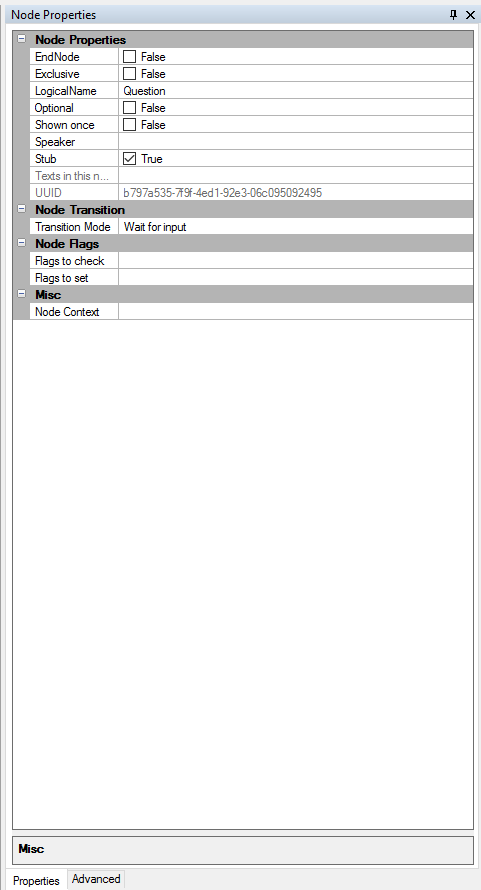
You can only edit the properties of one node at a time. So if you have multiple nodes selected you can not change their properties. Not every node type offers the same node properties. A more in-depth discussion is provided in #Node Properties and Node Types.
To copy and paste properties from one node to another, you can right click the property and choose for 'Copy'. If you want a textual representation of a property (eg. for documentation), you can choose 'Copy display string to clipboard'.
You can drag the Node Properties window to dock it somewhere else or move it to a second screen for easier editing.
As your dialogue grows not all nodes will fit on the screen anymore. When your view doesn't contain all the nodes in the dialogue tree anymore, the dialogue editor will show scrollbars to indicate where there's more nodes outside of the current view. Drag the scrollbars to pan the view. You can also right-click or middle-click the mouse and drag to move the dialogue view in a desired direction.
If you want an overview of the dialogue tree, you can zoom the dialogue view by scrolling the mouse-wheel.
If you want to center the view on a node, select the node and hit the HOME key on your keyboard.
Speakers
Every dialogue is written for a certain set of characters. These characters are the actors of the dialogue. Every dialogue keeps these actors in a list, called the Speakers. They indicate who says what in the dialogue. This Speaker list has a certain order. For example, say we have a dialogue between Bill and Ted. Bill would be speaker 1 (and be in the first slot) and Ted would be speaker 2 (and be in the second slot). Nodes refers to these slot to see who's saying the text contained in.
In our dialogues players will always be the last Speakers in the list. That's because we can have dialogues where depending on the situation more than 1 player can be active in a dialogue. Since we don't want to disrupt the order of the other Speakers, we add players in the back.\
For Question nodes, the Speaker of the node also determines who has to select the question.
Editing Speakers
At the top right of the Dialogue Designer window you can find the Speaker Editor:
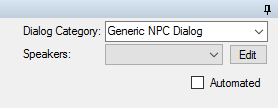
Click the Edit button to open up the Speaker Editor. The Speaker Editor will open and show the current Speakers assigned to the slots (if any):
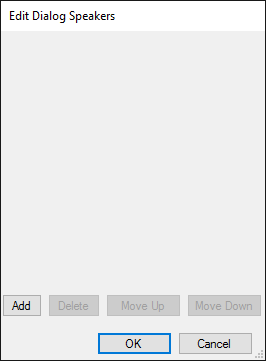
Click the Add button to add a Speaker Slot to the current dialogue:
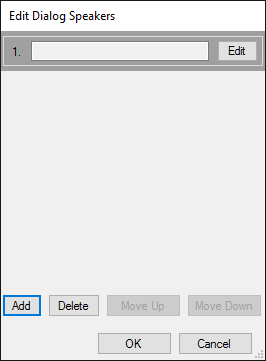
The slot with the grey background is the currently selected item. This is important if you want to change the order of the slots with the Move Up and Move Down buttons.
To select a Speaker Slot, just click it with the left mouse button.
The Delete button removes the currently selected slot from the list. When the removed slot is still used in the dialog, a messagebox will pop up asking you if you want to replace the speaker by another speaker. All occurrences of the removed speaker (in flags, speaker, animations...) will then be replaced by the selected speaker.
Click the Edit button next to a slot to start assigning Speakers to that slot:
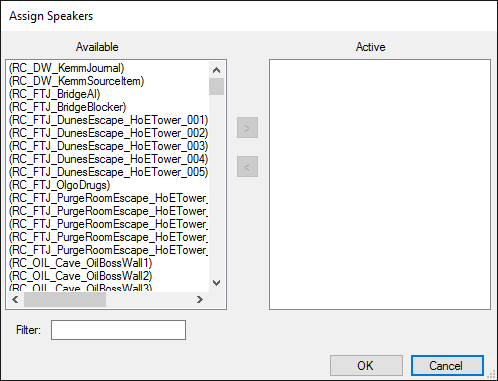
You'll see 2 lists. All the available Speakers in the game and the active Speakers in the selected slot. A slot can have more than 1 speaker assigned to it. This is because some dialogues can be said by several NPCs (think flavour automated dialogues).
To assign a Speaker to the current slot you have to move Speakers from the Available list to the Active List. You can do this in two ways:
- Double click a Speaker from the Available Speakers list
- Select one or more Speakers from the Available Speakers list and click the > button. Use the CTRL key on your keyboard to add or remove Speakers to your selection.
To remove Speakers from the current slot, you have to move them from the Active list to the Available Speakers list. You can do this in two ways:
- Double click a Speaker from the Active Speakers list
- Select one or more Speakers from the Active Speakers list and hit the < button. Use the CTRL key on your keyboard to add or remove Speakers to your selection.
You can use the Filter textbox to search for speakers in the list of Available Speakers.
Once you're done, click the OK button and you'll see your Speakers show up in your selected slot.