Reflection Dialogues
INTRODUCTION
In this guide, you'll get a run through how to create your own Reflection Dialogue for your mod. It should be simple enough by following the instructions. We'll operate under the assumption of using only the standard Origin/Generic characters, but there is a sub-section later on explaining how to add extra characters.
Prerequisites
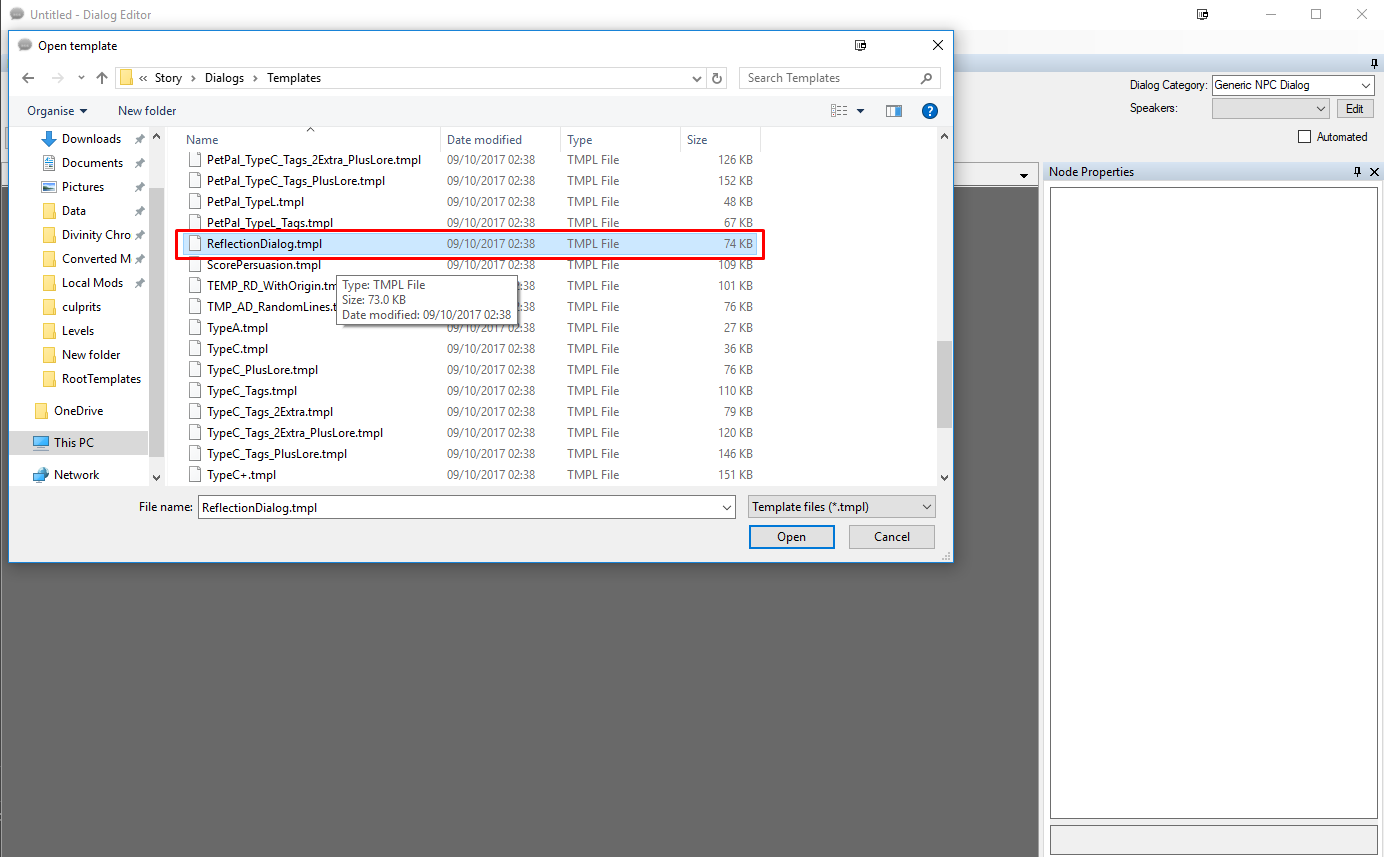
We will be using a dialogue template which we will import inside the engine. Once downloaded, place it at \Data\Mods\YourMod_GUID\Story\Dialogs\Templates\. You could just place it under \Dialogs\, but may as well keep template files separately should you want to make different templates in the future.
1.1. Download the basic template for Reflection Dialogues: File:ReflectionDialogue.zip.
Once you've done this, you're ready to load up your project and begin writing your first reflection dialogue.
Initial Setup
2.1. Importing the template file
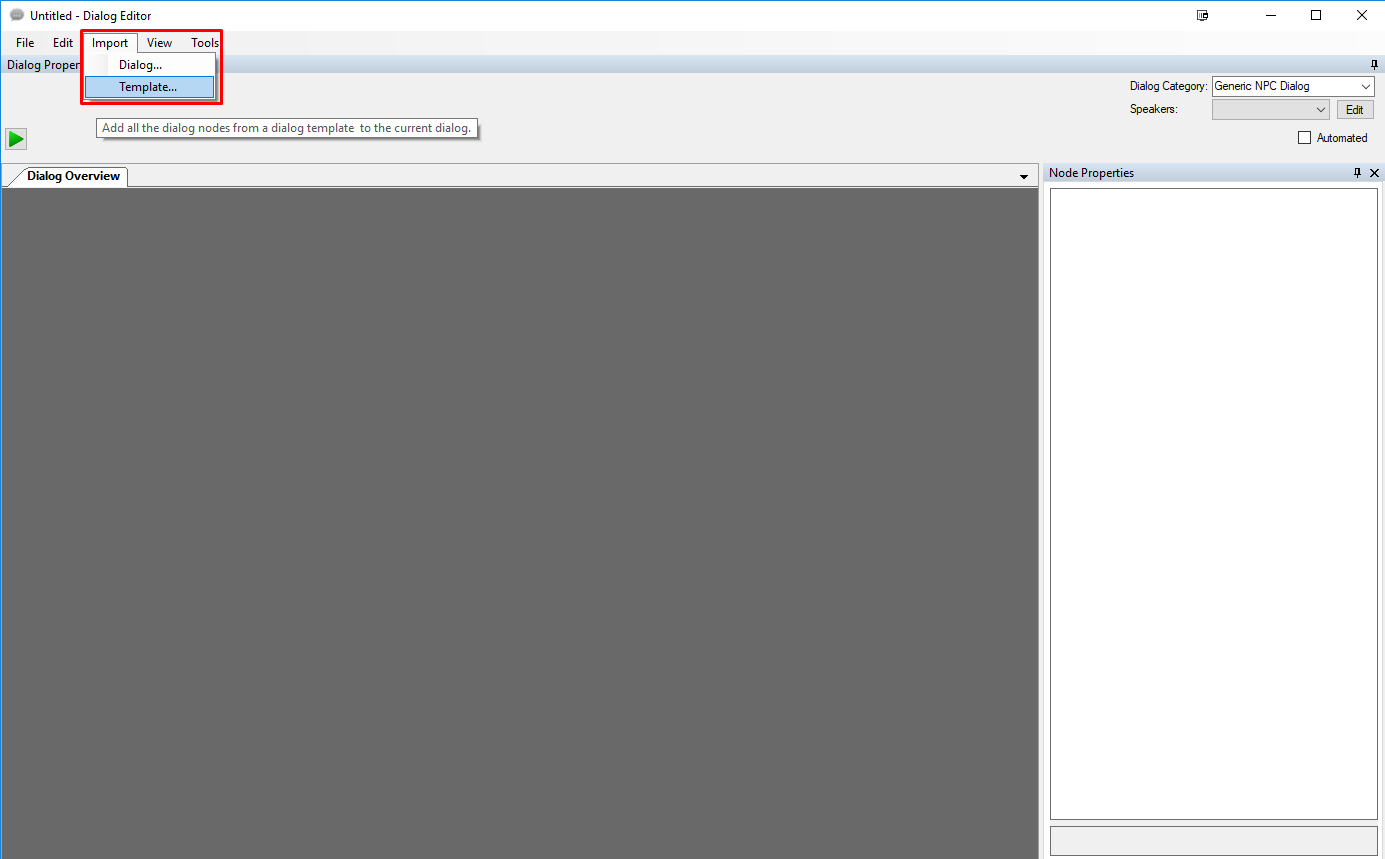
Open up the Dialogue Editor in the engine. Open up the import menu in the bar up top and choose 'Template'. Navigate to where we saved the template file (\Data\Mods\YourMod_GUID\Story\Dialogs\Templates\). You'll be met by a promt stating the template has no defined parameters. Hit finish to proceed and hit OK on the next prompt as well.
2.2. Applying appropriate dialogue category and speakers
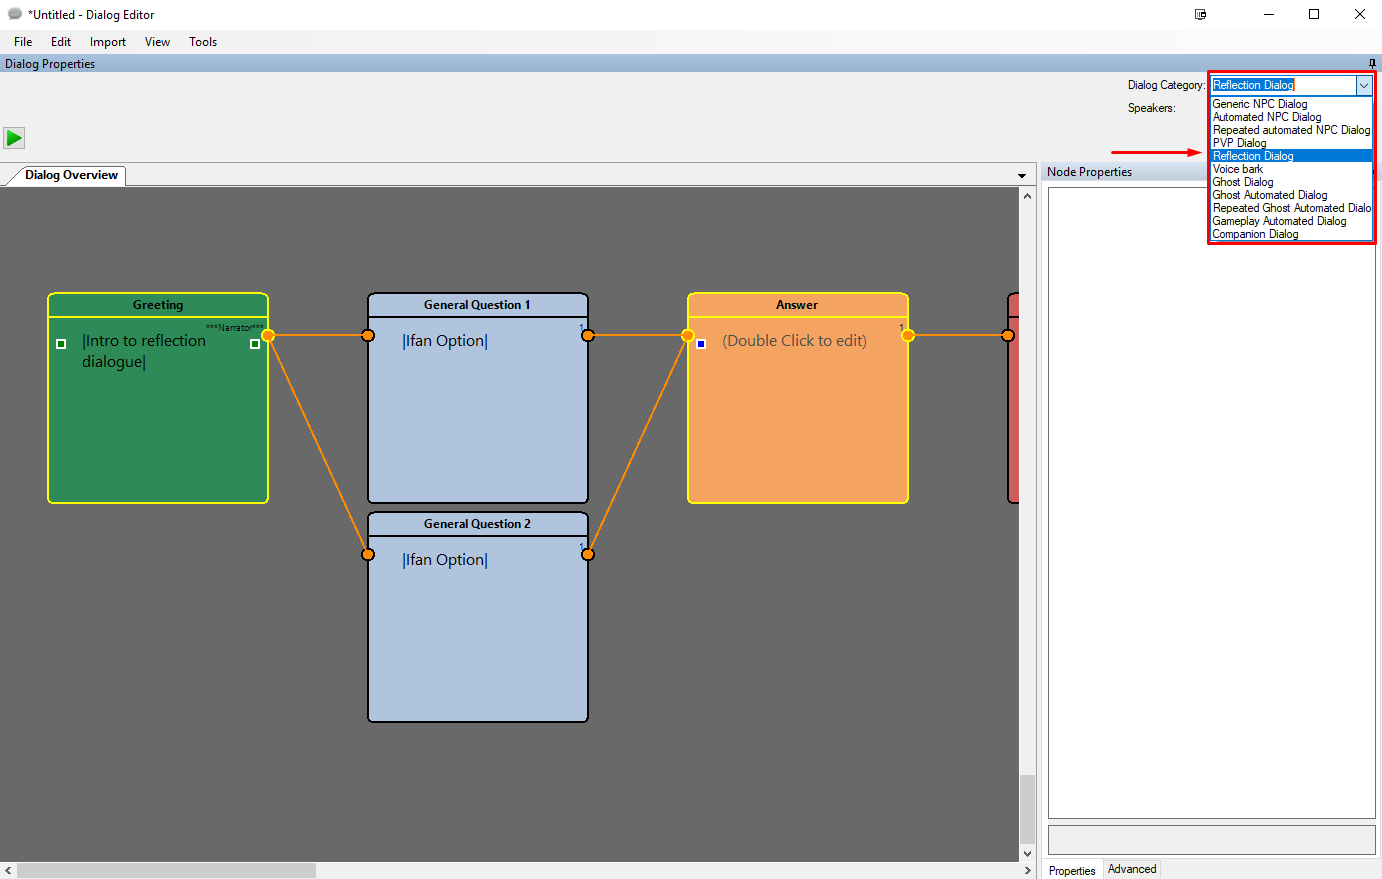
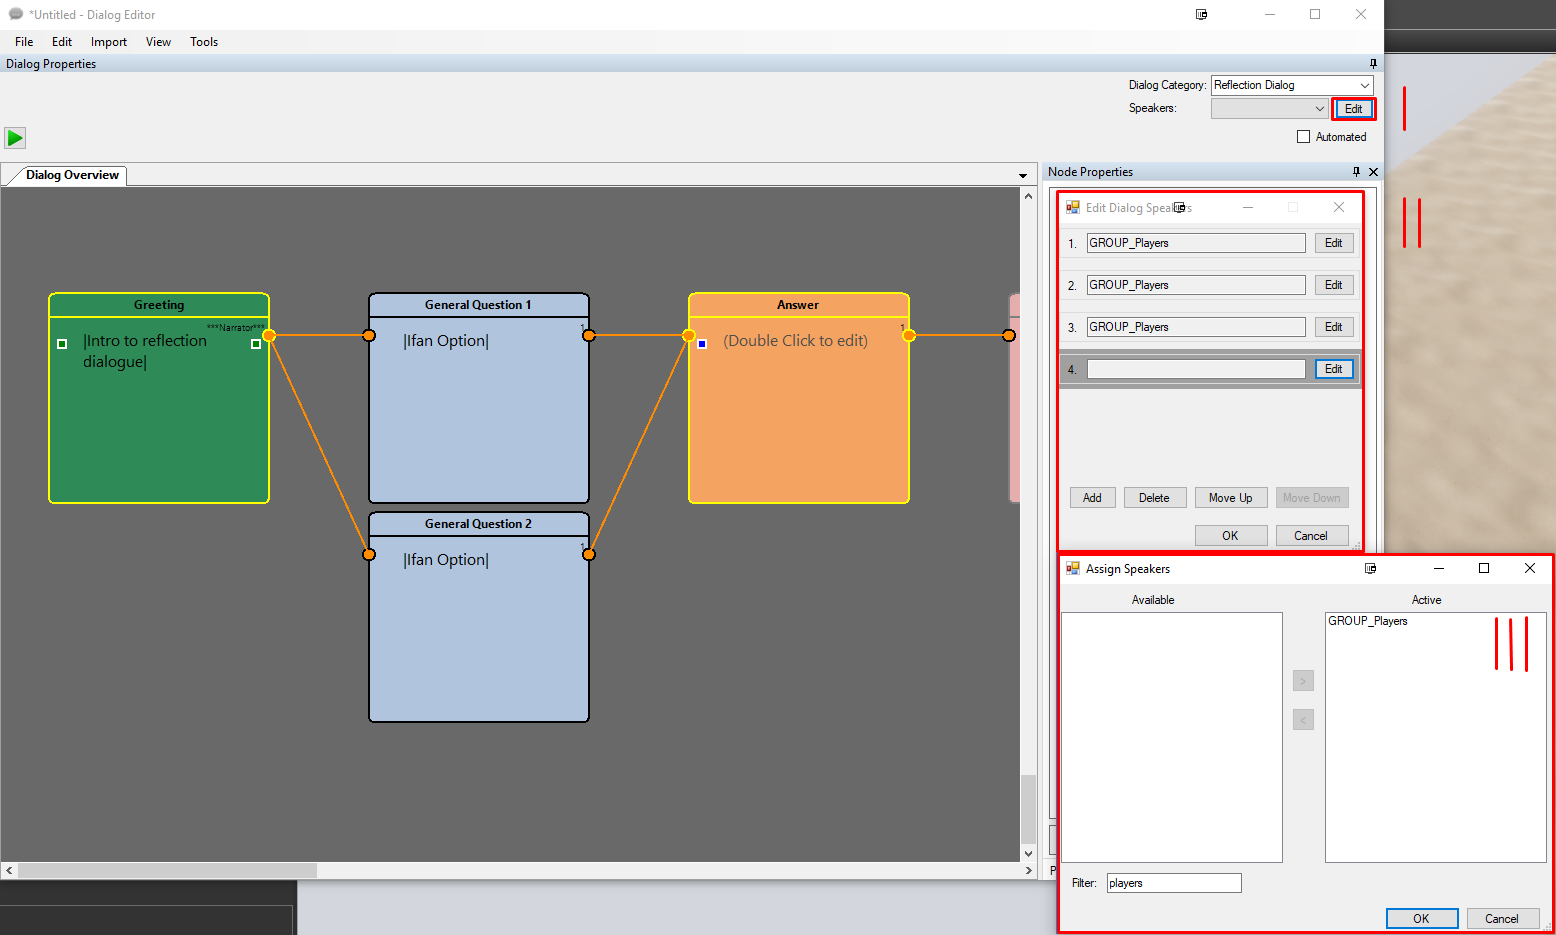
Click on the Dialogue Category drop down up in the top-right corner and select "Reflection Dialog". Then in the speakers menu, hit 'Edit' and add three more entries. Add "GROUP_Players" as the speakers in all four entries.
Writing the dialogue
3.1. Writing the intro and the dialogue options
The greeting node typically is the narrator speaking, introducing the scene. You could do this, or alternatively add a fifth speaker entry with a character of your own participating in the reflection dialogue.
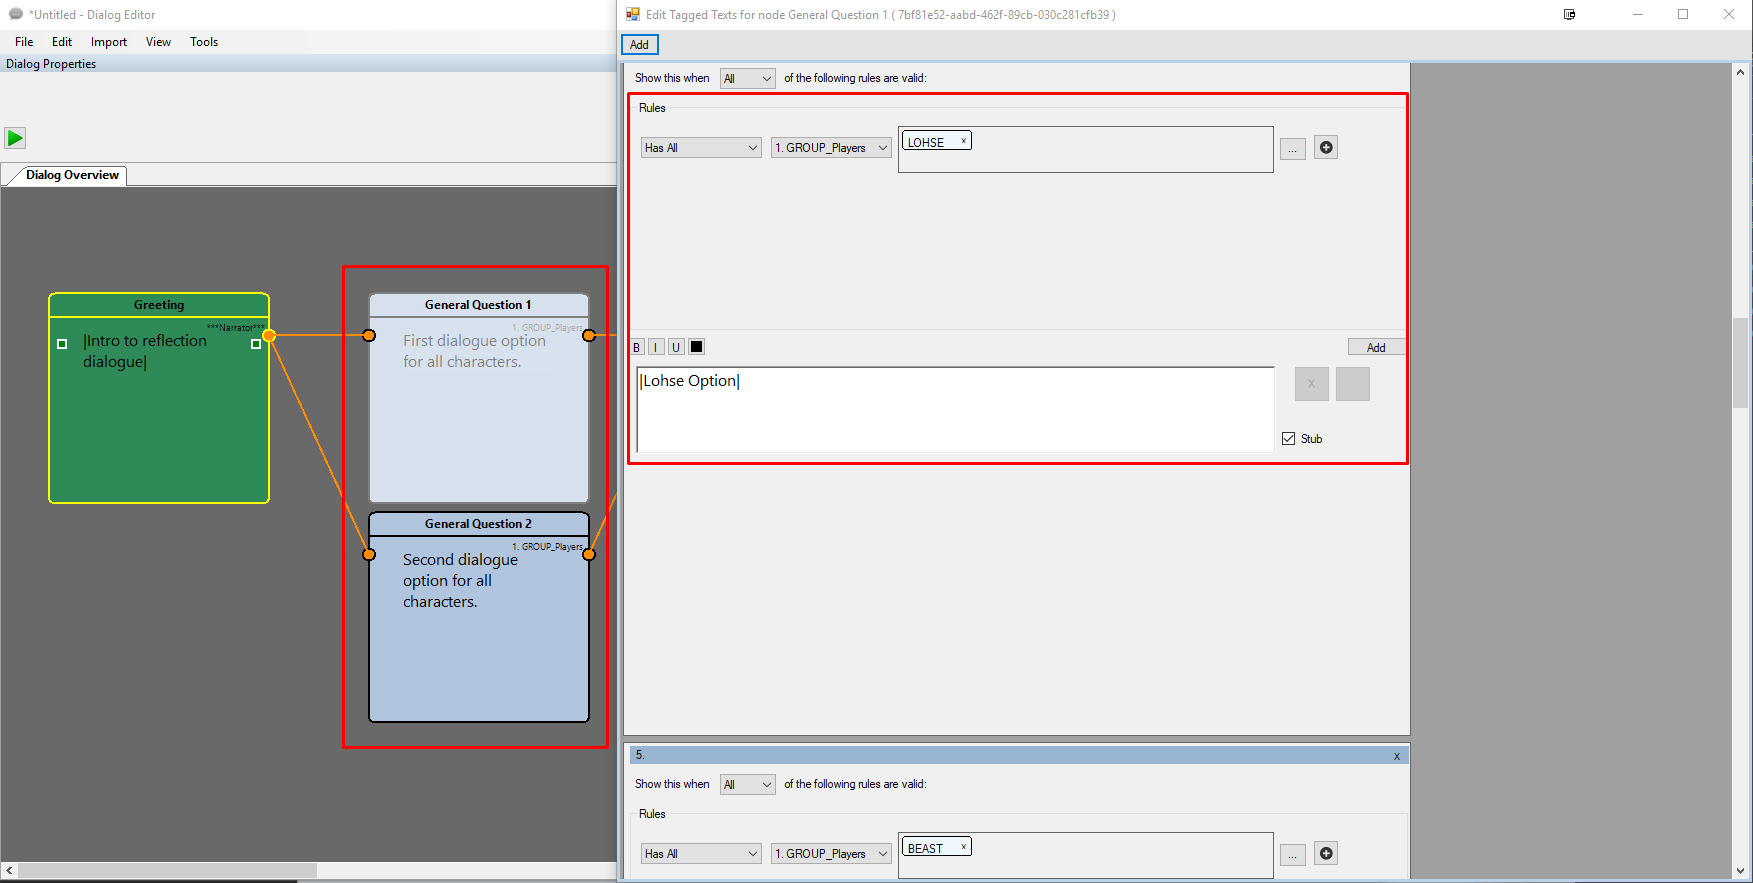
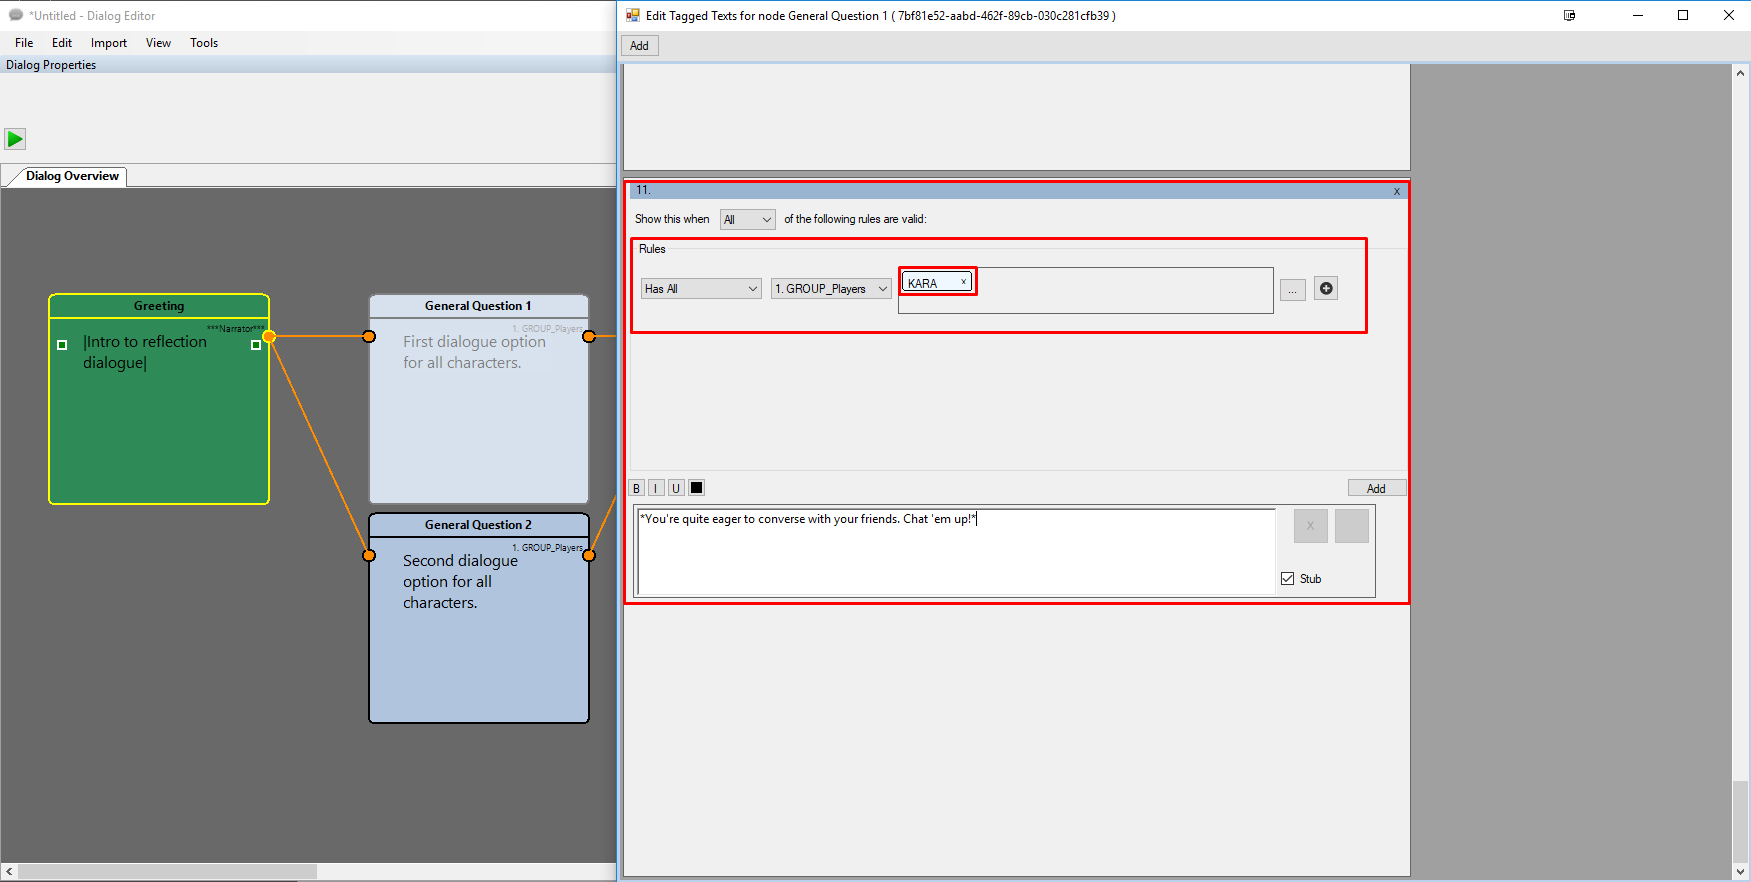
You'll see two question nodes each saying |Ifan Option|. Let's call them Node 1 and Node 2. Each represent a dialogue option for every character, so whether you'd play as the Red Prince, Ifan or any other character, the first node will hold their first option. If you double-click Node 1 and scroll down, you'll see multiple entries, one for each character. It'll check for 'Has All' on 'GROUP_Players' and look for an assigned tag. Where you see the tag 'Lohse', that'll be Lohse's dialogue option in Node 1.
If you have a custom character or Origin character made in your mod, hit 'Add' in the top left corner to add a new entry. Make sure it has identical requirements (Has all: GROUP_Players - TAG) and also make sure your custom character bears this tag so it's recognized. This is how you include new Origin characters, etc.
Follow this process on every node and write up an option for each character with dialogue depending on context of what caused the reflection dialogue to begin with. Bonus points if you manage to keep each character's options fitting their personalities!
3.2. Create the rest of the dialog
You should have the basic gist of things by now. Do the same process for Node 2. You could even hit CTRL+C on Node 1 and then CTRL+V to create Node 3, so that there could be three dialogue options if you so see fit. Save when done.
Let's reflect upon things!
Once done, save your dialogue and name it something appropriate. We'll say 'YourMod_ReflectionDialogue' for now as an example.
You should be set. Open up the Story Editor and open an existing relevant Goal, or create a new one. Write up the prerequisites for triggering the Reflection Dialogue and finish with the call
THEN
ProcDefineReflectionDialog("YourMod_ReflectionDialogue", _Player);
That should be it! Enjoy!
