Modding: The main campaign: Difference between revisions
mNo edit summary |
No edit summary |
||
| Line 9: | Line 9: | ||
Assuming you have already figured out how to launch the editor, the first thing you will need to do is to create a new project. If you haven't already, first open the project browser (under File > Open Project...). | Assuming you have already figured out how to launch the editor, the first thing you will need to do is to create a new project. If you haven't already, first open the project browser (under File > Open Project...). | ||
Next, navigate to the "New Project" tab <span style="color:#FCFF27">(1)</span>. Here, select the "Add-on" type project <span style="color:#FCFF27">(2)</span>, target and load data from Story <span style="color:#FCFF27">(3)</span> and name your project <span style="color:#FCFF27">(4)</span>. Then, simply press "Create" <span style="color:#FCFF27">(5)</span> to finish creating your project. | |||
<br /> | <br /> | ||
| Line 16: | Line 18: | ||
Next, we will need to open the level we want to mod. | Next, we will need to open the level we want to mod. Open the level browser if you do not have it open already (Ctrl+O). | ||
In the level browser, navigate to the Levels tab <span style="color:#FCFF27">(1)</span> and toggle "Show Inherited Levels" <span style="color:#FCFF27">(2)</span> to see all loadable levels, including those from Story. | |||
For this guide I will be loading Fort Joy. Type the name in the level filter <span style="color:#FCFF27">(3)</span> to filter out all other levels. Then select (or double-click) Fort Joy <span style="color:#FCFF27">(4)</span>. Finally, click "Select" <span style="color:#FCFF27">(5)</span> to begin loading Fort Joy. You will also have to confirm a messagebox when first loading an inherited level. | |||
=== Step 3: modding a Divinity: Original Sin 2 level === | === Step 3: modding a Divinity: Original Sin 2 level === | ||
| Line 33: | Line 39: | ||
There are two viewmodes available specifically designed for modding: | There are two viewmodes available specifically designed for modding: | ||
* The ''Show Inherited Overlay'' viewmode shows a <span style="color:#006699">blue</span> overlay on objects that exist only in an inherited project. These objects are '''not''' changed by your mod. | * The [[File:ShowInheritedOverlayButton.png|32px]] ''Show Inherited Overlay'' viewmode shows a <span style="color:#006699">blue</span> overlay on objects that exist only in an inherited project. These objects are '''not''' changed by your mod. | ||
* The ''Show Overridden Overlay'' viewmode shows a <span style="color:#A3E600">green</span> overlay on objects that exist in both an inherited project and yours. These objects are changed by your mod. | * The [[File:ShowInheritedOverlayButton.png|32px]] ''Show Overridden Overlay'' viewmode shows a <span style="color:#A3E600">green</span> overlay on objects that exist in both an inherited project and yours. These objects are changed by your mod. | ||
<br /> | <br /> | ||
| Line 46: | Line 52: | ||
The level browser also shows the inherited/overridden status of levels in your project. Levels with the ''inherited'' icon are loaded from another project, whereas levels with the ''overridden'' icon are loaded from both your project and an inherited one. | The level browser also shows the inherited/overridden status of levels in your project. Levels with the [[File:ProjectBrowser_Inherited.png|32px]] ''inherited'' icon are loaded from another project, whereas levels with the [[File:ProjectBrowser_Overridden.png|32px]] ''overridden'' icon are loaded from both your project and an inherited one. | ||
<br /> | <br /> | ||
Revision as of 07:33, 25 September 2017
Description
Modding the main campaign can be done simply by creating a new Add-On project, loading data from and targeting Story, and then loading and modifying an existing level such as Fort Joy or Reaper's Coast. Let's go through the steps.
Modding the main campaign
Step 1: creating a new project
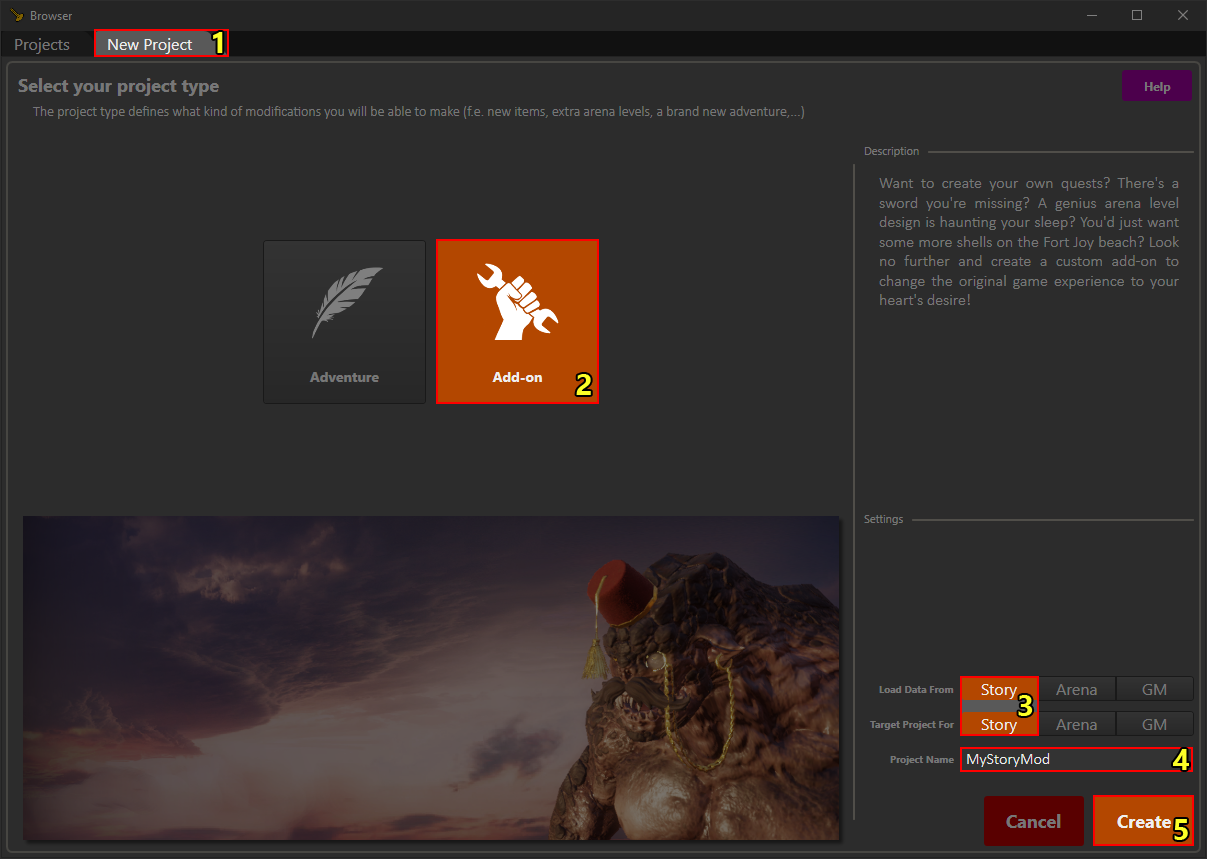
Creating a new add-on project
Assuming you have already figured out how to launch the editor, the first thing you will need to do is to create a new project. If you haven't already, first open the project browser (under File > Open Project...).
Next, navigate to the "New Project" tab (1). Here, select the "Add-on" type project (2), target and load data from Story (3) and name your project (4). Then, simply press "Create" (5) to finish creating your project.
Step 2: opening a Divinity: Original Sin 2 level
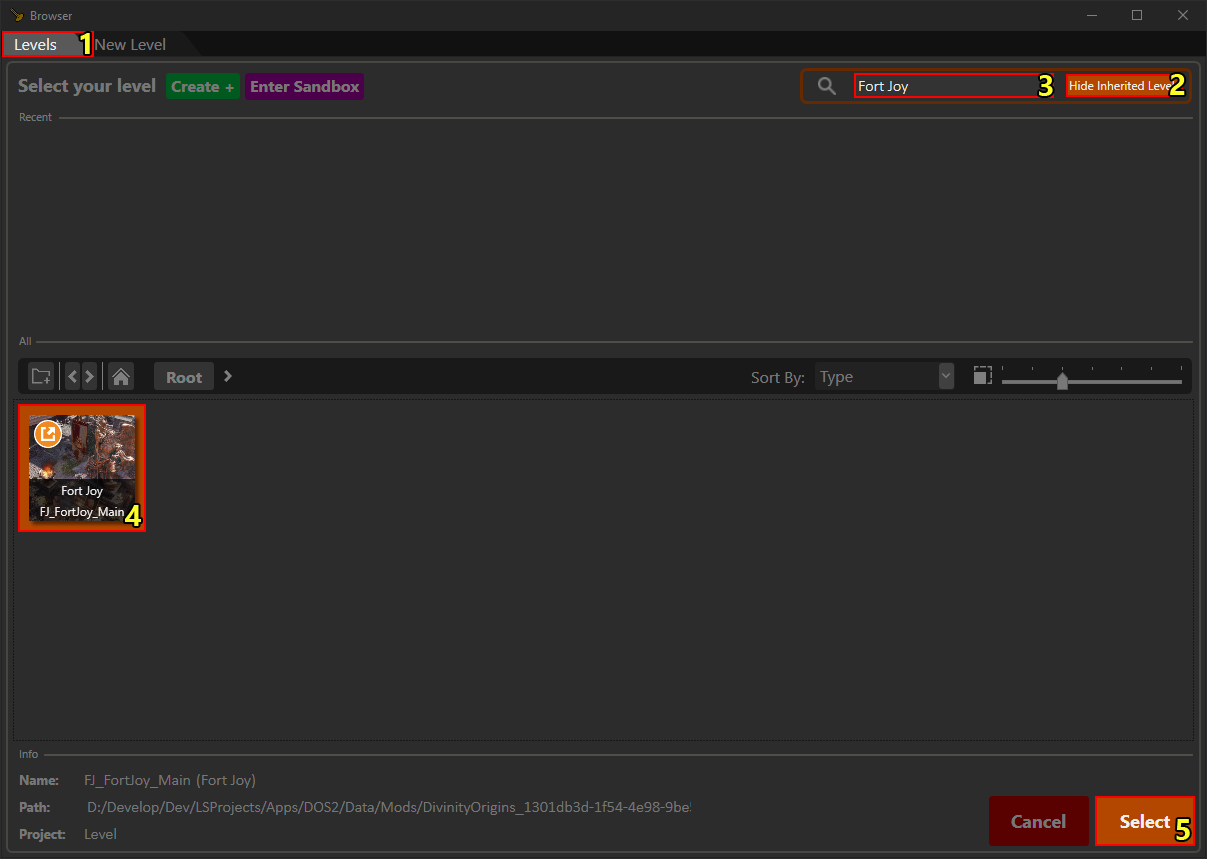
Opening Fort Joy
Next, we will need to open the level we want to mod. Open the level browser if you do not have it open already (Ctrl+O).
In the level browser, navigate to the Levels tab (1) and toggle "Show Inherited Levels" (2) to see all loadable levels, including those from Story.
For this guide I will be loading Fort Joy. Type the name in the level filter (3) to filter out all other levels. Then select (or double-click) Fort Joy (4). Finally, click "Select" (5) to begin loading Fort Joy. You will also have to confirm a messagebox when first loading an inherited level.
Step 3: modding a Divinity: Original Sin 2 level
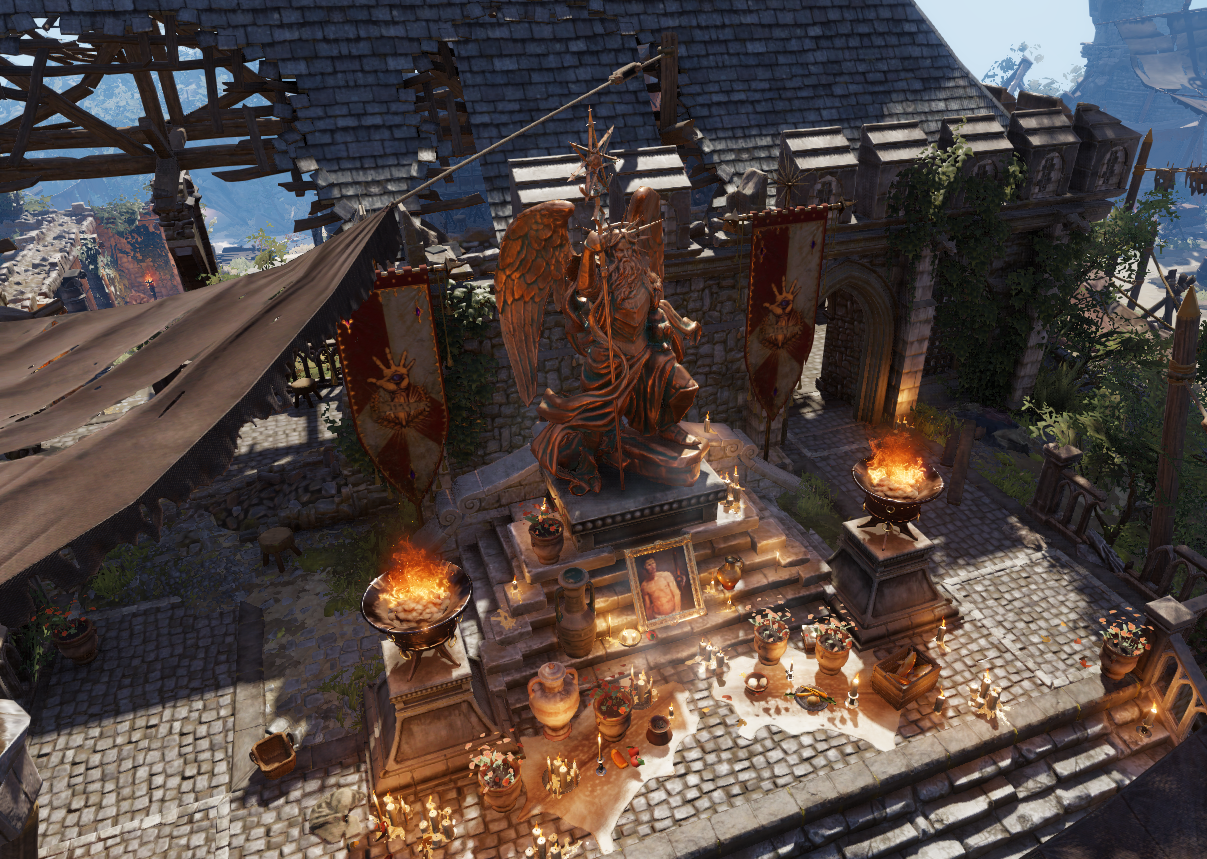
Fort Joy in a custom project
Now you are ready to begin modding! Move, add or modify the level all you like!
Tips & Tricks
Tip 1: object modding status overlay

The viewmode toggles for modding levels
There are two viewmodes available specifically designed for modding:
- The File:ShowInheritedOverlayButton.png Show Inherited Overlay viewmode shows a blue overlay on objects that exist only in an inherited project. These objects are not changed by your mod.
- The File:ShowInheritedOverlayButton.png Show Overridden Overlay viewmode shows a green overlay on objects that exist in both an inherited project and yours. These objects are changed by your mod.
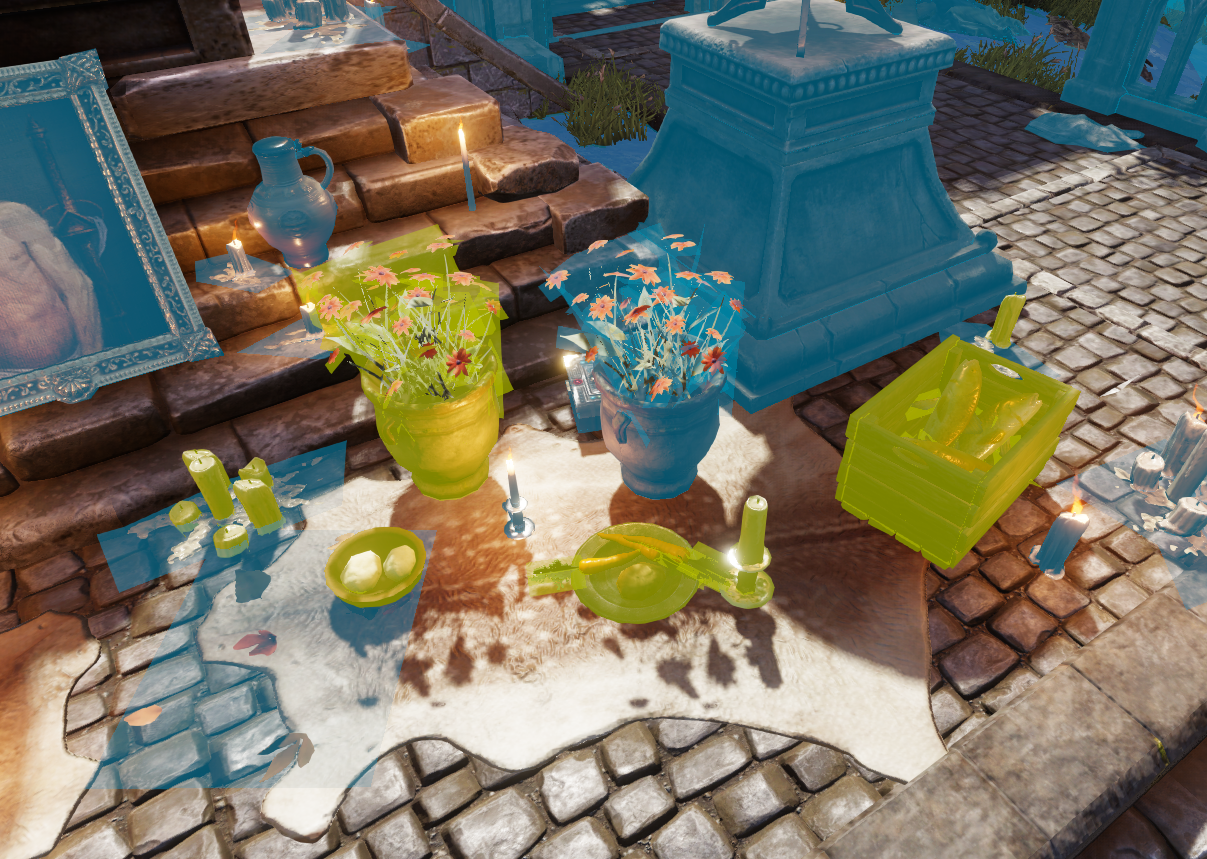
The viewmode toggles in action
Tip 2: level modding status icon
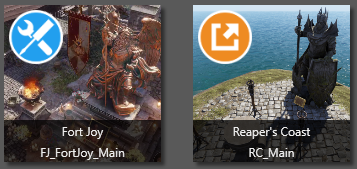
The level modding status icons
The level browser also shows the inherited/overridden status of levels in your project. Levels with the ![]() inherited icon are loaded from another project, whereas levels with the
inherited icon are loaded from another project, whereas levels with the ![]() overridden icon are loaded from both your project and an inherited one.
overridden icon are loaded from both your project and an inherited one.