Difference between revisions of "Vignettes"

From Divinity Engine Wiki
Jump to: navigation, search
(Vignette Canvas)
(Vignette Canvas)
Line 65: Line 65:
 
|-
 
|-
 
|
 
|
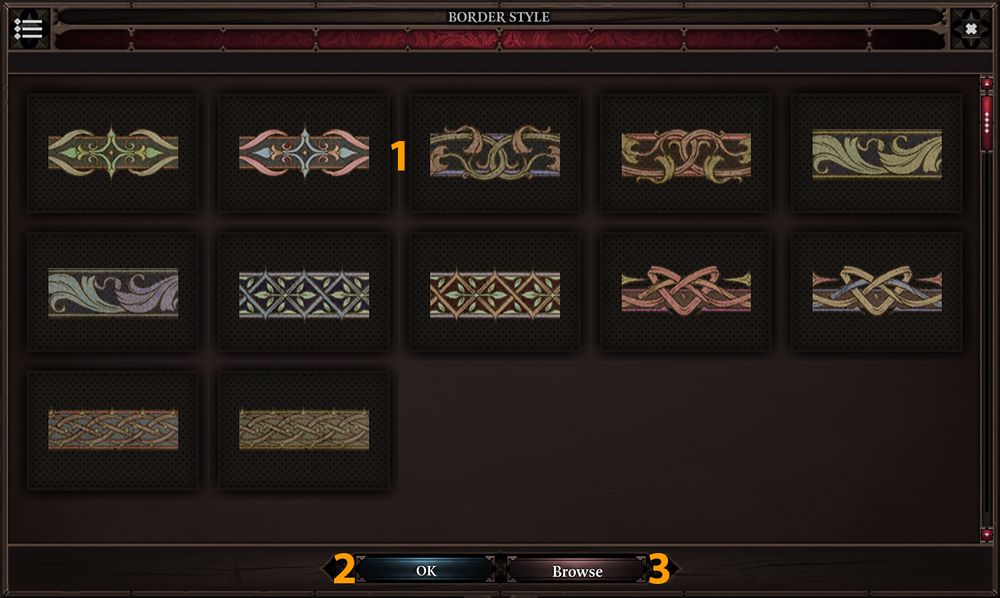
# '''Canvas Area''', this is where all the images available are
+
# '''Canvas Area''', this is where all the canvas images available are
 
# '''OK''', pressing this button after selecting an image will change the image of the '''Vignette'''
 
# '''OK''', pressing this button after selecting an image will change the image of the '''Vignette'''
 
# '''Browse''', this will allow you to import an image from your computer into your campaign
 
# '''Browse''', this will allow you to import an image from your computer into your campaign

Revision as of 15:46, 31 August 2017

General

Vignettes are used by the Game Master to tell part of the story with some visual and are also use to ask the party what they want to do after.

This part will cover every details related to Vignettes.

Vignettes

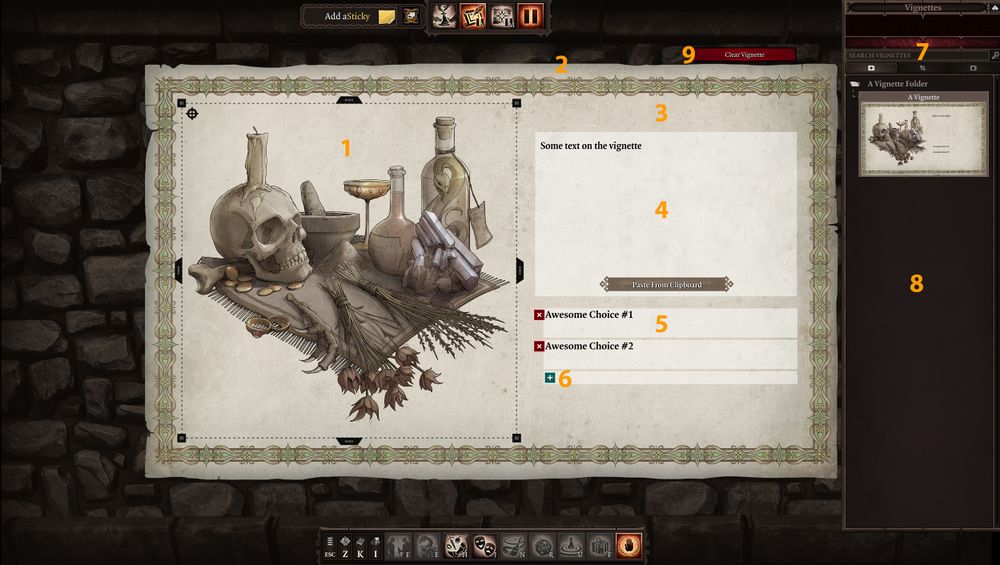
By default, when opening the Vignette panel you will already have a black Vignette with an image on it.

Then it should look like this:

GM Vignettes.jpg

  1. Vignette Image, the image of your current Vignette. Can be changed. You can also crop it with the black handles around it
  2. Vignette Borders, the borders of the Vignette. Can be changed
  3. Vignette Canvas, the canvas color/image of the Vignette'. Can be changed.
  4. Vignette Text, this is where you write the text that will be seen by the players
  5. Vignette Choices, this is where you can add multiple choices for the party to take
  6. Adding Choices, the green/blue-ish button is there to add more choices to the Vignette
  7. Search & Folders, this is where you can search for words to find specific Vignette. You can also Add Folders, Rename Folders, Delete Folders.
  8. Vignette Area, this is where all your Vignettes and Folders will be
  9. Clear Vignette, this will wipe all the text in the Vignette. IMPORTANT NOTE: Clicking this red button will wipe the text forever.

Creating Vignettes

Creating a Vignette is really simple. You just have to right-click on the Vignettes & Folder Area and select Add Vignette.

From there you can also Delete a Vignette. IMPORTANT NOTE: If you select this option, the Vignette will be gone forever. Also, you can't delete the Vignette if there is only one.

Changing Vignettes

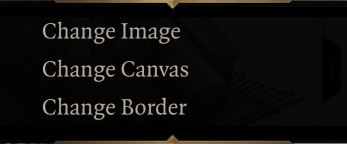
Right-clicking somewhere on the Vignette or on the Vignette itself on the right bar will open up a menu with these options:

GM VignetteMenu.jpg

  1. Change Image, will allow you to change the image of the vignette
  2. Change Canvas, will allow you to change the backgroumnd of the vignette
  3. Change Border, will allow you to change the border of the vignette


Vignette Image

GM Vignette Image.jpg

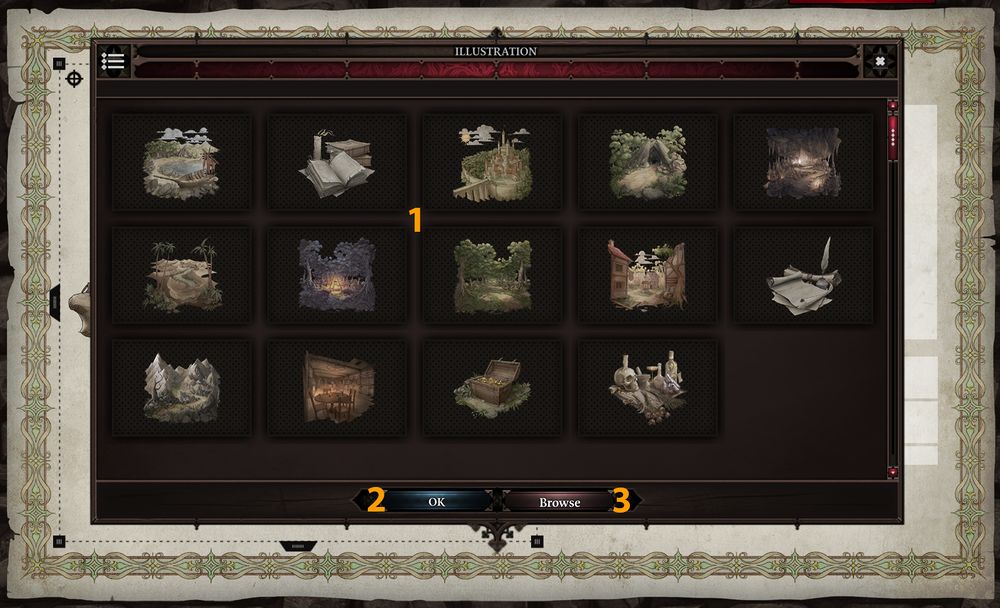
  1. Images Area, this is where all the images available are
  2. OK, pressing this button after selecting an image will change the image of the Vignette
  3. Browse, this will allow you to import an image from your computer into your campaign

Vignette Canvas

GM Vignette Canvas.jpg

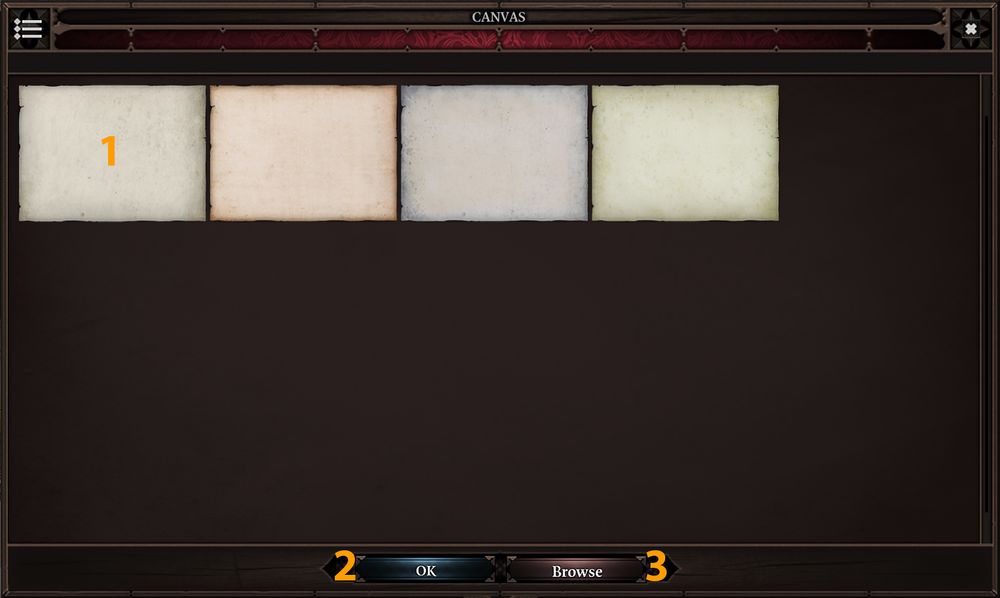
  1. Canvas Area, this is where all the canvas images available are
  2. OK, pressing this button after selecting an image will change the image of the Vignette
  3. Browse, this will allow you to import an image from your computer into your campaign

Vignette Borders

GM Vignette Borders.jpg