Subregion UI Notifications: Difference between revisions
(Created page with "== Description == Sub-regions can be used to provide some extra polish and regional distinction within a level by displaying a ribbon UI with its name to the screen. For exam...") |
No edit summary |
||
| (One intermediate revision by the same user not shown) | |||
| Line 6: | Line 6: | ||
== Procedure == | == Procedure == | ||
Adding sub- | Adding sub-region UI notifications to your level is a three step process: | ||
=== 1. Create a Trigger to Define the Sub-region === | === 1. Create a Trigger to Define the Sub-region === | ||
| Line 20: | Line 20: | ||
Example based on the trigger created in step 1 above:<br /> | Example based on the trigger created in step 1 above:<br /> | ||
DB_Subregion(TRIGGERGUID_TRG_Moon_Iolo_hut_09b43f5f-278c-409a-9aaa-bf31b7364538, "LVL_SUB_IOLOS_HUT", 0); | DB_Subregion(TRIGGERGUID_TRG_Moon_Iolo_hut_09b43f5f-278c-409a-9aaa-bf31b7364538, "LVL_SUB_IOLOS_HUT", 0); | ||
'''NOTE:''' Regarding where to add these story calls, please become acquainted with [[Osiris_Design_Patterns#Direct_Dependencies|Osiris Dependencies]] to make sure that the _GLOBAL_Subregions goal has initialized prior to the execution of this frame.<br /> | |||
<br /> | |||
=== 3. Create the Corresponding Translated String Key Entry === | === 3. Create the Corresponding Translated String Key Entry === | ||
Now that your story captures the event when a character enters a trigger, it will look for an entry in the Translated String Key table with the matching 'Key' field and display whatever is found in the 'Description' field.<br /> | Now that your story captures the event when a character enters a trigger, it will look for an entry in the Translated String Key table with the matching 'Key' field and display whatever is found in the 'Description' field.<br /> | ||
Latest revision as of 19:52, 11 October 2017
Description
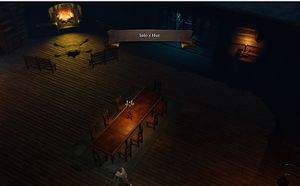
Sub-regions can be used to provide some extra polish and regional distinction within a level by displaying a ribbon UI with its name to the screen. For example in Origins:

Procedure
Adding sub-region UI notifications to your level is a three step process:
1. Create a Trigger to Define the Sub-region
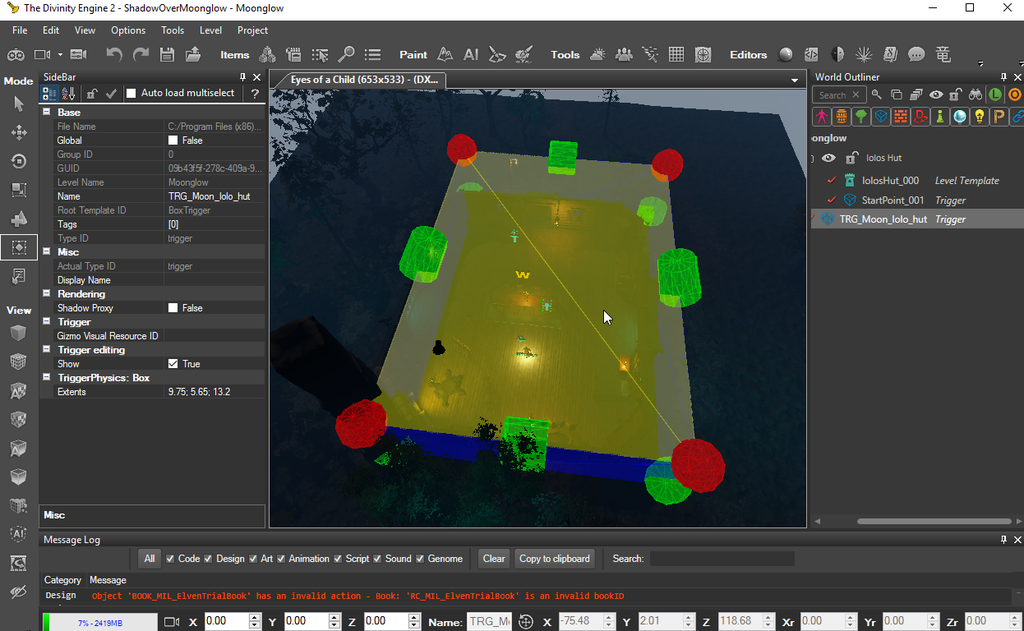
You can choose a simple box trigger or poly trigger to define the boundaries. Anytime a character enters the trigger, the sub-region ribbon text will get displayed. It will be helpful to give it a unique name that you can easily identify.

2. Define a DB_Subregion in a Story Goal
Larian have provided a simple interface to identify a sub-region using the DB_Subregion() database procedure defined in the _GLOBAL_Subregions goal.
DB_Subregion((TRIGGERGUID)_Trigger,(STRING)_,(INTEGER)_)
The first argument is the GUID of the trigger you created in step 1 above. The second argument is a string value that represents a key into a Translated String Key Editor entry where the actual display name of the sub-region will be defined.
Example based on the trigger created in step 1 above:
DB_Subregion(TRIGGERGUID_TRG_Moon_Iolo_hut_09b43f5f-278c-409a-9aaa-bf31b7364538, "LVL_SUB_IOLOS_HUT", 0);
NOTE: Regarding where to add these story calls, please become acquainted with Osiris Dependencies to make sure that the _GLOBAL_Subregions goal has initialized prior to the execution of this frame.
3. Create the Corresponding Translated String Key Entry
Now that your story captures the event when a character enters a trigger, it will look for an entry in the Translated String Key table with the matching 'Key' field and display whatever is found in the 'Description' field.
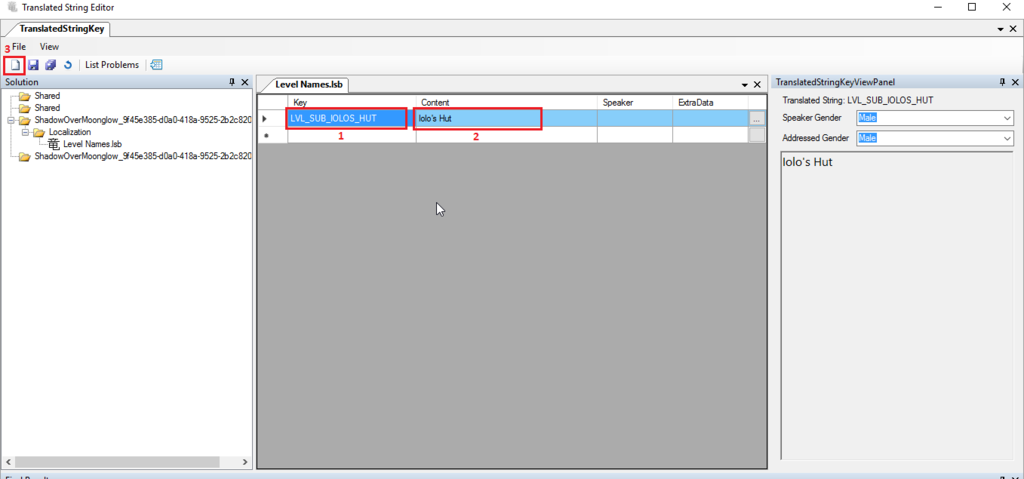
In our example, when a player enters the trigger we want a sub-region that displays "Iolo's Hut". Given the trigger we defined in step 1 and the sub-region we created in step 2, our table entry would appear as follows:
| [1] Key | LVL_SUB_IOLOS_HUT |
| [2] Description | Iolo's Hut |

Note: If this is the first Translated String key entry you have needed for your mod, you made need to create a table using the create button [3] highlighted in the image above.
Once you have created and saved the entry, you will need to restart your project to see the results (and perhaps even the editor?).
Final Results
