Visual resource panel: Difference between revisions
No edit summary |
JoykaDeReyst (talk | contribs) |
||
| (32 intermediate revisions by 4 users not shown) | |||
| Line 1: | Line 1: | ||
A Visual Resource is recognised by the yellow little teapot in the Content Browser. To open it, double click the visual resource of your interest. | |||
[[File:Visuals open.jpg|1280px|frameless]] | |||
==1. Materials Tab== | |||
Here you find the list of each seperate object that was exported in your GR2 file. Each object will need a material in order to properly show in game. You can assign a material by selecting a material resource (purple sphere) and click on the '<-' button. <br \> | |||
Without a material the model will use a default checkers material. | |||
'''TIP:''' Try to keep the amount of models as low as possible. The more models you have the more likely you create to encounter material sorting issues when special shaders are applied through status effects. Less models is also less render calls when this visual is used in game. | |||
'''IMPORTANT:''' Each skinned object is capped in the engine to a limit of 128 bones! This means if you have a character with a rig that has more than 128 bones that you will need to cut the mesh into 2 different models in your 3rd party modeling tool. For your own convenience, look for a place to cut your mesh where possible seams in texture and shaders are hardly visible. | |||
The | [[File:Visuals tab1.jpg|1280px|frameless]] | ||
==2. Animation Waterfall Tab== | |||
This tab lets you assign different Animation sets and arrange them in a top to down priority list. The game engine will waterfall down through all the animation sets to find the animation it needs.<br \> In the example below, the game engine will first look for its animation in the animation set ''Animals_Shark_ABC_Ghost'' and when it doesn't find what it needs it will continue its search in the animation set ''Animals_Shark_ABC_Default''. <br \> | |||
This means that the animations assigned in a higher prioritized animation set will ALWAYS override the animations that are assigned in lower prioritized animations sets.<br \> | |||
You can assign an animation set by selecting an animation set resource (red running men) and click on the '<-' button. Adding animation set is done by assigning it to the blanc slot, this will automatically adopt the animation set name and create a new blanc slot underneath it. By click-dragging the slots you can rearrange the priority order. | |||
[[File:Visuals tab2.jpg|1280px|frameless]] | |||
==3. Default Animations Tab== | |||
This tab is literally the same as having an animation set resource with the only fundamental difference that the animation set is embedded and exclusively for this visual ONLY. | |||
'''TIP:''' If you have no particular reason to embed the animation list into your visual, I would advise to avoid resorting to use this tab since you can just create an animation set resource instead and plug it in the waterfall like shown in the screenshot above. This will result in the same while allowing you the freedom to plug this default animation set in any other visual that has a rig compatible with those animations as well. | |||
[[File:Visuals tab3.jpg|1280px|frameless]] | |||
==4. Resolved Animations Tab== | |||
[[File:Visuals tab4.jpg|1280px|frameless]] | |||
==5. Script Overrides Tab== | |||
In this tab you can list all the animation sets that can be called upon through script. When you assign an animation set in this tab you should come up with a Simple Name for that set, a name that will be used in the script calls. When script calls this simple name than this animation set will overrides any other animation set currently set as default OR set in the animation waterfall. This also means, that if an animation is requested by the game engine while its NOT filled in the script overridden animation set, then nothing will be played. There is no fallback! | |||
We have [[Standard_Character_Animations|a list]] of available simple animation names and the races for which these animations have been made. | |||
[[File:Visuals tab5.jpg|1280px|frameless]] | |||
==6. Attachments Tab== | |||
Here you get an overview of all the bones the visual resource has and gives you the ability to attach visual effects and items to them. These attached visual effects are not depending on animation and will spawn when the visual is set on stage. It will also continuously play if the attached visual effect is set to looping, otherwise it will play once. At this point only visual effects resources can be attached, nothing else! | |||
[[File:Visuals tab6.jpg|1280px|frameless]] | |||
==7. Cloths Tab== | |||
This tab allows you to set all the cloth properties of each model within your visual. Cloth properties simulate the fabric properties of cloth.<br \> | |||
The properties will only be applied to models that are exported with Vertex Painting and the attribute UserDefinedProperty with value cloth=1. <br \> | |||
Read [[Modding:_Maya_Exporter|The Maya Exporter Guide]] to sknow how to apply the cloth sim attribute. <br \> | |||
<br \> | |||
'''Warning''': Cloth simmed objects need to have 2 bones skinned to them. Use a 0.01 influence for helmet feathers on the chin bone after skinning them to the head bone.<br \> | |||
'''Tip:''' Long closed skirts don't look very good with cloth sim. Always make sure to have extra cuts<br \> | |||
<br \> | |||
These are the cloth properties available: | |||
*'''Stiffness: ''' How much the cloth can stretch. | |||
*'''Bending: ''' How much the cloth can bend. | |||
*'''Iterations: ''' How often the cloth calcuations are redone before being considered final. | |||
*'''PoseMatching:''' How close it it sticks to the default skin position. (Used for feather on helmets) | |||
*'''Margin:''' How large the collision model is for the cloth. | |||
*'''kg/m2:''' How heavy the cloth is for the simulation. (Isn't used during non still animations) | |||
[[File:Visuals tab7.jpg|1280px|frameless]] | |||
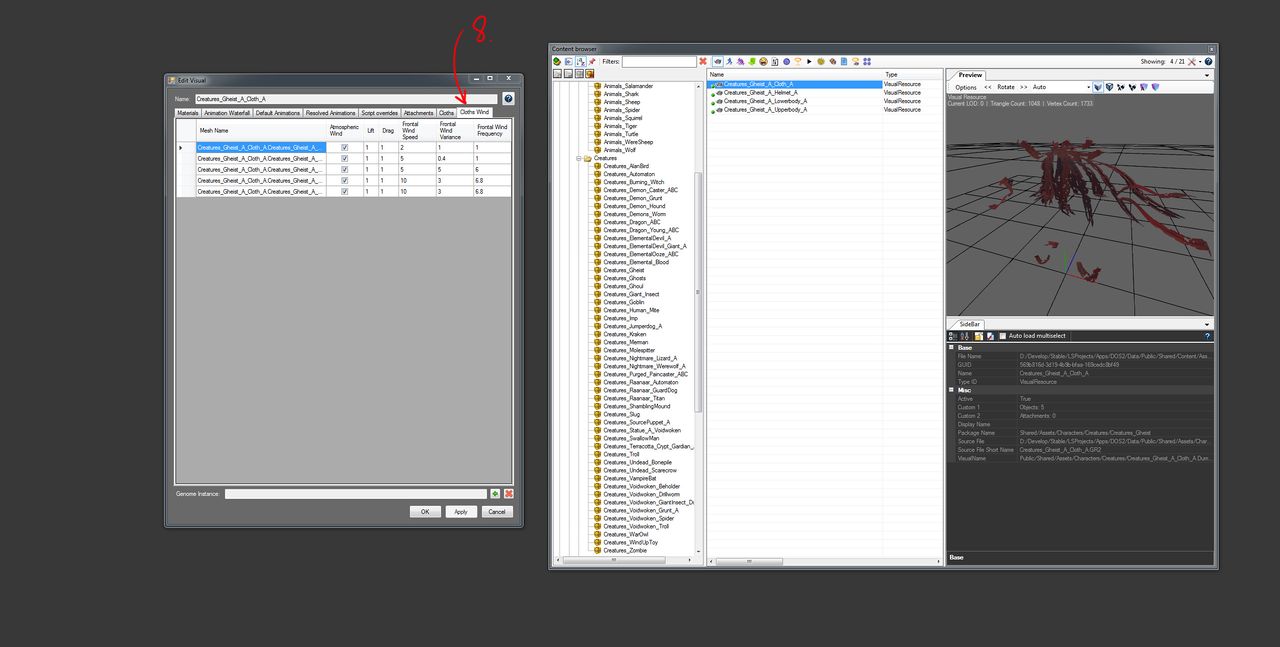
==8. Cloths Wind Tab== | |||
This tab allows you to have an automatic wind simulated on the cloth model. To have these variables matter for your cloth make sure to check '''Atmospheric Wind'''.<br \> | |||
Models that use these variables are ''the burning witch'' and ''gheist'' models. | |||
These are the variables available for defining what the simulated wind is like: | |||
*'''Atmospheric wind:''' Turn on the have to have the cloth automatically simulate and use these variables. | |||
*'''Lift:''' ??? | |||
*'''Drag:''' ??? | |||
*'''Frontal Wind Speed:''' The speed with which the wind is blowing for this cloth. | |||
*'''Frontal Wind Variance:''' changes the noise range of the wind. | |||
*'''Frontal Wind Frequency:''' changes how fast the cloth jumps back and fort within the variance. | |||
[[File:Visuals tab8.jpg|1280px|frameless]] | |||
__________________<br /> | |||
Back to [[Panels]] | |||
Latest revision as of 14:30, 7 February 2018
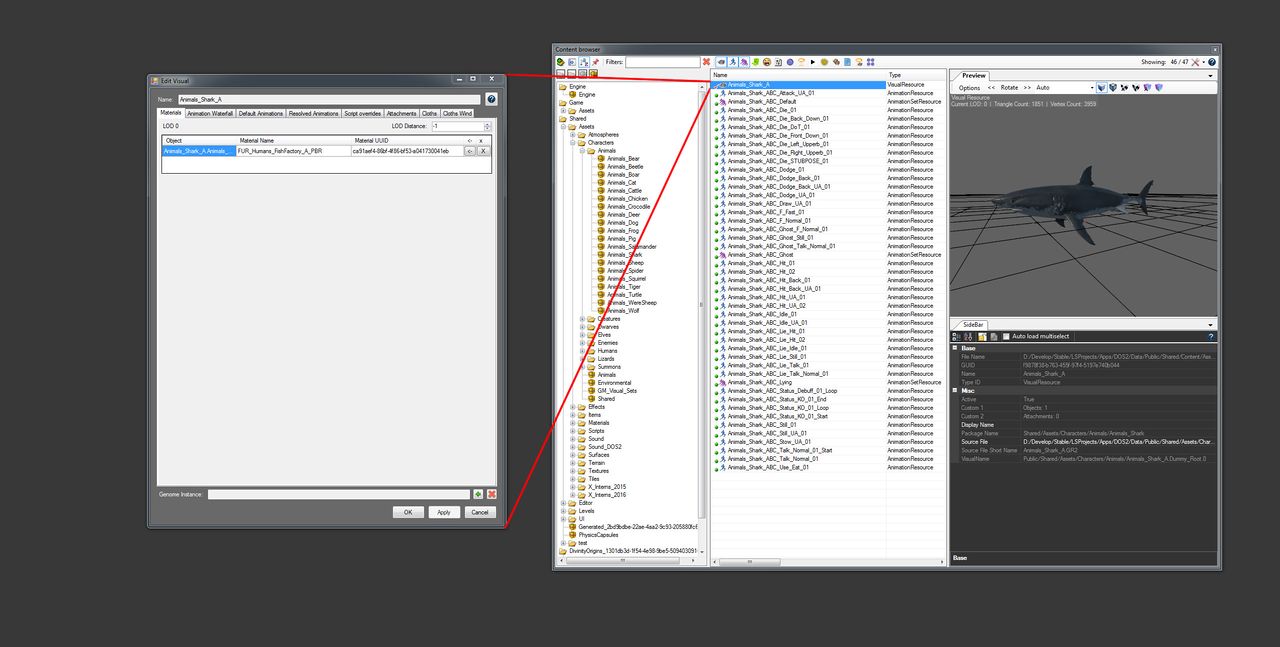
A Visual Resource is recognised by the yellow little teapot in the Content Browser. To open it, double click the visual resource of your interest.
1. Materials Tab
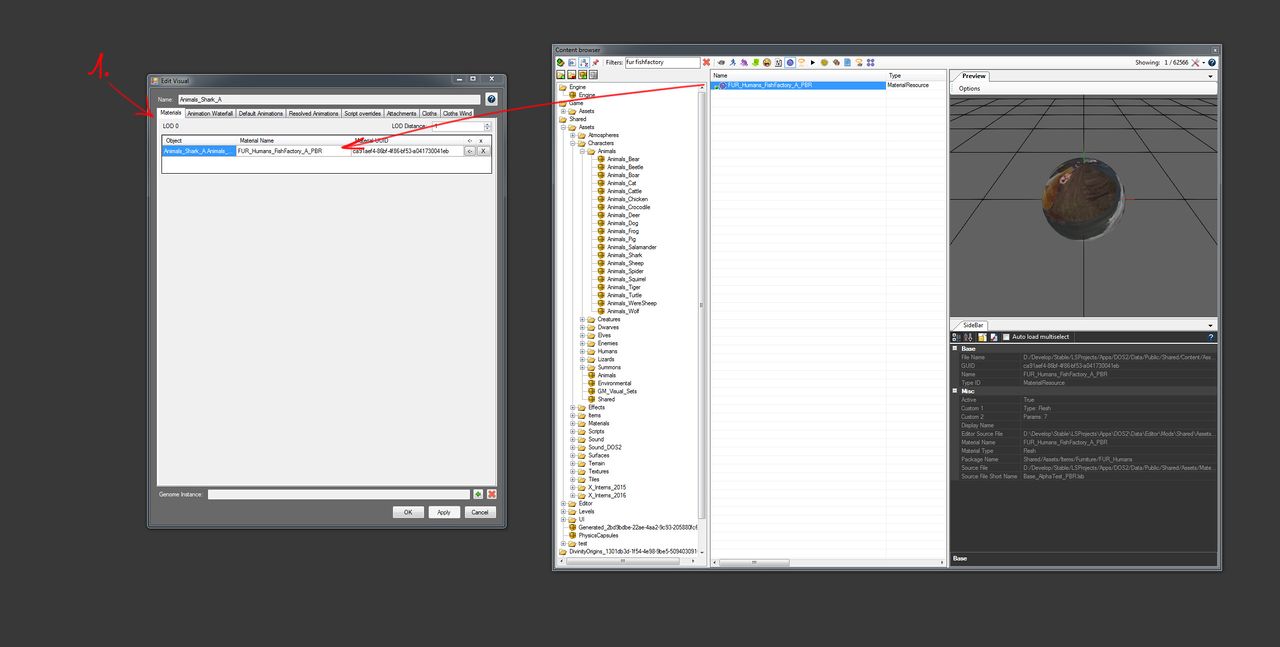
Here you find the list of each seperate object that was exported in your GR2 file. Each object will need a material in order to properly show in game. You can assign a material by selecting a material resource (purple sphere) and click on the '<-' button.
Without a material the model will use a default checkers material.
TIP: Try to keep the amount of models as low as possible. The more models you have the more likely you create to encounter material sorting issues when special shaders are applied through status effects. Less models is also less render calls when this visual is used in game.
IMPORTANT: Each skinned object is capped in the engine to a limit of 128 bones! This means if you have a character with a rig that has more than 128 bones that you will need to cut the mesh into 2 different models in your 3rd party modeling tool. For your own convenience, look for a place to cut your mesh where possible seams in texture and shaders are hardly visible.
2. Animation Waterfall Tab
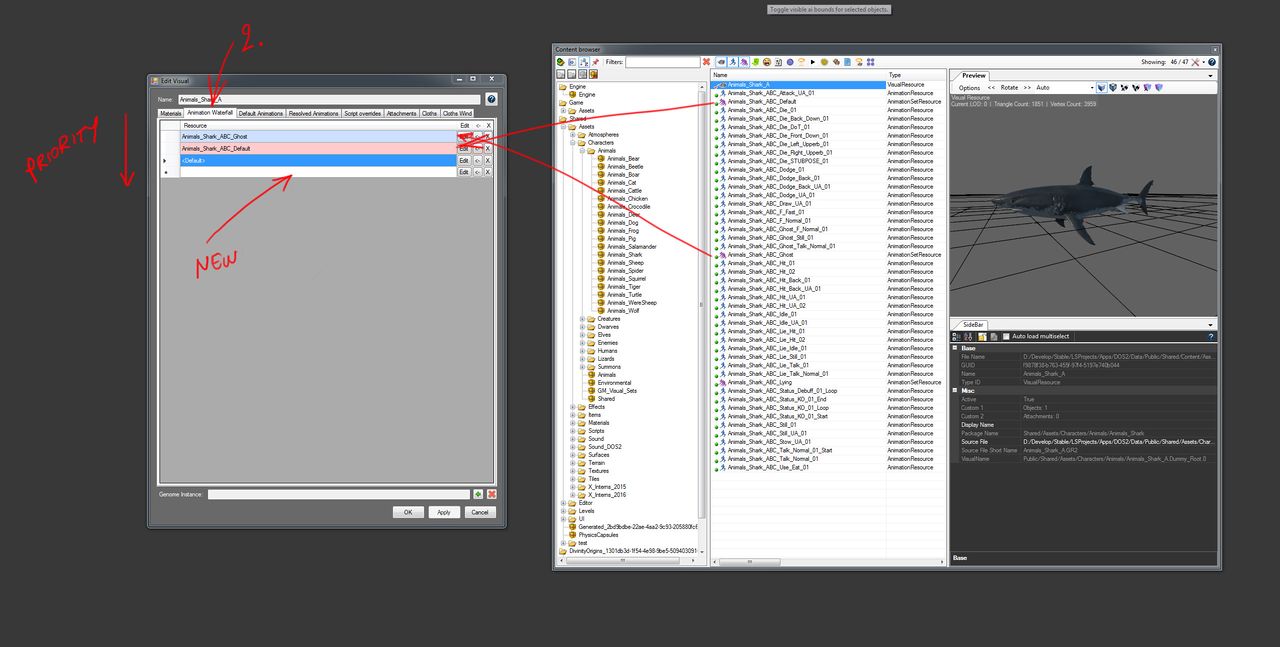
This tab lets you assign different Animation sets and arrange them in a top to down priority list. The game engine will waterfall down through all the animation sets to find the animation it needs.
In the example below, the game engine will first look for its animation in the animation set Animals_Shark_ABC_Ghost and when it doesn't find what it needs it will continue its search in the animation set Animals_Shark_ABC_Default.
This means that the animations assigned in a higher prioritized animation set will ALWAYS override the animations that are assigned in lower prioritized animations sets.
You can assign an animation set by selecting an animation set resource (red running men) and click on the '<-' button. Adding animation set is done by assigning it to the blanc slot, this will automatically adopt the animation set name and create a new blanc slot underneath it. By click-dragging the slots you can rearrange the priority order.
3. Default Animations Tab
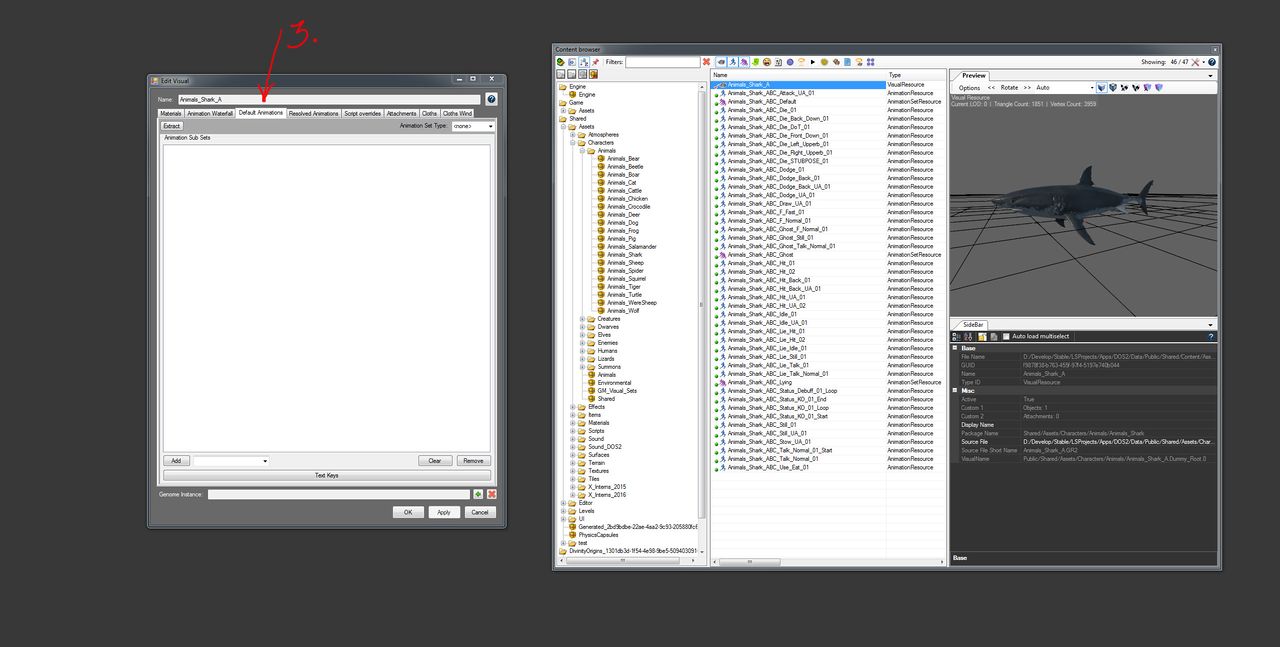
This tab is literally the same as having an animation set resource with the only fundamental difference that the animation set is embedded and exclusively for this visual ONLY.
TIP: If you have no particular reason to embed the animation list into your visual, I would advise to avoid resorting to use this tab since you can just create an animation set resource instead and plug it in the waterfall like shown in the screenshot above. This will result in the same while allowing you the freedom to plug this default animation set in any other visual that has a rig compatible with those animations as well.
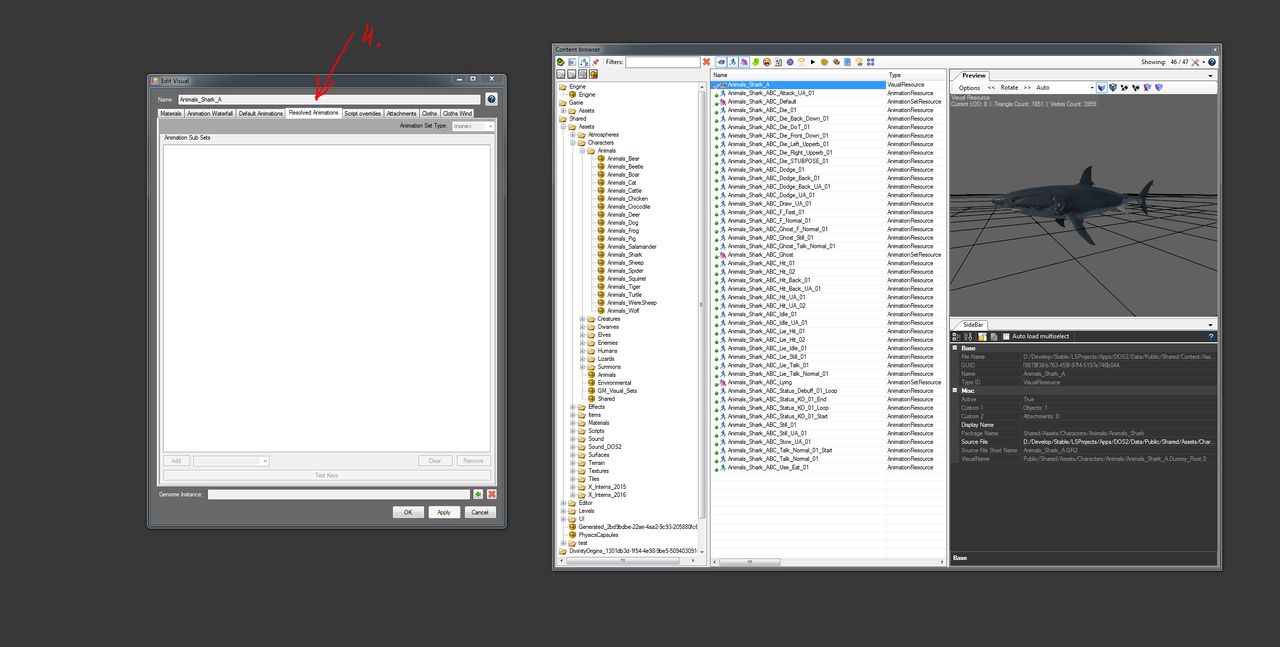
4. Resolved Animations Tab
5. Script Overrides Tab
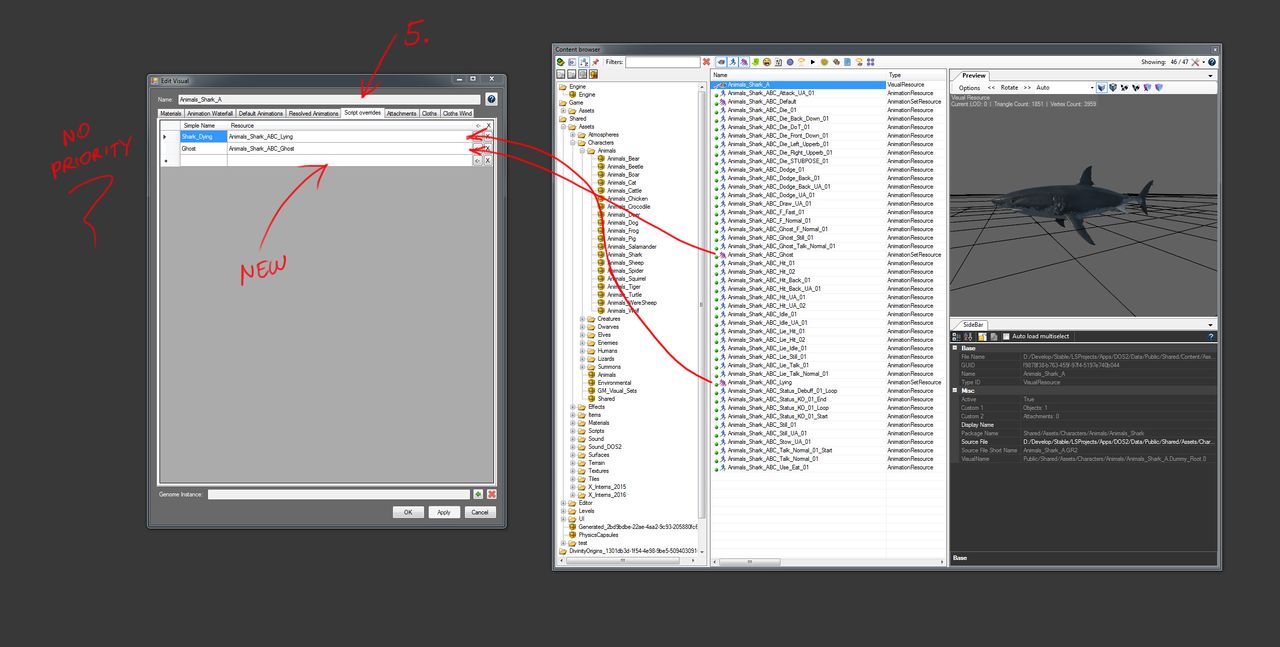
In this tab you can list all the animation sets that can be called upon through script. When you assign an animation set in this tab you should come up with a Simple Name for that set, a name that will be used in the script calls. When script calls this simple name than this animation set will overrides any other animation set currently set as default OR set in the animation waterfall. This also means, that if an animation is requested by the game engine while its NOT filled in the script overridden animation set, then nothing will be played. There is no fallback!
We have a list of available simple animation names and the races for which these animations have been made.
6. Attachments Tab
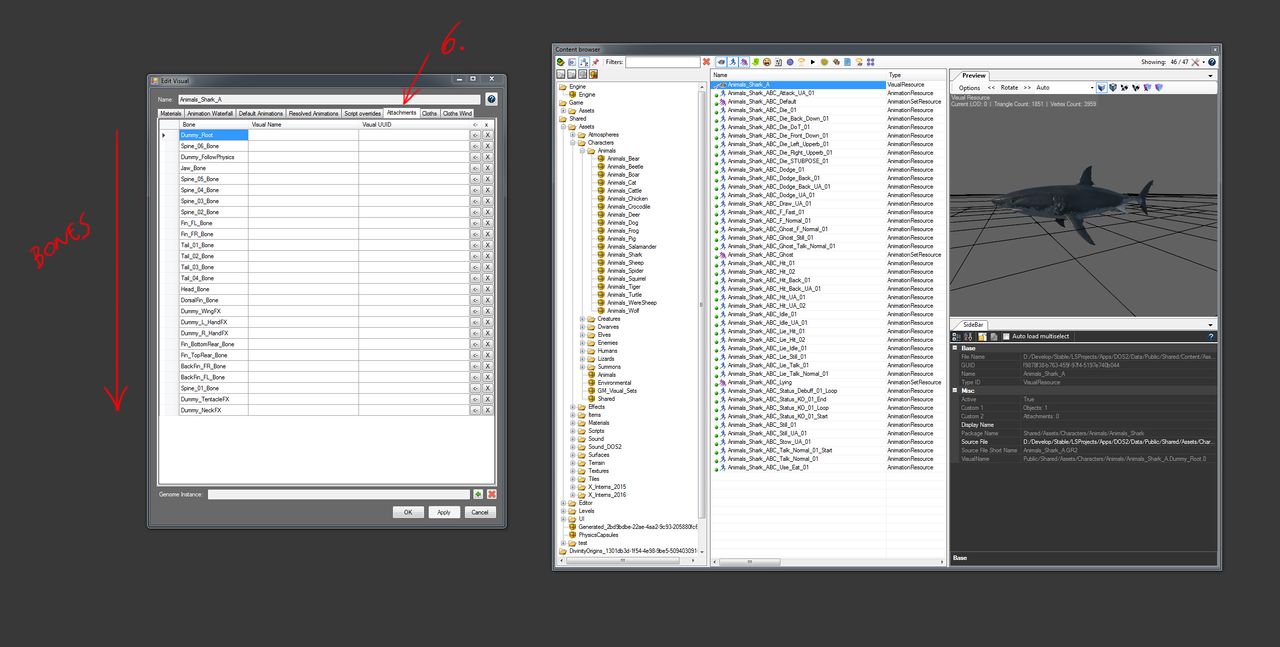
Here you get an overview of all the bones the visual resource has and gives you the ability to attach visual effects and items to them. These attached visual effects are not depending on animation and will spawn when the visual is set on stage. It will also continuously play if the attached visual effect is set to looping, otherwise it will play once. At this point only visual effects resources can be attached, nothing else!
7. Cloths Tab
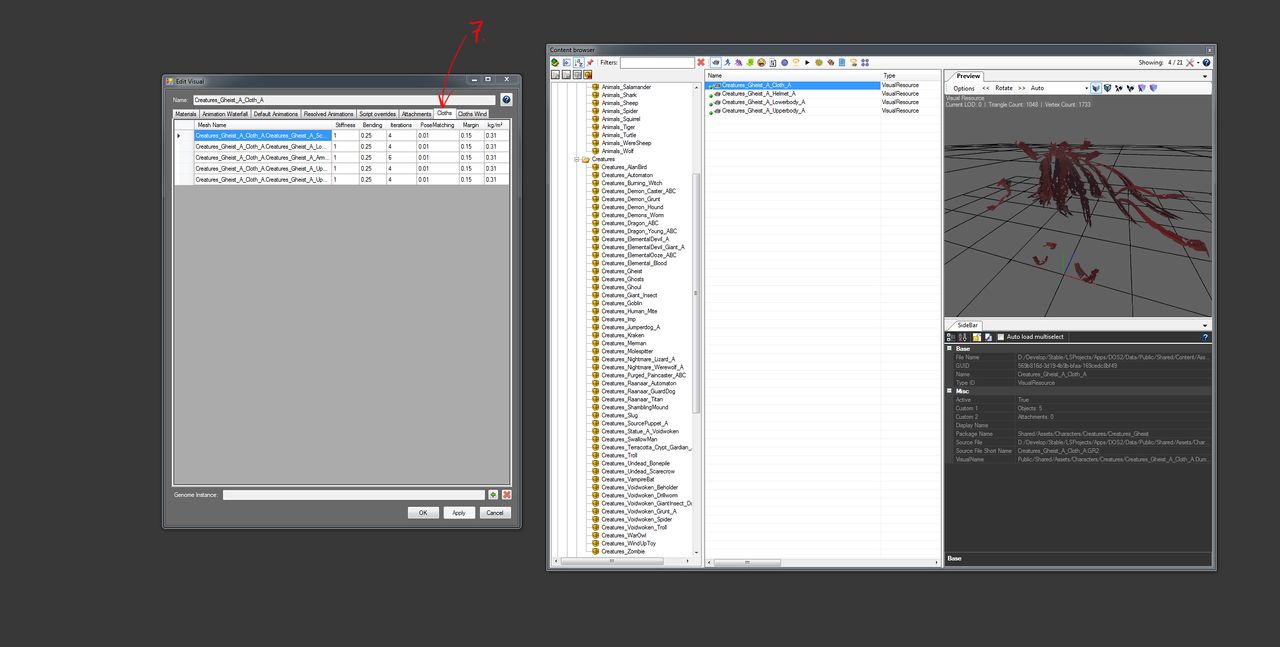
This tab allows you to set all the cloth properties of each model within your visual. Cloth properties simulate the fabric properties of cloth.
The properties will only be applied to models that are exported with Vertex Painting and the attribute UserDefinedProperty with value cloth=1.
Read The Maya Exporter Guide to sknow how to apply the cloth sim attribute.
Warning: Cloth simmed objects need to have 2 bones skinned to them. Use a 0.01 influence for helmet feathers on the chin bone after skinning them to the head bone.
Tip: Long closed skirts don't look very good with cloth sim. Always make sure to have extra cuts
These are the cloth properties available:
- Stiffness: How much the cloth can stretch.
- Bending: How much the cloth can bend.
- Iterations: How often the cloth calcuations are redone before being considered final.
- PoseMatching: How close it it sticks to the default skin position. (Used for feather on helmets)
- Margin: How large the collision model is for the cloth.
- kg/m2: How heavy the cloth is for the simulation. (Isn't used during non still animations)
8. Cloths Wind Tab
This tab allows you to have an automatic wind simulated on the cloth model. To have these variables matter for your cloth make sure to check Atmospheric Wind.
Models that use these variables are the burning witch and gheist models.
These are the variables available for defining what the simulated wind is like:
- Atmospheric wind: Turn on the have to have the cloth automatically simulate and use these variables.
- Lift: ???
- Drag: ???
- Frontal Wind Speed: The speed with which the wind is blowing for this cloth.
- Frontal Wind Variance: changes the noise range of the wind.
- Frontal Wind Frequency: changes how fast the cloth jumps back and fort within the variance.
__________________
Back to Panels
