Difference between revisions of "Scenes"
Larian Jeff (talk | contribs) (→Scenes) |
Larian Jeff (talk | contribs) (→Scene Panel) |
||
| (14 intermediate revisions by the same user not shown) | |||
| Line 1: | Line 1: | ||
| − | == | + | == <font color="#ff9c00">General</font> == |
'''Scenes''' are the core of a campaign. | '''Scenes''' are the core of a campaign. | ||
| Line 8: | Line 8: | ||
But first, how to create a '''Scene'''. | But first, how to create a '''Scene'''. | ||
| + | |||
| + | == <font color="#ff9c00">Scenes</font> == | ||
| + | |||
| + | === <font color="#ff9c00">Scene Panel</font> === | ||
While you have the '''Overview Map''' open, at the top right you will be able to see a '''Scene''' button. Pressing this will switch the tab to '''Scene''' mode. | While you have the '''Overview Map''' open, at the top right you will be able to see a '''Scene''' button. Pressing this will switch the tab to '''Scene''' mode. | ||
| Line 23: | Line 27: | ||
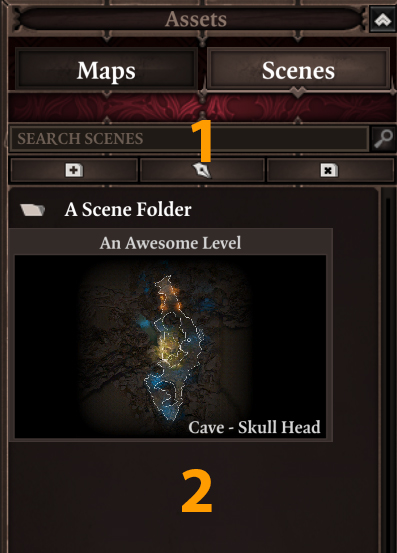
# '''Search''', this is where you can type something in the search bar to filter your scenes. | # '''Search''', this is where you can type something in the search bar to filter your scenes. | ||
#* '''Folders''', there you can, in order, '''Add''' a folder, '''Rename''' a folder, '''Delete''' a folder | #* '''Folders''', there you can, in order, '''Add''' a folder, '''Rename''' a folder, '''Delete''' a folder | ||
| − | # '''Scenes''', this is where all the '''Scenes''' and the '''Folders''' of your campaign will be | + | # '''Scenes''', this is where all the '''Scenes''' and the '''Folders''' of your campaign will be. You can also right-click in the blank there to create a '''Scene'''. |
| + | |- | ||
| + | |} | ||
| + | |||
| + | === <font color="#ff9c00">Creating a Scene</font> === | ||
| + | |||
| + | In the '''Scene Panel''', right-click in a blank area and choose '''Create New Scene'''. A small naming window will appear and should look like this: | ||
| + | |||
| + | [[File:GM_NewSceneName.jpg|500px]] | ||
| + | |||
| + | Enter a name and press '''Accept'''. | ||
| + | |||
| + | |||
| + | After pressing '''Accept''' a bigger windows will appear and will look like this: | ||
| + | |||
| + | [[File:GM_SceneWindow.jpg|500px]] | ||
| + | |||
| + | {| class="wikitable" | ||
| + | |- | ||
| + | | | ||
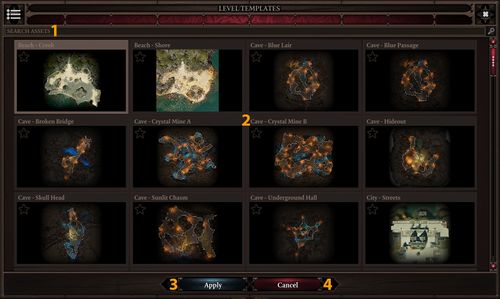
| + | # '''Search''', this is where you can type something like Forest or Swamp and all the scene with the chosen word in their name will be shown | ||
| + | # '''Scenes''', all the scenes available are there | ||
| + | # '''Apply''', press this after choosing a scene to accept | ||
| + | # '''Cancel''', this will cancel the whole thing and bring you back on the Overview Map | ||
|- | |- | ||
|} | |} | ||
| + | |||
| + | From there you will be able to select the '''Scene''' that you want to work on. | ||
| + | |||
| + | Like just said above, select the '''Scene''' you want and press '''Apply'''. | ||
| + | |||
| + | Your '''Scene''' will now be available on the '''Scene Panel''' to the right. | ||
Latest revision as of 20:16, 30 August 2017
General
Scenes are the core of a campaign.
This is where the Game Master will spend most of his time and where the party will travel.
In Scenes, Game Master will be able to decorate with the assets provided by the game. This is also where he/she will be able to add encounters, loots, paint surfaces and more.
But first, how to create a Scene.
Scenes
Scene Panel
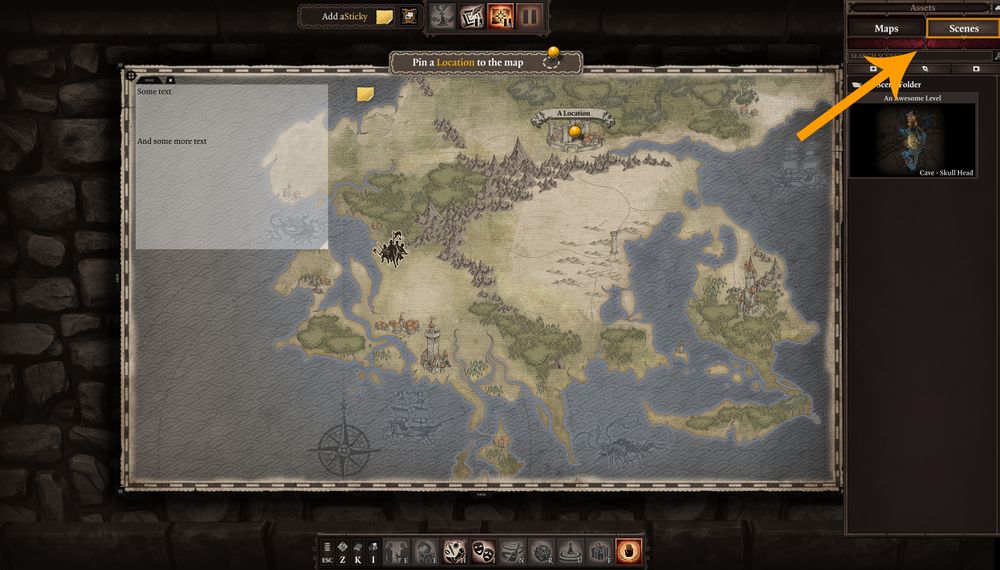
While you have the Overview Map open, at the top right you will be able to see a Scene button. Pressing this will switch the tab to Scene mode.
If it's the first time you open this tab, it will be empty but it should look like this minus a Scene and a Folder already there.
|
Creating a Scene
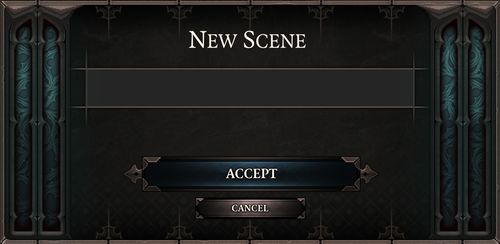
In the Scene Panel, right-click in a blank area and choose Create New Scene. A small naming window will appear and should look like this:
Enter a name and press Accept.
After pressing Accept a bigger windows will appear and will look like this:
|
From there you will be able to select the Scene that you want to work on.
Like just said above, select the Scene you want and press Apply.
Your Scene will now be available on the Scene Panel to the right.


